Zel's Fleet Blog - BX, Jag XJ-S, Sinclair C5, Mercedes 208D & 230TE, AC Model 70.

Tell us your ongoing tales and experiences with your French car here. Post pictures of your car here as well.
User avatar
Zelandeth
Donor 2024
Posts: 5040
Joined: 16 Nov 2014, 23:36
x 1505

Re: Zel's Fleet Blog - Xantia Activa, Jag XJ-S, Sinclair C5, Mercedes 208D, AC Model 70.

Unread post by Zelandeth »

Finally got the money refunded for the parts I ordered for the Xantia back in late February so a replacement replacement exhaust system has been ordered.

Of course since February I've lost the note of which bushes I need for the control arm now so will need to track that down later and get those reordered.


Nothing much to say really about today's work on the van other than "That's a lot of work for something nobody will ever see!"

Yesterday:

Image

Today:

Image

Didn't get a before shot of the other end but it looks like this now.

Image

I also did a bit of bodge undoing. For some reason I cannot for the life of me figure out, the slide out section of the bed had been cut in two. This meant that it was near impossible to deploy or stow it because the two sections would immediately get out of line with each other and wedge the whole lot in place. The rear section only sat in a runner at the one end too. The upshot of this was that when the locker was open, the rear section would random decide to detach itself and drop. Usually on my head. Aside from one occasion when it managed to land on my right pinkie. That was reassembled into one piece. It is now far less likely to fall on me and can actually be stowed and deployed by one person without major swearing.

Well it would have been if the second of the three hinges hadn't then snapped. Though not really surprising given these were what passed for hinges.

Image

Five actual hinges made of metal replace the original three bendy plastic things.

Image

This was when I realised that a lot of the internal support structure under there wasn't actually attached to anything, so what are essentially some legs for the bed. You can just about see those in the photos above.

The mains wiring needs a complete do-over at some point, though that's a job for another day.
Current fleet:
07 Volvo V70 SE D5, 88 Renault 25 Monaco, 85 Sinclair C5, 84 Trabant 601S, 73 AC Model 70, 62 Rover 110.
User avatar
Zelandeth
Donor 2024
Posts: 5040
Joined: 16 Nov 2014, 23:36
x 1505

Re: Zel's Fleet Blog - Xantia Activa, Jag XJ-S, Sinclair C5, Mercedes 208D, AC Model 70.

Unread post by Zelandeth »

The state of the heater's fuel pump wiring was bugging me so I happened to it.

Image

Better, I don't want to cut it down in case I do wind up moving the pump at a future date as I've not discounted the idea of moving it outside the cabin in the future yet. So it's just been tidily bundled up for now.

Probably going to leave the van alone for a little while after today and turn my attention back to other things. Main immediate task will be getting the Invacar hub pulled so I can finally get a replacement Fiat one ordered and machined to suit. That should get the car back on the road with a bit of luck. Likewise it looks like I'll have bits on the way to get the Xantia through an MOT shortly.

One last bit of kit I want to get installed in the van is this.

Image

It's a good bit older than the van, but just happens to be floating around in the garage following a kerbside skip find, and it works perfectly and I don't know what else to do with it! I can't really see a situation where we're likely to need mains voltage power while off-grid but it's one of those things where should that wacky situation arise one day it's something that you could be very glad to have on board. I will probably wire this up so that it's in the same circuit as the DC feed to the fridge, so will be powered from the vehicle battery only when the engine is running and the charging circuit is active. As it isn't really intended to be for general use it will get its own socket probably tucked away around the front of the locker next to an isolator switch (there are no controls at all on the unit) rather than trying to hook it up to the main sockets and have to mess around with changeover switches and suchlike. I will install a prominent indicator light to alert me that it's on as well - not that it should really be possible to miss it given the racket that it makes!

Not wired up just now, but I have bolted it in place in the corner of the locker to be returned to at a later date.

Image

For now though I've put that whole area back together.

Image

I've done a bit of fiddling around in the config options for the Afterburner and found I could set it so that it defaults to the detailed view when the heater is powered up and the thermostat view when it's off before the display blanks after about ten minutes.

Image

The original mains socket that I removed seemed well worth saving. It's one of these Clipsal units.

Image

I don't think this has actually faded and yellowed, I think they were this cream colour from new.

I believe these were quite commonly used in campers and caravans from around this era. If anyone wants this one for their van so they have an extra which matches their existing sockets let me know. Happy to pass it on to someone who can make good use of it. The little blanking plugs for the screw holes are still present and are stored inside the body at the moment.

Last thing I wanted to do for the day was to make a bit of a tweak to the lighting over the bed. I had replaced the original 15W incandescent lamps in there with LED ones a little while ago simply to reduce the DC load and the amount of heat thrown into the fittings. However they're quite a cold white which isn't exactly pleasant. Plus given that we're generally using these only when reading in bed or watching a movie they were honestly too bright. I'd come up with a bit of a plan for this based on some lamps I had rolling around in the random parts box. These are also LED based, but are amber (they're meant to be indicator replacements). As they're phosphor based amber LEDs the colour is actually really quite pleasant, quite reminiscent of the colour of low pressure sodium lighting.

You can clearly see the contrast here!

Image

Much warmer.

Image

We'll give it a try and see how it works for us. I suspect I'll end up switching to some very warm white ones and a dimmer system, but this is a bit more pleasant for now I reckon.

I think this is likely to be the last real work that is done on this, certainly to the interior for a bit. I do have a few other jobs in mind for the near future, but they are mostly exterior based (I want to replace a good portion of the weatherproofing sealant for one thing...which I'm really not looking forward to as it's a horrible job!), so we'll be moving on to other things for a bit. Probably be some Invacar work next unless the exhaust for the Xantia arrives unexpectedly quickly...though we'll see how long I can ignore that for as I hate exhaust work!
Current fleet:
07 Volvo V70 SE D5, 88 Renault 25 Monaco, 85 Sinclair C5, 84 Trabant 601S, 73 AC Model 70, 62 Rover 110.
User avatar
mickthemaverick
Moderating Team
Posts: 16342
Joined: 11 May 2019, 17:56
x 6872

Re: Zel's Fleet Blog - Xantia Activa, Jag XJ-S, Sinclair C5, Mercedes 208D, AC Model 70.

Unread post by mickthemaverick »

Interesting variety of things there Zel! Two comments: Could you not use that mains socket for your invertor?, and how much current does the heater pump draw? At 12v I would expect it to be quite a lot and that "tidy" coil may result in unintended inductance which may decrease the pump voltage and possibly warm up! I'd run it in a 'there and back' loop across the locker to avoid both of those possibilities!
Love the lighting, but as you suggest a dimmer system would give more flexibilty, especially should you need bright light for any reason, I need it just to read by these days!!
I used to be indecisive, now I'm not so sure!
I used to ride on two wheels, but now I need all four!
User avatar
Zelandeth
Donor 2024
Posts: 5040
Joined: 16 Nov 2014, 23:36
x 1505

Re: Zel's Fleet Blog - Xantia Activa, Jag XJ-S, Sinclair C5, Mercedes 208D, AC Model 70.

Unread post by Zelandeth »

Yes I could use this socket, my intention though is to use an unswitched one. This inverter is an extremely basic design and one downside of that is that it can sometimes be cranky about starting with no load attached. So the routine is "plug in, power on..." and eliminating the switch on the socket just removes a step.

The other thing I was thinking was to use a prominently coloured socket to hopefully draw attention to it being something separate to the standard mains system and prompt reading of the label that will live next to it explaining how to use the inverter.

The fuel pump is a solenoid based dosing pump, so is just pulsed to provide fuel flow, the duty cycle is low and repeat rate is a maximum of 5Hz. You make a good point though and I will check today to see if there are any signs of heating. If so it will just be trimmed down to a sensible length.
Current fleet:
07 Volvo V70 SE D5, 88 Renault 25 Monaco, 85 Sinclair C5, 84 Trabant 601S, 73 AC Model 70, 62 Rover 110.
Gibbo2286
(Donor 2020)
Posts: 7954
Joined: 08 Jun 2011, 18:04
x 2840

Re: Zel's Fleet Blog - Xantia Activa, Jag XJ-S, Sinclair C5, Mercedes 208D, AC Model 70.

Unread post by Gibbo2286 »

Talking inverters, I have one of these sitting on my shelf, it was bought for emergencies while I was rebuilding a derelict cottage but never used.
Any offers?
https://www.ebay.co.uk/i/332967013056?c ... 0f937470
Anyone who has never made a mistake has never tried anything new. (Albert Einstein)
User avatar
Zelandeth
Donor 2024
Posts: 5040
Joined: 16 Nov 2014, 23:36
x 1505

Re: Zel's Fleet Blog - Xantia Activa, Jag XJ-S, Sinclair C5, Mercedes 208D, AC Model 70.

Unread post by Zelandeth »

Gibbo2286 wrote: 16 Jun 2020, 12:33 Talking inverters, I have one of these sitting on my shelf, it was bought for emergencies while I was rebuilding a derelict cottage but never used.
Any offers?
https://www.ebay.co.uk/i/332967013056?c ... 0f937470
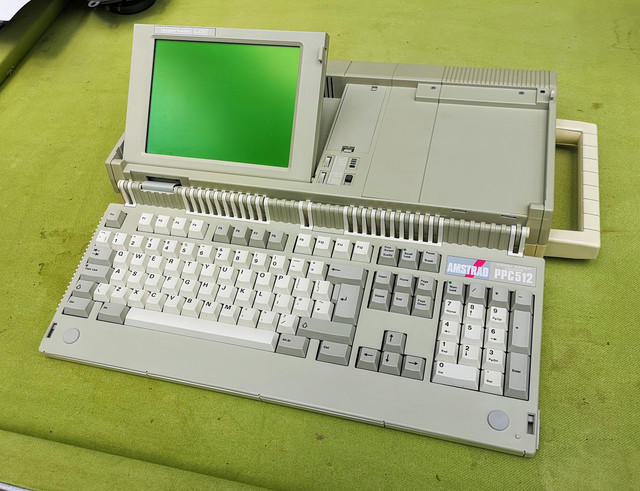
Sadly I think that's the fate which befalls 99% of that sort of inverters - especially as more and more of our daily technology moves to USB power. I really don't *need* one on the van at all...I just want to actually find a useful home for this one as I like technology from this era and I want to use it!

-- -- --

You remember me saying I wasn't planning to really do anything else with the van this week? Yeah...about that.

A question that you never want to end up asking yourself on any vehicle is "Wait...Where's that water coming from?" On a camper van though it brings double the feeling of dread as there's a whole extra plumbing system worth of potential trouble.

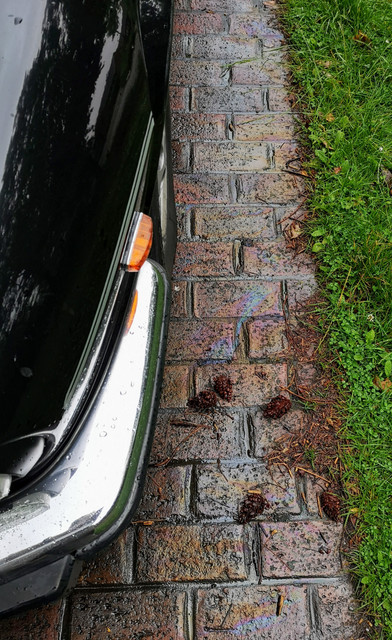
When I noticed a slow drip hitting the ground just behind the nearside rear wheel I had a horrible feeling that I was in for trouble.

Image

Standing on my head the area it's coming from is pretty easy to see.

Image

That's not a good answer. The precise area that drip is coming from is right under the shower tray. That is very thoroughly incorporated into the fabric of the bathroom now and cannot be removed without a huge amount of hassle.

A bit of thinking however suggested that something was odd about that as a location for a leak. There were only two pipes in this area: the suction line from the fresh water tank running to the pump (which lives pretty much directly above the wheel arch) and the pressure feed back to the kitchen (the bathroom one just goes straight through the wall from the service locker). I hadn't done any drilling or screwing of things anywhere vaguely near to this in the best part of a year and there are no connections there - it's all continuous hose. I had a nose around in the base of the service locker under the wardrobe where the water pump lives, bone dry. Unless something had rubbed through (unlikely, this hose is good quality stuff and seems pretty resilient) or I've got mice, it seems more likely that the water is running from somewhere else. Where though?

The only other thing in this neighbourhood is the toilet. It's not been used in months, but worth investigating. Cue much surprise when I pulled the cassette out I found the whole area beneath it swimming and mouldy. It was bone dry and spotlessly clean a couple of months ago when I last cleaned the cassette tank out. A few moments later I spotted a drip and my heart sank.

Image

I was really hoping that the hose connection you can see would be responsible...however I'm not that lucky. The water is dripping down out of the moulding up at the top. There's only two possible sources for a leak up there occurring when the unit hasn't been used...Either the hose connection onto the solenoid valve for the flush button or the solenoid valve itself. These both however are buried deep within the moulding so can't be checked in situ. I'll need to remove this from the van to investigate. This is...Sub optimal as it will require me to remove a metric ton of silicone, about three million screws and a bunch of tiling. I guess that's the chance you take when you reuse 30 year old equipment though. That's a job for another day. In the meantime I will cap this line off to stop the leak so I can still use the sink, which given I regularly use the van to take the dogs out it really useful so I can wash my hands before driving home.

When I was looking for the source of the leak it did give me a good chance to look better at the drain line routing and assess how hard it will be to upgrade. I don't reckon it will be too difficult at all to get rigid lines run back all the way to the tank. There are a few awkward things I'll need to work around obviously and I'll probably take a different route to the original flexible lines, but I may well do this sooner than later as it would be nice to just have it ticked off. The original convolute still leaks in several places too despite me having patched a bunch of it up.

While crawling around under the back of the van I did find something which *really* annoyed me though.

Long time readers of this blog may recall that I was quite surprised when at the last MOT the garage proclaimed that the entire rear braking system was basically scrap. The drums were worn oval and had bevelled the wearing surface, both wheel cylinders were leaking, the handbrake wasn't working to a satisfactory level, and apparently one of the brake shoe linings had detached. This surprised me rather a lot as the brakes were fine, I'd never detected the slightest bit of vibration through them, the handbrake was quite capable of stopping the rotation of the planet and it had never used a drop of brake fluid. However I needed the van sorted for a trip in less than a week so just told them to get on with the work. Ended up with a bill for pocket change short of £600 which was mostly the brakes.

Since that work was done, the brakes have been noticeably worse. The pedal is far more spongy and the handbrake really needs a good tug now on a gradient whereas it used to have a really good bite at what felt a more reasonable level of force. When I got the van back the brake fluid was massively overfilled to the extent that it had flooded all over the bulkhead on the drive back home from the garage. It's taken me the best part of a year to get the oil stain out of the driver's seat cover too as they never used slip covers.

In addition to the brake issues, failed the MOT initially for things so trivial as missing rear reflectors (which weren't missing...the tester was just blind - including missing the *additional* ones I fitted to satisfy them when I went back for the retest, and sticking MORE on themselves (squint too!) which wound up pulling the paint off when I removed them), and pulled up advisories for a very slightly frayed seatbelt and a tarnished headlight which I've since had apart and have been able to find absolutely nothing wrong with. They mainly do PCV and HGV testing though, so I wasn't sure if I was just being unreasonable in my expectations for them to be picky.

...If that were the case though, I might have expected them to at the very least flag up these rear brake hose ferrules up as an advisory.

Image

Image

The top one there in particular really is quite crusty (there's no way my MOT tester back up north would have passed it)...I'm not thrilled by the state of the rigid line on it either in a couple of spots and the hoses are quite perished. It goes without saying that a full set has already been ordered.

I've crawled over the front of the van quite a few times (especially investigating an erroneous brake pad wear warning indicator) and things are fine up there...I'd never really looked in that much detail at the rear end though beyond changing the oil in the diff...which was done on a day when it was pouring with rain so I was rather mission focused at the time.

Absolutely a demonstration that an MOT should never be taken as a clear bill of health...you should always give your car a thorough check over yourself.

This discovery absolutely guarantees that I will never, ever be darkening the door of Egerton's Fleet Services ever again.

The realisation hit me this afternoon that I still had to finish up sealing up the the gas locker so I got that finished. It's not pretty, but it will do the job. I'll be installing some rubber floor matting and a proper gas bottle clamp in due course. I just want to leave the floor and the bottom of the rear wall open for the time being until I'm certain I've got to the bottom of a water ingress issue in that corner (down just above the bumper). For the time being I'm leaving it open so that any water that gets in can get back out again. I need to find a slightly smaller bracket for the waste pipe there too or pack it out a bit.

Image

There was a small gap at the top (because I can't measure for toffee) so this was sealed up and then taped for good measure.

Image

This foil tape sticks ridiculously well (it will remove your fingerprints if you're not careful) as it's basically intended for sealing joints on HVAC ductwork. It doesn't have much strength in terms of things poking through it, but it stick really well even to surfaces that aren't spotlessly clean - and can lay a really good foundation if you then layer something else over the top of it. I'll probably go over this lot with some good quality cloth tape just for belt and braces before throwing a bit of paint around in here. It's a bit "how ya doin'" but it will do the job. It's a cupboard at the end of the day rather than a Lamborghini showroom.

You can also spy one other thing I finally sorted today. I had been struggling ever since fitting the sink to get the hose running between the draining board and the sink drain itself to seal properly.

After what must have been ten attempts to get it to seal using three or four different pipes I lost patience with it today. I remembered that I had a bit of 19mm heater hose floating around in a box somewhere which according to my version 1.0 eyeball looked a close fit...turned out it was indeed a pretty much perfect snug fit.

Image

Job done! It should actually be better anyway as the smooth hose shouldn't be prone to trapping water the same way the convolute was. I'm actually tempted to do the same in our kitchen as we have a really long overflow line due to the way the waste disposal unit is attached and it's always been prone to getting smelly, and having to take the whole lot to bits every quarter to clean it is really annoying. I might swap it for a smooth hose like this and see if that helps now I've realised it's the same size.

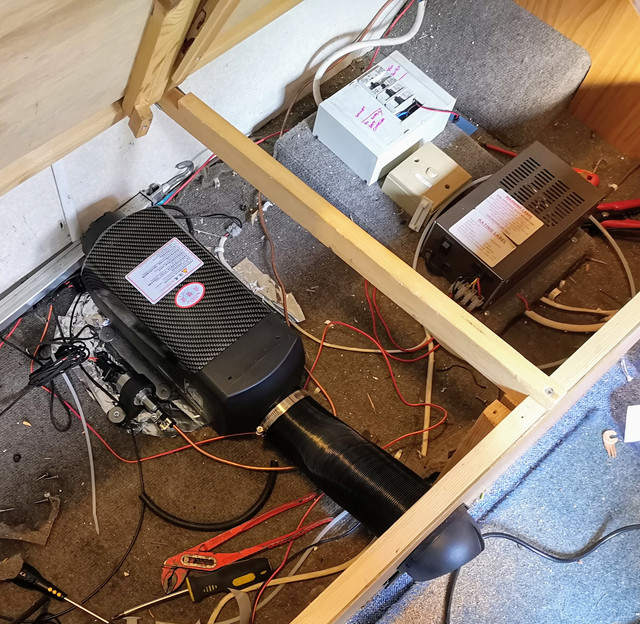
The job I had actually set out with the intention of getting done today was to wire up the recently fitted inverter. The more I thought about it the more it seemed daft to me to have gone to the lengths of fitting it but not wiring it up.

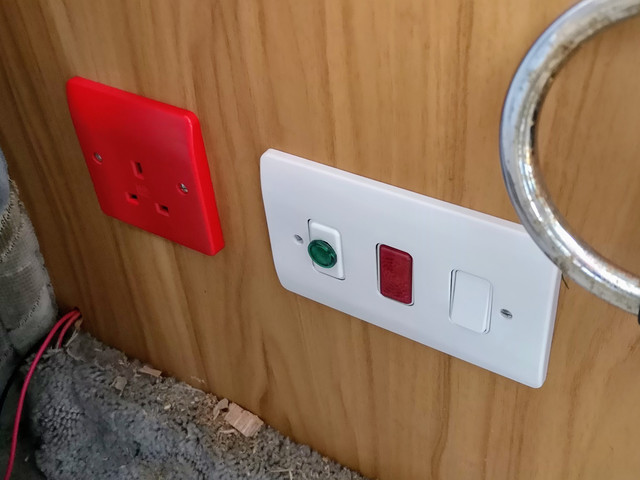
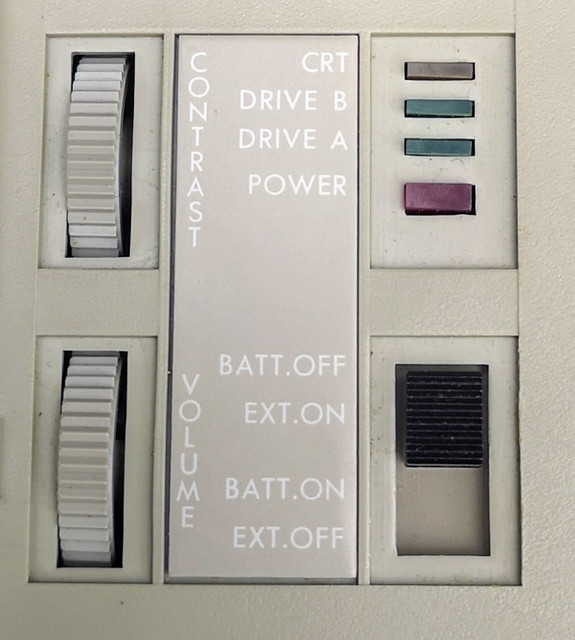
As I am never planning the inverter to be used regularly I want it to be tucked away and not look like it's part of the main power system. As such it will have its own little control panel and I'll probably use a red socket faceplate. I had planned to get that done today, but with the above nonsense going on I never got any further than cobbling together the switch faceplate I'll use, tracking down a relay I'll use to switch the supply and find some wiring (just scavenged from the random bits box, so I need to pull out the bits I'm actually going to use from the bundle yet - the bit in the photo is just for reference!).

Image

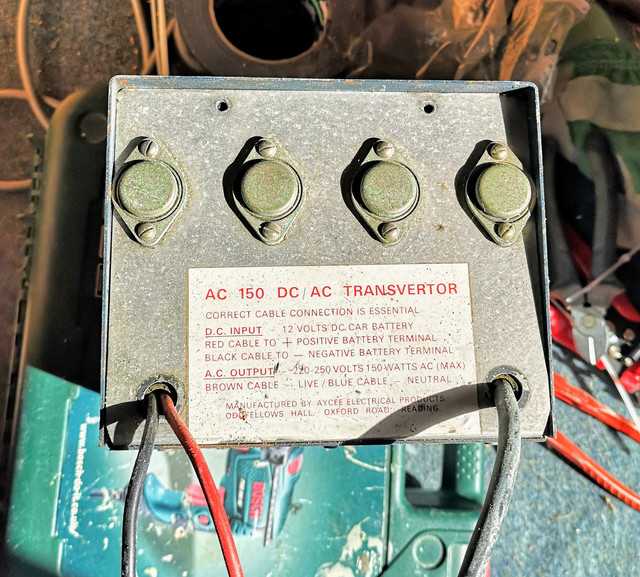
I'll just use the originally removed mains socket for now. The switch panel has two indicators on it. The green one is a standard 12V automotive one which will show when the DC supply to the inverter is on, and the red one is a mains voltage neon to give visual confirmation that it's actually running. Figured this was a good idea as it can be a bit touchy about starting if there's no load (which is why I'm going to use an unswitched socket and have the procedure be to "insert plug, turn power on" to hopefully prevent that being a problem. The frequency meter...well...it's been rattling around for several years and I want to actually use it for something! The mains cable to run to the socket is just a random skinny one from a random bag of cables. It will be absolutely fine for this job bearing in mind that this inverter is only rated for a maximum load of 150W (so about 0.7A). There's no ground provision on the inverter so the socket will be labelled with a warning to that effect.

Hopefully time will allow me to actually screw this lot together tomorrow...Then we can report back once the new brake hose set arrives. I've ordered a full set for both front and rear axles as they're inexpensive and while they're not so visibly degraded as the rear ones the front ones are obviously still quite old and given she's not exactly a light vehicle it just makes sense to me to the the lot. Yes, I have made sure that I have rigid brake pipe in stock and will make double sure that I know where the flaring kit is before I start! I also hate doing brake work...so tend to work on the basis of "I hate it, so let's get as much as possible done in one shot" when I do need to tackle it. Will be a good opportunity to either fix or disable the brake pad wear warning light too as that playing up is really annoying.

An appointment with the most aggressive nozzle of my pressure washer, a few gallons of Vactan and the nation's entire stock of Dinitrol are also in the underbody's near future - though the underbody sealant isn't happening until AFTER I'm done crawling around under there sorting the brakes and routing plumbing lines. I did drown the underneath of the cab last year though as that was obviously in the most imminent danger of dissolving but the weather turned before I got to the rest of the chassis.
Current fleet:
07 Volvo V70 SE D5, 88 Renault 25 Monaco, 85 Sinclair C5, 84 Trabant 601S, 73 AC Model 70, 62 Rover 110.
User avatar
Zelandeth
Donor 2024
Posts: 5040
Joined: 16 Nov 2014, 23:36
x 1505

Re: Zel's Fleet Blog - Xantia Activa, Jag XJ-S, Sinclair C5, Mercedes 208D, AC Model 70.

Unread post by Zelandeth »

Got the new lights in the van a proper after dark test run.

Up until these arrived I had never actually seen phosphor yellow/amber LEDs in person so it was an interesting technological experiment in itself.

Image

The colour definitely brings to mind old school low pressure sodium (SOX) lamps albeit with surprisingly good colour rendering for an amber light.

Image


The really heavy rain we had a couple of days ago revealed a couple of issues with the Jag. Firstly the somewhat embarrassing degree to which it leaks oil.

Image

The second leak wasn't entirely unexpected given their reputation for leaks here.

Image

We'll be getting some Capt. Tolley's on there soon - I'll also get the rear seat out again to make sure we don't have water pooling under there again. I did that earlier in the year given they have a reputation for leaks here rotting complicated box sections out from the inside where the water collects above the rear suspension mounts. It was bone dry back in January...Not so sure that will now be the case!

One fault that's been on the to do list to sort for the last few weeks has apparently decided to fix itself without requiring any manual intervention at least.

Image

The bulb check warning light decided to quit working a couple of weeks ago but randomly sprang back to life yesterday afternoon. Further confirming my suspicion that we've got a dodgy contact at the lamp holder. That'll be a rainy day project. There are a few traces on the back of the instrument cluster that I want to repair to prevent future issues - and to investigate to see if I can figure out why the oil pressure gauge is still playing up (it does register pressure changes, just has a huge positive offset on).

On the to do list also is properly sorting the trim above the driver's door.

Image

I keep wedging this back in place above the trim (or "crash pad" in Jaguar terminology) where it stays until the first time I drive above around 30mph with the window open. I need to get in there with some proper adhesive to see if I can get it to stay put.

I had been wanting to try to get a decent recording of how different the Jag sounds and behaves when just gentle bumbling around (and with how different the character of the sound is with windows open vs closed) for a while. So I just set the camera recording and went out for a wander...Then got lost in a housing estate. It is literally just me wandering around for about 20 minutes, so don't expect anything exciting. Sound and video are just straight off my phone stuck to the windscreen up next to the rear view mirror.


In the van I've finally gone around most of the shelves, drawers and lockers with the non slip matting.

Image

This will hopefully do a bit to cut down on the clonks and rattles. It's definitely helped as it's noticeable how much less drumming there is just opening and closing the doors.

The inverter has now been mostly hooked up. The control panel and socket are now in place (note the red socket face to help highlight it's its own thing rather than part of the wider AC system).

Image

Bit irked I fouled up the alignment so the socket sits a bit too high.

The green DC on light was bugging me too. I'd hoped to be able to get it to fit better.

Knowing I had a spare one of the mains indicators floating around I decided to pull that to bits and convert it for 12V DC use.

Surprising how many bits is inside a simple mains indicator!

Image

I had a play around with a few LED options but couldn't find one that really gave a usable spread of light, so opted for a small incandescent lamp instead.

Image

In place...

Image

Then reassembled and tested out.

Image

I'll get that dropped in tomorrow hopefully. The only other inverter task I've got to do is to actually hook up the supply leads in the main vehicle battery box which should see that up and running. Oh, and get some labelled printed off so it's clear what it is.


The new exhaust has now arrived for the Xantia.

Image

Yay...The new exhaust is here so I can get that sorted.

Boo!...That means I need to fit the exhaust. Have I mentioned that I truly despise exhaust work? It's a big step towards the car being back in service though...I'm *hoping* that the spherical type joints used will at least make it a bit easier to get this pattern system in place without too many headaches. I do note that judging from the logos stamped on it that it's from the same makers as the one on the van...Let's see if it has any more baffles in than that system does!
Current fleet:
07 Volvo V70 SE D5, 88 Renault 25 Monaco, 85 Sinclair C5, 84 Trabant 601S, 73 AC Model 70, 62 Rover 110.
User avatar
NewcastleFalcon
Posts: 26252
Joined: 25 Feb 2009, 10:40
x 7084

Re: Zel's Fleet Blog - Xantia Activa, Jag XJ-S, Sinclair C5, Mercedes 208D, AC Model 70.

Unread post by NewcastleFalcon »

You've captured a bit of Top Quality Corner Cutting from Grey Van Man
cutting corners
cutting corners
REgards Neil
Only One AA Box left
687 Trinity, Jersey
User avatar
Zelandeth
Donor 2024
Posts: 5040
Joined: 16 Nov 2014, 23:36
x 1505

Re: Zel's Fleet Blog - Xantia Activa, Jag XJ-S, Sinclair C5, Mercedes 208D, AC Model 70.

Unread post by Zelandeth »

NewcastleFalcon wrote: 20 Jun 2020, 10:48 You've captured a bit of Top Quality Corner Cutting from Grey Van Man

Image

REgards Neil
That's absolutely standard around here. Everyone takes the most direct route around junctions, roundabouts and often corners - irrespective of whether they're totally blind.

I actually insist on taking the long way round to get to Cranfield because I've nearly been wiped out on one particular blind corner by people cutting it so badly more times than I can count.
Current fleet:
07 Volvo V70 SE D5, 88 Renault 25 Monaco, 85 Sinclair C5, 84 Trabant 601S, 73 AC Model 70, 62 Rover 110.
User avatar
NewcastleFalcon
Posts: 26252
Joined: 25 Feb 2009, 10:40
x 7084

Re: Zel's Fleet Blog - Xantia Activa, Jag XJ-S, Sinclair C5, Mercedes 208D, AC Model 70.

Unread post by NewcastleFalcon »

I dont want to bog your blog down with pictures of red church clocks but if you will permit me here's one, with Citrojim's bike leaning against the wall.....yes that is what Cranfield is currently most well-known-for for me!

Now if you want to bog your own blog down with a picture of a nice black XJS with the red clock in the background on a visit to Cranfield, well that would be entirely at your own discretion :-D

Image

REgards Neil
Only One AA Box left
687 Trinity, Jersey
User avatar
Zelandeth
Donor 2024
Posts: 5040
Joined: 16 Nov 2014, 23:36
x 1505

Re: Zel's Fleet Blog - Xantia Activa, Jag XJ-S, Sinclair C5, Mercedes 208D, AC Model 70.

Unread post by Zelandeth »

NewcastleFalcon wrote: 20 Jun 2020, 13:00 I dont want to bog your blog down with pictures of red church clocks but if you will permit me...
Have you *seen* this blog? You're never going to get complaints from me for random off topic tangents. Cranfield seems a nice enough place in itself, just need to be careful getting there - and take cover as far away as possible if you see the bus that serves the university coming as some of their drivers are utterly insane.

-- -- --

A brief tangent here as some of you seem to find the occasional bits of obscure, ancient or otherwise noteworthy technology to be interesting.

In a moment of weakness a couple of days ago I caved and bought another old computer on eBay. This is something I've generally been trying to avoid doing...but I've a serious weakness where early portable machines are concerned, the odder the better.

This was a bit of a gamble...the listing was shall we say, minimalist, and had only a handful of photos most of which looked to have been taken with a late 90s webcam. Often these end predictably with the item not really being fit for anything aside from a complete restoration or to simply be a parts donor. Occasionally though the gamble does pay off. The price though was right so I put the order in...we'd just have to see what turned up.

Fast forward to this morning when a box turned up. This was an encouraging start as unlike the last two packages containing fragile technology it didn't look like it had been dropped from low earth orbit without a parachute.

Image

Compliments to the seller on that count, this was actually very well packed.

So...we were saying that sometimes this sort of buy can be a disaster or bargain. Initial signs seem to suggest this is the latter.

Image

The carry case was in all honesty a bit gross. Very dusty and in a few places mouldy...which I didn't reckon boded well at all for what was inside it.

Image

Image

What emerged from the case though was quite a pleasant surprise.

Image

Image

Image

Image

I've obviously given everything a wipe over given the current situation, but didn't remove anything visible aside from a bit of dust around the carry handle...

Image

Even the keyboard was pretty much spotless.

Image

Biggest surprise so far...the screen detent actually works! Can't remember the last time I came across one of these where something hadn't had to be improvised to hold the screen up.

Image

So far the only damage found is a tiny what looks like a cigarette burn on the carry handle and a missing foot on the one end.

Image

...Which I'm pretty sure has actually just been pushed into the case as there's something which sounds like that rattling around in there.

The extremely flimsy hinges on the port cover are all fine.

Image

Likewise the catches for the battery tray. No rechargeable tech here...if you want to take the off-grid you need to track down TEN C Cells...which will be good for an hour. Ish.

Image

I initially thought the badges on the case were peeling before realising that no...they still have their protective film on.

Image

Image

The usually grubby area around the power switch tells a story of very little use I think.

Image

Image

This was also in the box.

Image

Which includes the original software discs *and* sensibly, backups of them.

Image

Plus what looks to be a spreadsheet program.

Image

Remember when the manuals shipped with software were that big? The 640 page one for Windows 3.0 always sticks in my mind. Looks like this software shipped with both 3.5" and 5 1/4" discs...these have probably never been used.

Image

I was quite surprised by how heavy this thing isn't. It's hardly a MacBook Air, I'm guessing around 5kg...but by the standards of portable computers in the late 80s it's perfectly reasonable. An amusing "but" to that is that they have managed to make a reasonably light portable computer...and then shipped it with a transformer power supply that weighs over a kilogram itself!

Image

Of course anyone who knows computers of this age knows that looking tidy and being in working order are two very different things...so there were no guarantees that it would power up or the two double density floppy drives would work.

Image

Image

Promising start...

Stuck the DOS system disc in there...

Image

Image

We appear to be in business! ...Really quiet drives too.

Image

The display is hilariously bad. The actual LCD doesn't seem bad, but it desperately needs a backlight.

Only had a really quick poke around but all the main software I got seems to work fine.

Tasword.

Image

Which appears to be about as friendly for new users as VIM.

Image

Can I have a help file to help decipher the help file for Tasword please? Information overload much?

Image

Image

Mirror II, which looks to be a file transfer/backup program with network support.

Image

PPC Organiser, which looks to be a combined diary, word processor, contact list type deal.

Image

I've got quite a few old DOS programs I've been waiting on finding a machine old enough to run them properly on...so looking forward to experimenting.

The carry case was emptied and unceremoniously dumped in the washing machine on a delecates cycle...I just didn't want to touch it otherwise.

Image

I was worried it might disintegrate...but it seemed a risk worth taking as it was unlikely to get used otherwise...

Came out unscathed though, looking (and smelling!) infinitely better.

Image

Image

Have only had a chance to very briefly investigate it so far, but definitely pleased with it so far...and as someone with a soft spot for early portable machines it's definitely worth having.

World's away from the Toshibas though... they're built like tanks. This is very much creaky, squeaky, bendy plastic and obviously built down to and below a price. No less interesting though...and still has a surprisingly nice keyboard (which both looks and feels so similar to the Acorn A3000/3010/3020 ones that I'd be startled if they're not made by the same OEM).

So that's my one eBay gamble win for the year used up then!
Current fleet:
07 Volvo V70 SE D5, 88 Renault 25 Monaco, 85 Sinclair C5, 84 Trabant 601S, 73 AC Model 70, 62 Rover 110.
User avatar
Zelandeth
Donor 2024
Posts: 5040
Joined: 16 Nov 2014, 23:36
x 1505

Re: Zel's Fleet Blog - Xantia Activa, Jag XJ-S, Sinclair C5, Mercedes 208D, AC Model 70.

Unread post by Zelandeth »

Back to getting to the inverter installation in the van done.

It was brought to my attention that the green light being next to the red socket looked wrong...I couldn't argue with that logic so when the improved DC on indicator light was fitted I swapped them around.

Image

Better.

Time to start hooking things up. DC input control supply connected (via a 2.5A fuse - smallest I had on hand)...this gave us a happily clicking relay when the switch was operated and the "DC on" light working.

Image

Then added the main high power supply line. This was meant to be via a 20A fuse but I couldn't find another inline fuse holder to save my life, so I disconnected it again after testing everything worked, until I pick one up.

Yep...it still hums impressively.

Image

Borrowed a desk lamp to test it would deliver power under a load.

Image

This was tested both with a modern LED lamp and an old magnetically ballasted one just to see whether it would play nicely with an inductive load, it did.

You're not seeing the wiring as I've also run out of cable ties so it's a right mess. You can see it once I've restocked and tidied things up.


Had an hour or so to play around with the Amstrad PPC512 today.

Observations: While it's downright bizarre, it's actually not a bad form factor from the perspective of an early portable machine. It's not unpleasant to carry and the top of the case gives an ideally shaped space to put discs while you're using them. I also am a great fan of the keyboard - which I'm now convinced is mechanically identical to the Acorn Archimedes ones. The key action isn't like any other board I've ever used...and while not as tactile as the Model M, has a very progressive spring action which means you don't tend to wind up bottoming out the key travel. It seems to be a keyboard well suited to ridiculously fast typing...which suits me just fine. I could see this machine ending up on writing duties if I find a word processor I get along with (haven't had a proper look at Tasword yet).

What follows is basically a bunch of screenshots which hopefully will be interesting to folks like me who find things even familiar stuff working on different machines and display technology interesting.

This display isn't actually dire to use... it's not great but it does the job. It is however an absolute *swine* to photograph! I will have to experiment a bit and see if I can come up with a better solution.

I had a particular experiment in mind for today though, getting some software going that I've never actually had going on a physical machine running. Step one was a lot of this.

Image

Onwards to...

Image

Then (somewhat astonishingly on the first try) we were in business.

Image

Hello Windows 2.0.

Image

Image

Let's have an aimless wander.

Calculator.

Image

It's easy to forget how huge the overhaul Paint got for Windows 3.0 was.

Image

Likewise how basic the control panel used to be.

Image

Image

While it gained a digital mode and colour makeover in later years the clock looks quite similar.

Image

Image

Reversi. Which I made a point of not getting sucked into. Especially as it's a pig to play without a mouse. Replaced by Minesweeper in 3.1.

Image

Image

Write is probably the program which feels like it remained unchanged the most through to 3.11.

Image

As a quick test to see if Windows 2 would run on this system though it has been a resounding success.

Image

If anyone wants to see anything specific attempting to run on here let me know, or I'll probably drop back here to the car specific things on topic for this forum!
Current fleet:
07 Volvo V70 SE D5, 88 Renault 25 Monaco, 85 Sinclair C5, 84 Trabant 601S, 73 AC Model 70, 62 Rover 110.
User avatar
xantia_v6
Forum Admin Team
Posts: 10108
Joined: 09 Nov 2005, 22:03
x 1118

Re: Zel's Fleet Blog - Xantia Activa, Jag XJ-S, Sinclair C5, Mercedes 208D, AC Model 70.

Unread post by xantia_v6 »

Back in the days when that machine would have been in use, my word processor of choice was Borland Sprint, which I used for several years, both as a code editor for assembly-language programming and as a word processor for writing technical manuals. It had an odd WYSIWYG mode which used proportional fonts and kerning to calculate line breaks and paragraph shape, but displayed the text on a fixed font display by omitting random letters so that the right number words would fit on each line.

I don't remember which spreadsheet I used in those days, I did use Borland Quattro, but there must have been something earlier than that.

My pride and joy was a Toshiba T1200 which, if you configured a RAM disk and switched off the HDD could manage something like 6 hours battery life on a long haul flight (which I did a lot of in those days).

I still have a T1200 in more or less mint condition (not the same one), it is time I dusted it off to see if it still boots.
User avatar
Zelandeth
Donor 2024
Posts: 5040
Joined: 16 Nov 2014, 23:36
x 1505

Re: Zel's Fleet Blog - Xantia Activa, Jag XJ-S, Sinclair C5, Mercedes 208D, AC Model 70.

Unread post by Zelandeth »

xantia_v6 wrote: 22 Jun 2020, 02:44 I still have a T1200 in more or less mint condition (not the same one), it is time I dusted it off to see if it still boots.
I have a T1200 here too - though in need of restoration/reassembly sadly as it suffered issues with electrolytic capacitors in the power supply section years ago.

I do recall the battery life knocking anything current absolutely out of the park when I was using it for schoolwork back around 2001 or so.

Has one of the oddest sounding hard drive spindle motors I've ever come across too if memory serves...on par with the 40Mb Fujitsu made ones fitted to the T3200s...

There were third party hard drive upgrade kits made for this Amstrad machine...though finding one of those and a suitable MFM drive might be a challenge!
Current fleet:
07 Volvo V70 SE D5, 88 Renault 25 Monaco, 85 Sinclair C5, 84 Trabant 601S, 73 AC Model 70, 62 Rover 110.
Gibbo2286
(Donor 2020)
Posts: 7954
Joined: 08 Jun 2011, 18:04
x 2840

Re: Zel's Fleet Blog - Xantia Activa, Jag XJ-S, Sinclair C5, Mercedes 208D, AC Model 70.

Unread post by Gibbo2286 »

I bought the desktop version of that Amstrad 512 for my business bookkeeping, at the same time I bought Sage software, the Amstrad only had a single 5 1/4" floppy disk drive, about a month later Sage upgraded their software and it would only run on a computer with a hard drive. :shock:

I think I paid about £1200 for that Amstrad and the Sage stuff from Dixons.

I did make a fair bit of use of it for other stuff so not a complete waste of money.
Anyone who has never made a mistake has never tried anything new. (Albert Einstein)