Hmm...Why do I get the impression that we have, or at least have had something of a water ingress issue in the car?

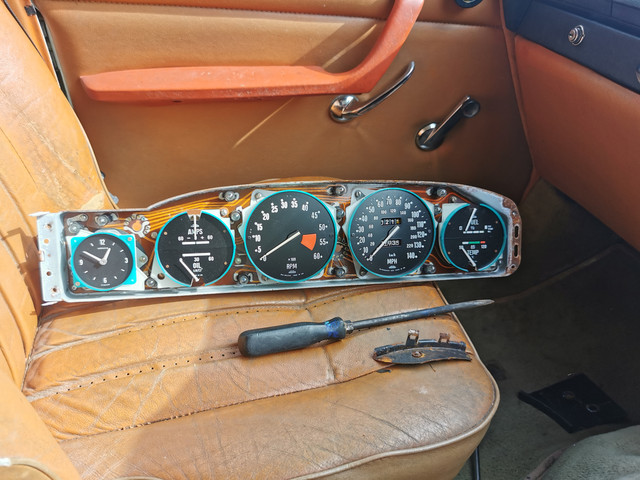
With those two flat head screws there out and an identical two at the other side the faceplate comes off.
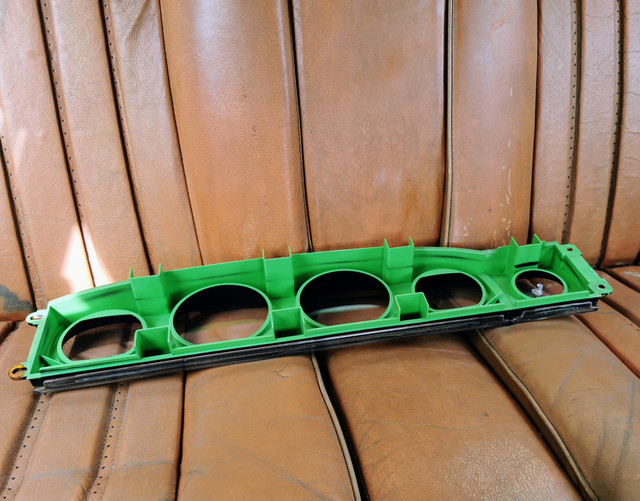
Which is actually all you need to remove to deal with any issue with panel lighting as the lamps are all replaceable from the front rather than having to faff about removing the whole panel for that. I don't mind that design at all.
Four more screws (the inner Philips head ones) release the panel, and once some cable connections and the speedometer drive are disconnected it lifts out. The cable connectors are a rather familiar layout to those of us used to working on valve era technology.
The speedometer drive comes in from the side to a bevel drive arrangement which actually makes it really easy to get to...which baffled me somewhat as that's usually the single biggest headache when removing/installing an instrument cluster. I certainly learned new swear words trying to reattach it to the speedometer in the P4. You just need to be really careful not to damage any of the dial faces or pointers when removing things.
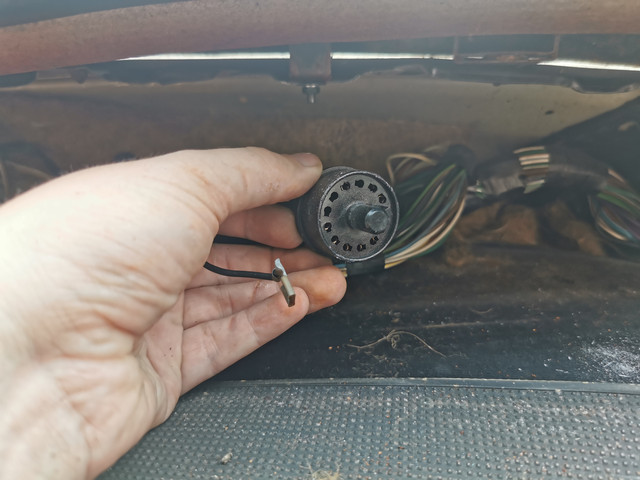
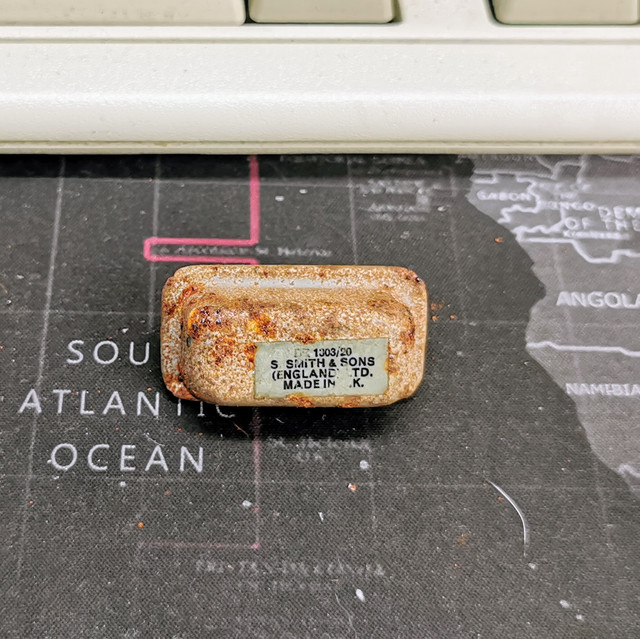
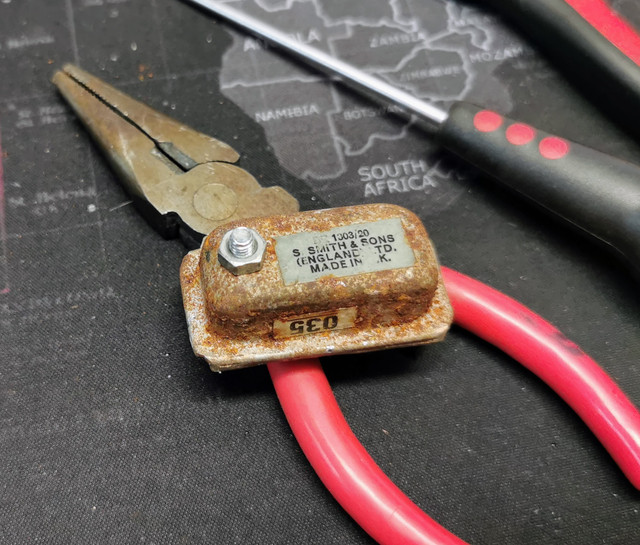
Our suspect on the bench. One slightly crusty looking Smith's 1300/20 10V voltage stabiliser.
Which sure enough when tested on the bench turned out to be dead as a doornail. The heater was open circuit so not just a case of cleaning the points. This is all that's inside one of these.
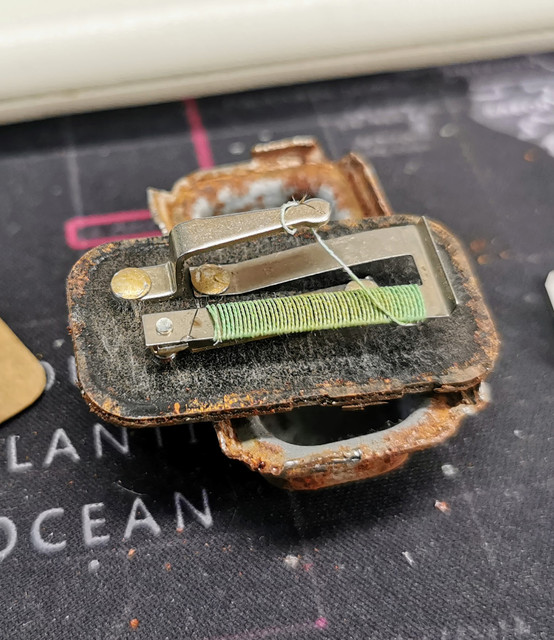
Just like a thermal flasher unit...which is basically all it is.
The innards of this one were stripped out and an L7810 10V regulator was attached to the inside of the lid to take its place.
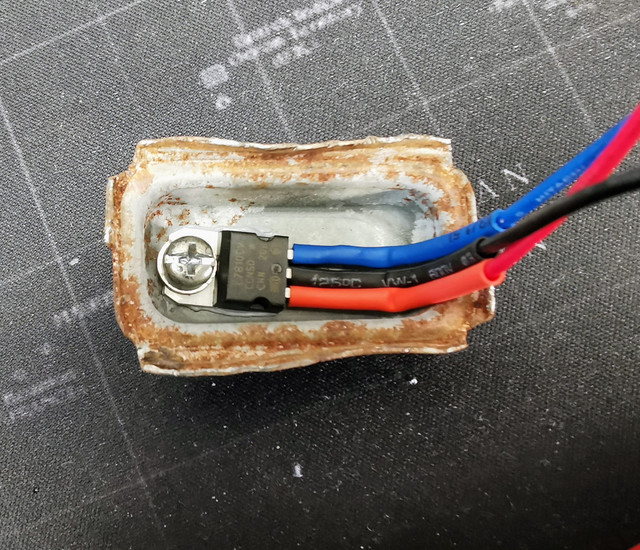
I could have just used flying leads to hook it up and either attached it to the back of the panel or to the bulkhead, but I preferred keeping the original case at least. Plus this should hopefully be a fit and forget solution.
Once everything was connected back up and the sender shorted to ground the temperature gauge (very slowly) started to climb just as we had hoped it would. So the gauge itself and the wiring to the sender is fine.

Under the bonnet I set about reattaching the kickdown cable to the throttle linkage. I don't have a roll pin the correct size to hand, so a bolt and lock nut has been used for now for testing purposes.

The missing bolts from the brake master cylinder mounting plate were located in the boot and reinstated where they belonged.
Had a crawl around underneath the car and couldn't find anything obviously loose or missing, and made sure that things like the wheel nuts were actually tight.
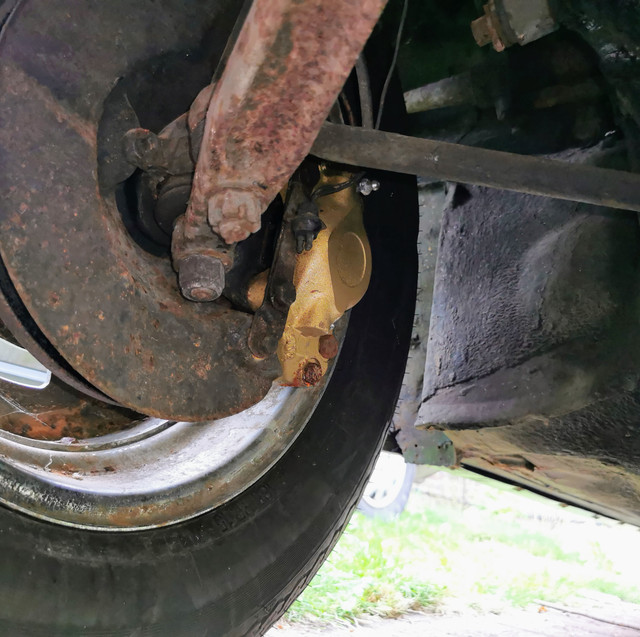
There are definite signs of (relatively) recent money being spent on this car. Aside from the paint which looks to date from 2019, the front brake calipers have clearly been rebuilt (or replaced) in the not too distant past.
This brake fluid clearly hasn't been sitting in here for decades either.

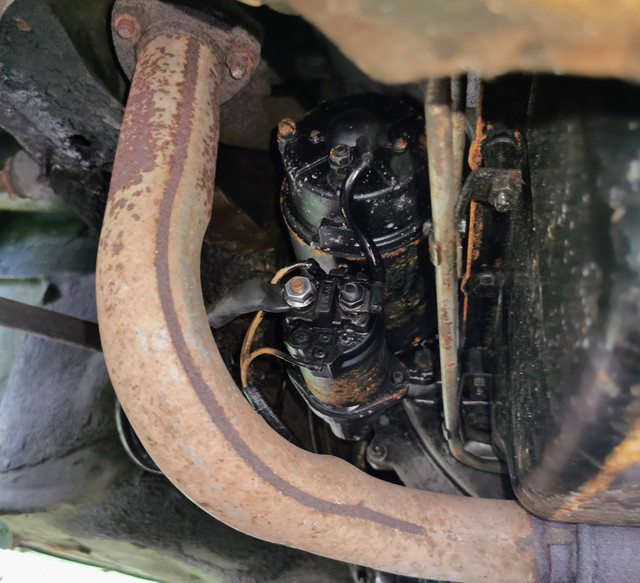
Likewise the starter motor looks pretty recent. Not new, but it's clearly been replaced in living memory.
Rear brakes aren't exactly pretty - but there's evidence that they have at least been doing *something* - which given the car hasn't been properly driven in forever isn't the worst start.
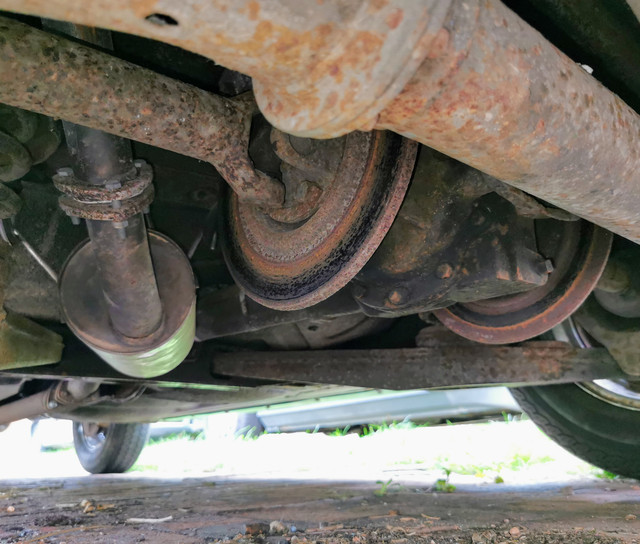
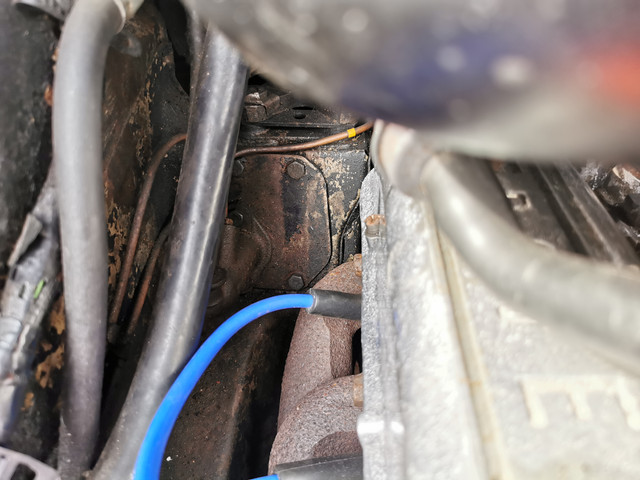
The boot on the Di-Dion tube looks to be in decent shape and there's not oil peeing everywhere...though admittedly that may also be because there is no oil *in* it...Haven't got as far as checking that yet.
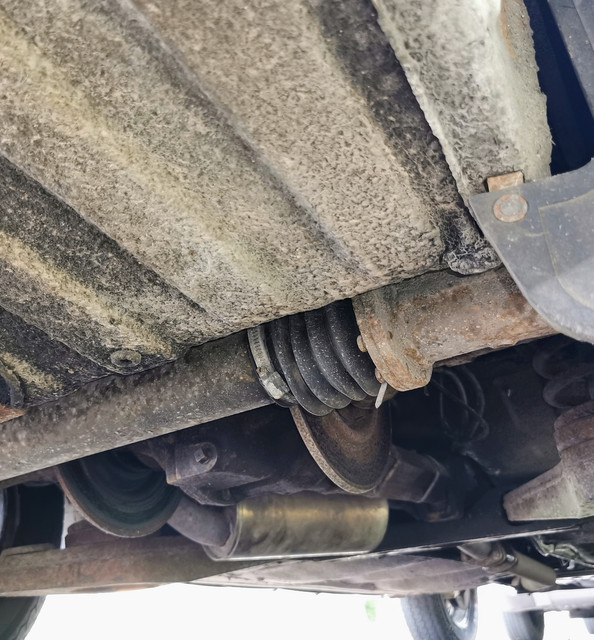
Again, the condition of that hose clamp to me suggests that's been worked on pretty recently.
I think the rear suspension likely will need some attention though given that the car seems to sit lower on the driver's side than the passenger's side by a good inch or so.
The braking system passed my patented "stand on the pedal with as much strength as I can muster and hold it for 20 seconds" test without any drama. So with this all in mind I decided to take advantage of the lull in activity around here between the school kick out madness and rush hour starting and went for a slow, careful bumble around our block. This literally amounts to a roughly 300 metre square all on 20mph roads.
Even locked in 1st, there's no real way to get any meaningful revs involved in a setting like this, so I really didn't expect cylinder number 5 to spring back to life - and sure enough it didn't. However after a few circuits I didn't really detect any issues. Brakes are a little spongy, but it pulls up smartly enough and in a straight line. Gearbox seems to shift as expected, smoothly and without slipping, and despite the lack of a cylinder it definitely seems to pull well. No clonks, bangs or rattles from the suspension and it seems to waft quite nicely. Not a bad place to be starting from really.
This allowed me to cover a couple of miles, and to get some halfway decent heat into the engine at least. However it also allowed me to see where the temperature stabilised - right about here was the answer while bumbling around our estate.
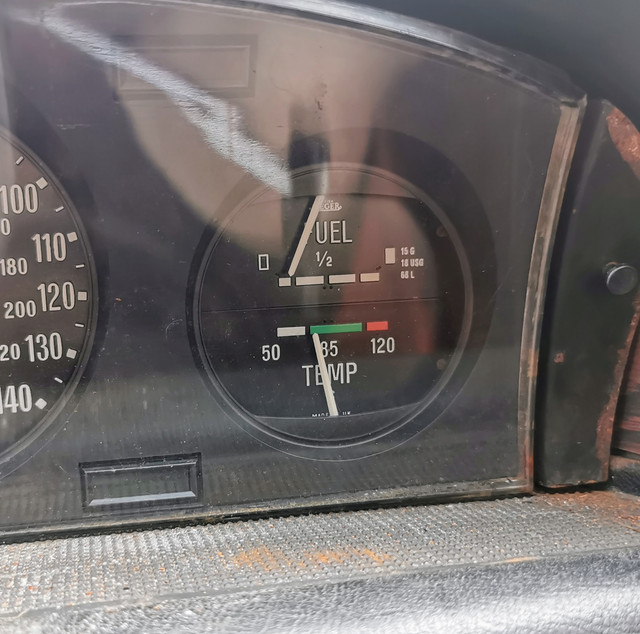
Hot oil pressure? Meh, we have some. Which given these engines and the absolutely fantastic accuracy these gauges are reputed to have I'll take as meaning "good enough." The warning light goes out instantly when the engine starts even when at temperature so I'm not worrying about that.

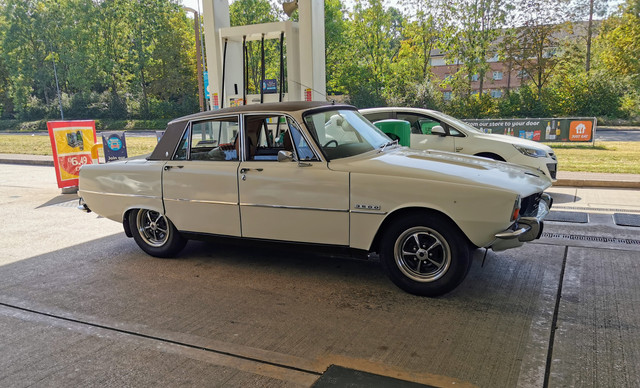
I'll want to make a few more checks on things before doing a slightly quicker test - but that's also something I feel I can only really do at set times as the traffic is so damned busy around here most of the time. There's a petrol station 0.8 miles away on a route that doesn't involve having to deal with dual carriageways or anything like that, and I'd like to make that a target so I can slosh a decent amount of fresh fuel in the tank.
Also on the subject of fuel, a replacement for this fuel pump (or a rebuild kit) will be getting ordered this evening as this could also have been a major contributor to why our oil was so badly fuel contaminated.

The diaphragm is highly unlikely to be ethanol resistant unless it's been recently replaced anyway, so it's a job that would want doing anyway.
I'm pretty much resigned to the fact that we're most likely going to need to pull the left hand head off to investigate what's going on with number five, and have ordered a head gasket set to that end. I'd been holding off that initially while I tried to confirm which engine we had fitted. I'm now 99% sure that this is an SD1 Vitesse unit based on what bits of the number we can make out.
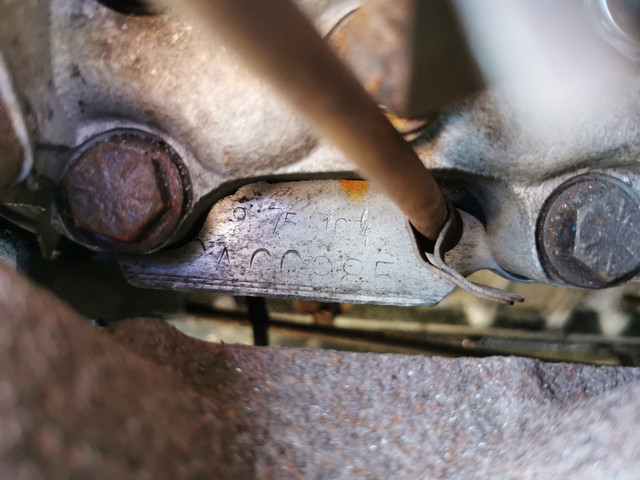
The fact we can clearly read the compression ratio as 9.75:1 helps a lot as that narrows things down a lot. The only engines I can see which have both that compression ratio and a number starting "?0A" with the right number of digits. I'm open to correction there from folks who know these engines better than I do, but that's the result my own deductive logic has brought me to based on the list over here.