
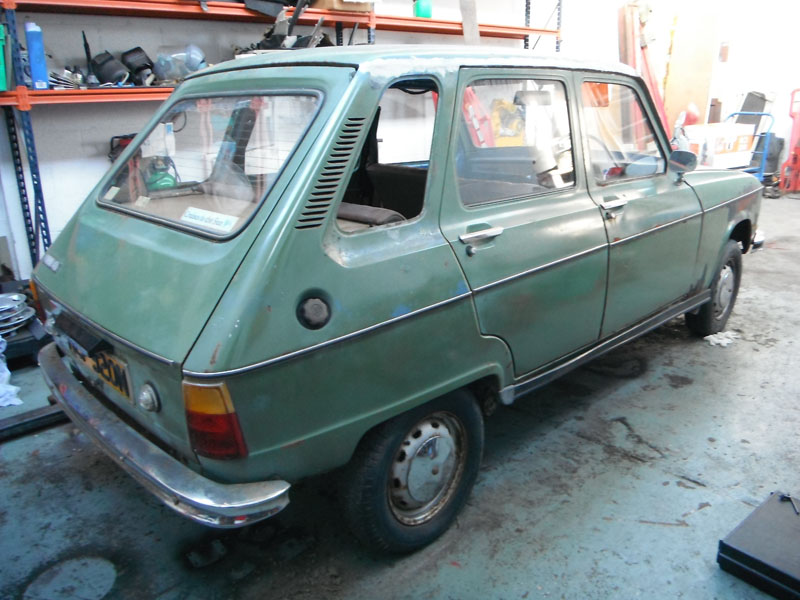
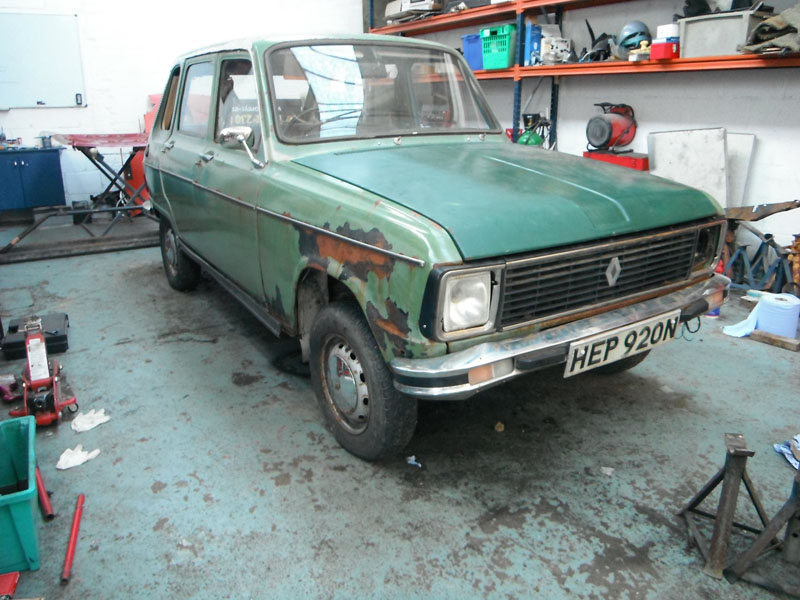
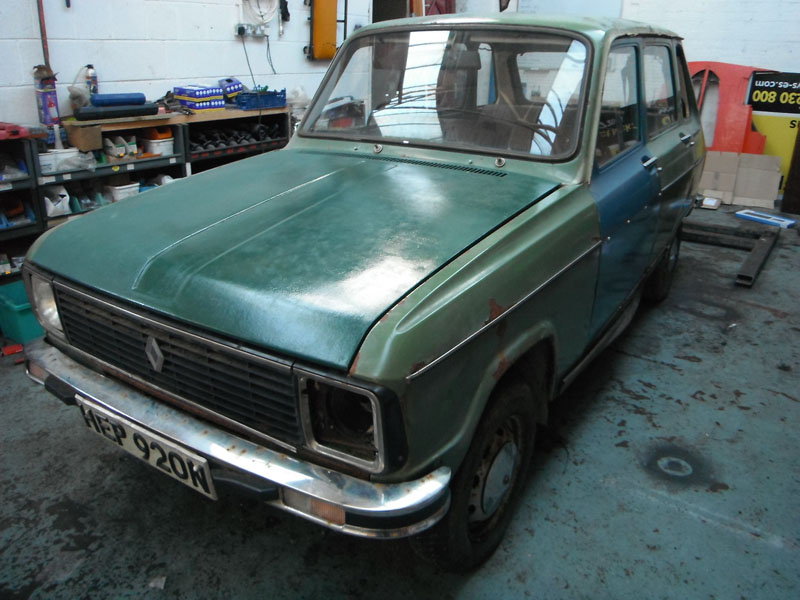
1975 Renault 6TL
-
vulgalour
- Posts: 228
- Joined: 05 Jul 2014, 22:32
- x 36
Re: 1975 Renault 6TL - 15/04 Update
Aww, you can't be mean to Nugget! He's our reliable little donkey car. Bought him for £180 in London and made it back to Stockton-on-Tees in one go on the windiest night ever and he has never, ever let us down. If it weren't for Nugget I'd have no transport as all three of my cars are in various stages of broken. 
-
daviemck2006
- Donor 2024
- Posts: 5032
- Joined: 04 Dec 2010, 18:45
- x 496

Re: 1975 Renault 6TL - 15/04 Update
I just poke fun at vauxhall for a laugh. Any vauxhall that has been in our family have been decent enough cars. My daughters astra is on 134000 miles and 100%reliable. My ex had a corsa b like that one and it was reliable too at well over 100. I have had a few vauxhalls over the years and the only thing I can remember about them was a mk 1 1300 astra needed a camshaft about 4 years old and 40k. Vauxhall paid fot it. I would actually consider another one, but not a corsa for me. They feel too narrow inside for me.
Skoda Karoq 1.6tdi 2018
Peugeot boxer 2016
In the family
Cupra Leon 1.5tsi tourer 2024 daughter 1
C1 vtr+ 2010 daughter 2
Vw golf 1.9gttdi 150 spare toy.
Peugeot boxer 2016
In the family
Cupra Leon 1.5tsi tourer 2024 daughter 1
C1 vtr+ 2010 daughter 2
Vw golf 1.9gttdi 150 spare toy.
-
CitroJim

- A very naughty boy
- Posts: 54745
- Joined: 30 Apr 2005, 23:33
- x 8172
Re: 1975 Renault 6TL - 15/04 Update
Same here! I've owned Vauxhalls and my last one, a Chavalier, was not a bad car at all...daviemck2006 wrote:I just poke fun at vauxhall for a laugh.
I did once have a very bad HC Viva in the 70s but that was a long time ago now! That really was a dire car... I got rid of it and got an R4 and been French on and off ever since so in that way Vauxhalls did me a favour
Jim
A bit of a Citroen AX fan...
A bit of a Citroen AX fan...
-
vulgalour
- Posts: 228
- Joined: 05 Jul 2014, 22:32
- x 36
Re: 1975 Renault 6TL - 15/04 Update
Update time again. The upper ball joints arrived and I collected some 6mm fuel hose and a pair of wiper blades the other day. Today is not the day I fit those though.
I did figure out where the long bar goes and in so doing where the missing bumper iron bolt was.
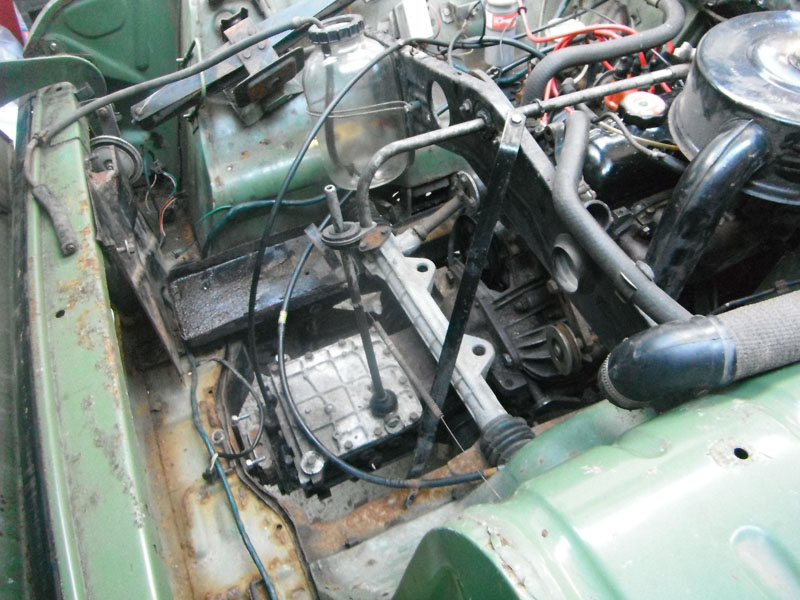
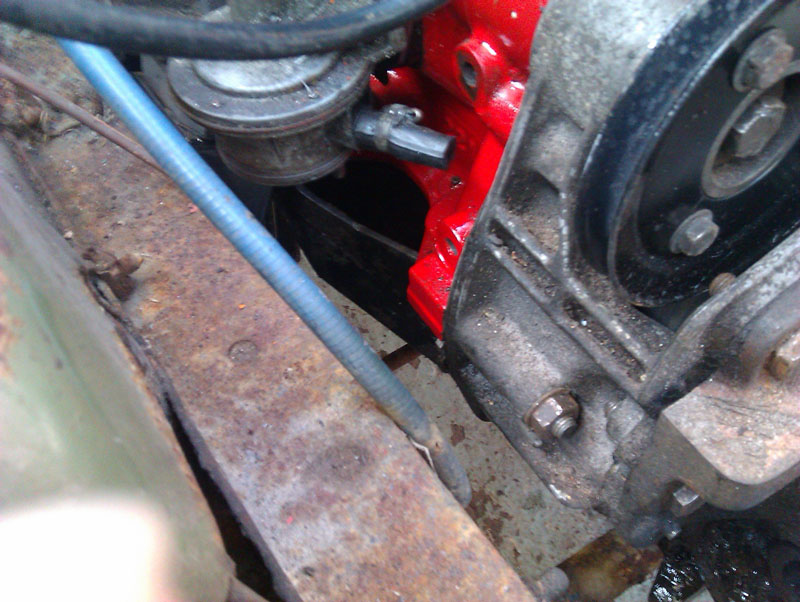
An attempt was made to fit the sump-to-bellhousing stiffener brackets with the engine in situ. Because of the size of my hands this proved impossible so I shall be lifting the engine out just far enough to bolt the brackets on before putting it back in again. Not too difficult a job really. Here's an idea of access and visibility.
What I really wanted to do today was some welding, specifically gutter repairs. They hadn't got any worse since I applied the seam sealer a year ago but they also hadn't got any better. They were fragile for most of the length so I decided to get rid of the perforated rusty bits. Easiest way to do this was to fold them down against the bodyshell lip/platform the roof is spotwelded to and take a flapwheel to the edge to trim off the old gutters.
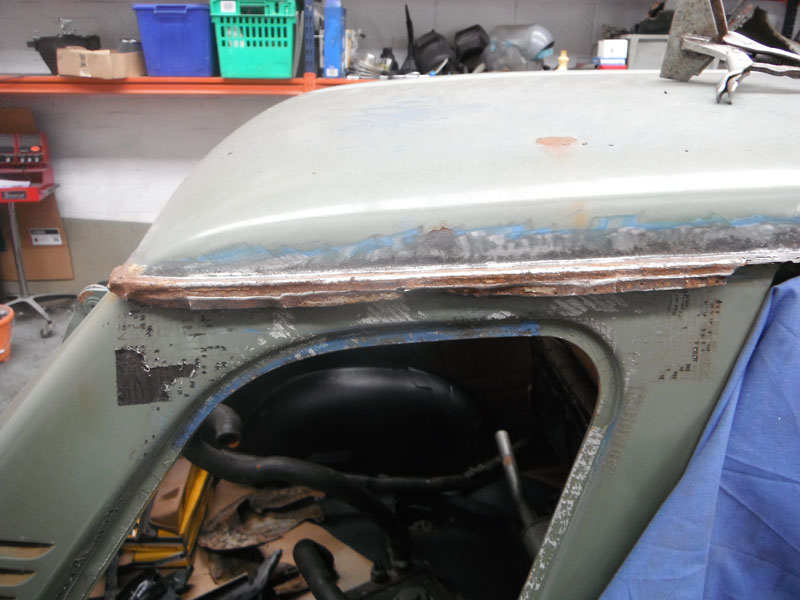
The A pillar gutters were still in really good shape so I left those alone. The roof still had lots of spot welds holding it down too.
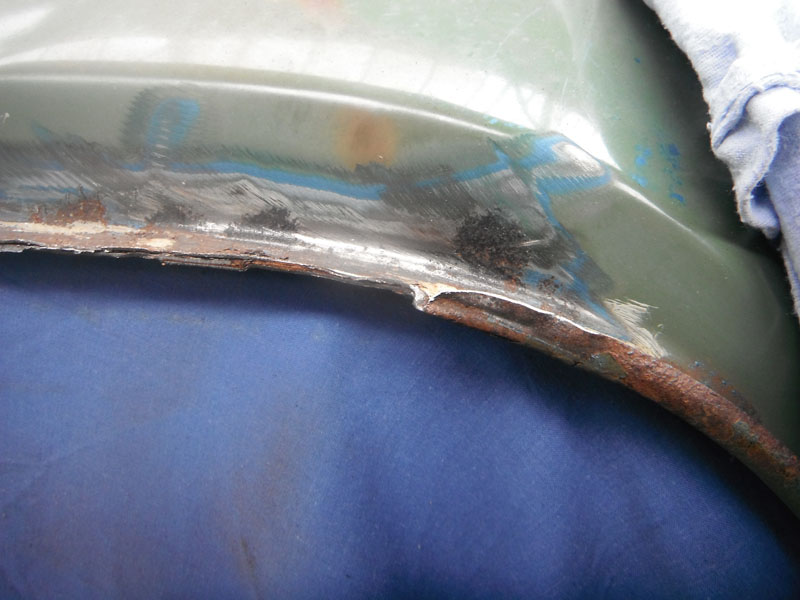
Well, apart from the middle third where the gutters had practically disappeared.
This is all that's left of them.
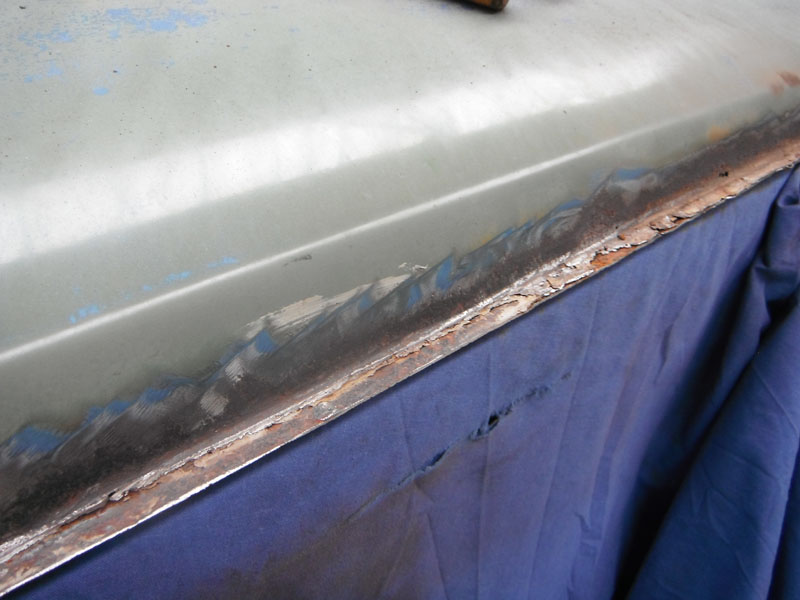
I was originally going to tidy up the surfaces and make up some new gutters, welding them in carefully as per factory. Then I thought sod it, lets do this the easier way. There's that much work involved in replacing the gutters I deemed it pointless so instead decided to deseam the Renault. A section at a time I ground back the gutter ledge until it was not quite flush with the roof skin, then tacked the two pieces together before moving to the next part so the whole roof didn't just spring off. Then, taking my time so things didn't get too hot and having just two small fires when stray welder sparks hit a dust sheet, I seam welded the join.
After going back a couple of times to address any pinholes where I'd missed, it was deemed ready for filler. A lot of the big roof dent this side came out with the heat of welding, which was useful. A skim of filler was applied to smooth out the weld line. The roof skin surprisingly didn't warp, I suspect this is down to the brace that runs on the other side keeping the shape.

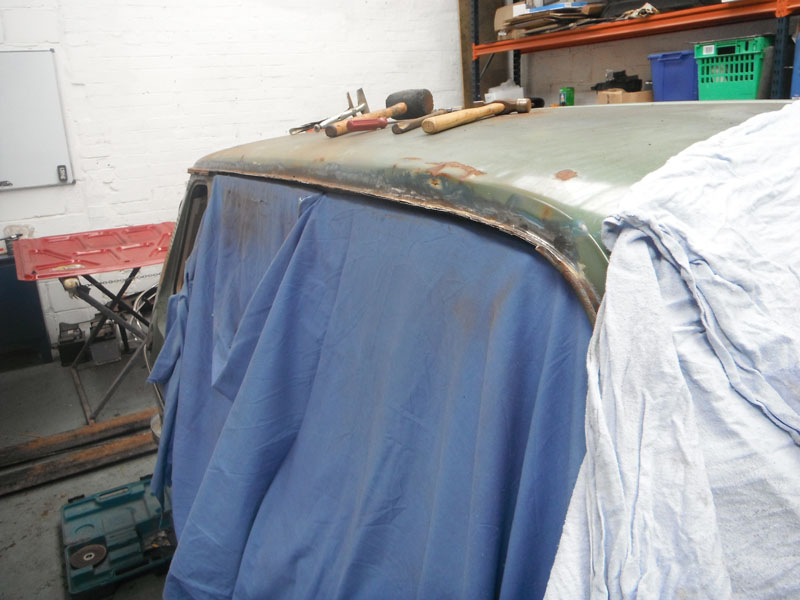
I'll finish sanding the filler another day. For now I'm happy the rust is gone and the car doesn't look that bad for being de-guttered. If I want to fit gutters in the future I can do so with ready made sections spot welded to the edge that is currently smoothed out. I tidied up the A pillar bit of guttering with the old damaged stainless trim cut down to suit.
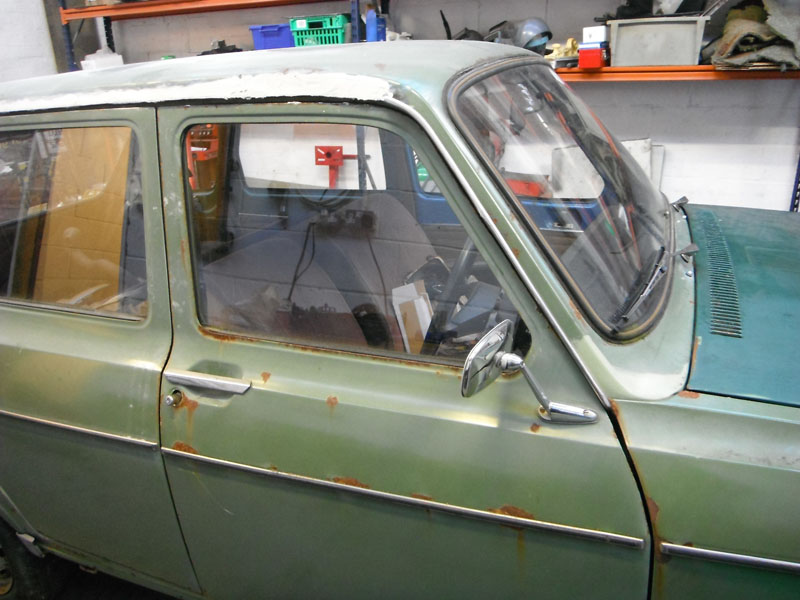
Other items of note are that the door mirror was found to be adjustable and perfectly functional and I refitted all of the side trim. I do need some more side trim clips, the ones on the car are very fragile and not really good enough to hold the trim on the car at speed.
I'll likely not be working on Crapaud again until Tuesday when my new clutch cable and brake pads are due to arrive. I'll turn my attention to getting the brackets fitted, the new brake parts on and the new ball joints in so the car can go back on his wheels again.
I did figure out where the long bar goes and in so doing where the missing bumper iron bolt was.
An attempt was made to fit the sump-to-bellhousing stiffener brackets with the engine in situ. Because of the size of my hands this proved impossible so I shall be lifting the engine out just far enough to bolt the brackets on before putting it back in again. Not too difficult a job really. Here's an idea of access and visibility.
What I really wanted to do today was some welding, specifically gutter repairs. They hadn't got any worse since I applied the seam sealer a year ago but they also hadn't got any better. They were fragile for most of the length so I decided to get rid of the perforated rusty bits. Easiest way to do this was to fold them down against the bodyshell lip/platform the roof is spotwelded to and take a flapwheel to the edge to trim off the old gutters.
The A pillar gutters were still in really good shape so I left those alone. The roof still had lots of spot welds holding it down too.
Well, apart from the middle third where the gutters had practically disappeared.
This is all that's left of them.
I was originally going to tidy up the surfaces and make up some new gutters, welding them in carefully as per factory. Then I thought sod it, lets do this the easier way. There's that much work involved in replacing the gutters I deemed it pointless so instead decided to deseam the Renault. A section at a time I ground back the gutter ledge until it was not quite flush with the roof skin, then tacked the two pieces together before moving to the next part so the whole roof didn't just spring off. Then, taking my time so things didn't get too hot and having just two small fires when stray welder sparks hit a dust sheet, I seam welded the join.
After going back a couple of times to address any pinholes where I'd missed, it was deemed ready for filler. A lot of the big roof dent this side came out with the heat of welding, which was useful. A skim of filler was applied to smooth out the weld line. The roof skin surprisingly didn't warp, I suspect this is down to the brace that runs on the other side keeping the shape.
I'll finish sanding the filler another day. For now I'm happy the rust is gone and the car doesn't look that bad for being de-guttered. If I want to fit gutters in the future I can do so with ready made sections spot welded to the edge that is currently smoothed out. I tidied up the A pillar bit of guttering with the old damaged stainless trim cut down to suit.
Other items of note are that the door mirror was found to be adjustable and perfectly functional and I refitted all of the side trim. I do need some more side trim clips, the ones on the car are very fragile and not really good enough to hold the trim on the car at speed.
I'll likely not be working on Crapaud again until Tuesday when my new clutch cable and brake pads are due to arrive. I'll turn my attention to getting the brackets fitted, the new brake parts on and the new ball joints in so the car can go back on his wheels again.
-
CitroJim
- A very naughty boy
- Posts: 54745
- Joined: 30 Apr 2005, 23:33
- x 8172
Re: 1975 Renault 6TL - 17/04 Update
Excellent work  Thoroughly enjoying reading this
Jim
A bit of a Citroen AX fan...
A bit of a Citroen AX fan...
-
Stickyfinger
- (Donor 2016)
- Posts: 11763
- Joined: 28 Mar 2013, 21:05
- x 1982
-
vulgalour
- Posts: 228
- Joined: 05 Jul 2014, 22:32
- x 36
Re: 1975 Renault 6TL - 17/04 Update
I shall do my best to continue to educate and entertain!
Mike and I hauled the engine and gearbox out of the engine bay again so we could fit those stiffener brackets that go from the engine mounts to the bellhousing. This was a chore and I wish I'd known what they were before the engine went in the car. What's more, with brackets fitted it's nearly impossible to put the nut on the bottom of the driver's side engine mount because access is something that happens to other cars. Had to remove the bonnet, gear lever brace and steering column to get the engine and gearbox out as well as putting the lifting straps on in such a way that they cleared the locations we needed to fit the stiffener brackets. This was not a particularly fun job.
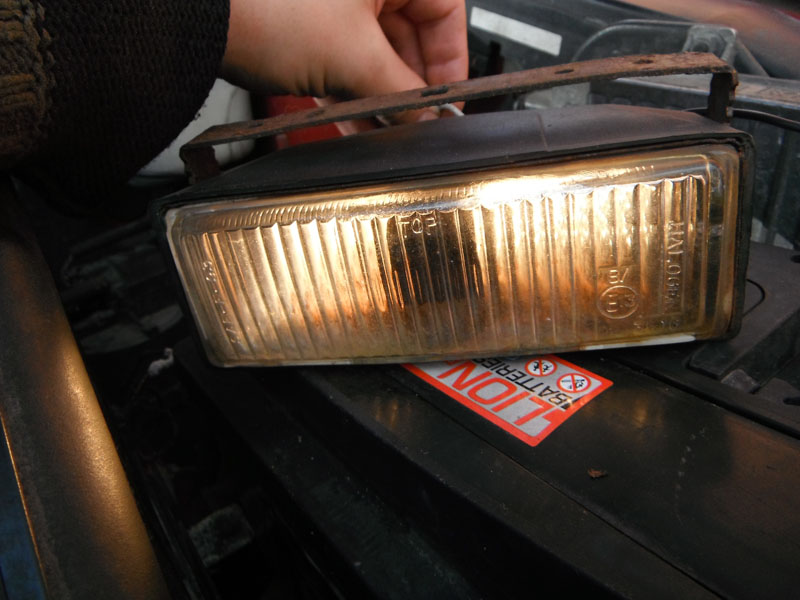
That done, a bit of info on the headlights. They are handed and have very specific fittings, not at all what I'm used to seeing.

On the outer side at the top there's a spring that the tab that makes the lights handed sits in.
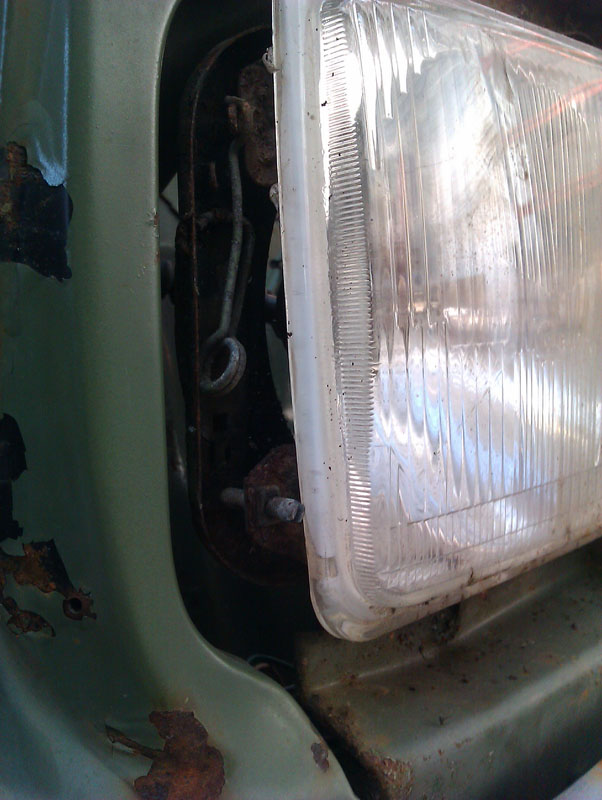
On the inner side at the bottom is a clip of sorts that holds the bracket that doesn't have an adjuster in it.
Frustratingly, the two headlight mounting brackets are mirrored, which is why I can't use the spare headlights I've got in this hole.
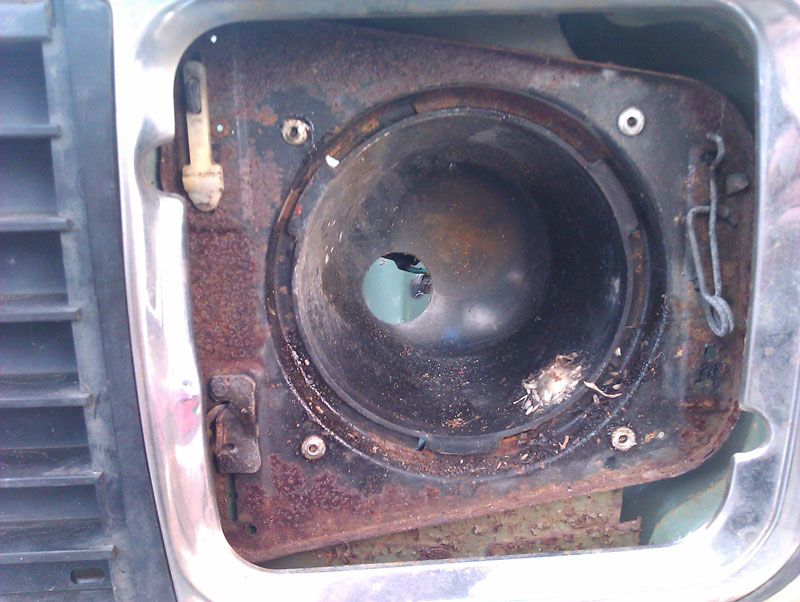
So, I decided that I'd take the wire wheel to the passenger side bowl to see if it could be cleaned up to be repaired. Results were less than satisfactory and I stopped almost as soon as I'd started.
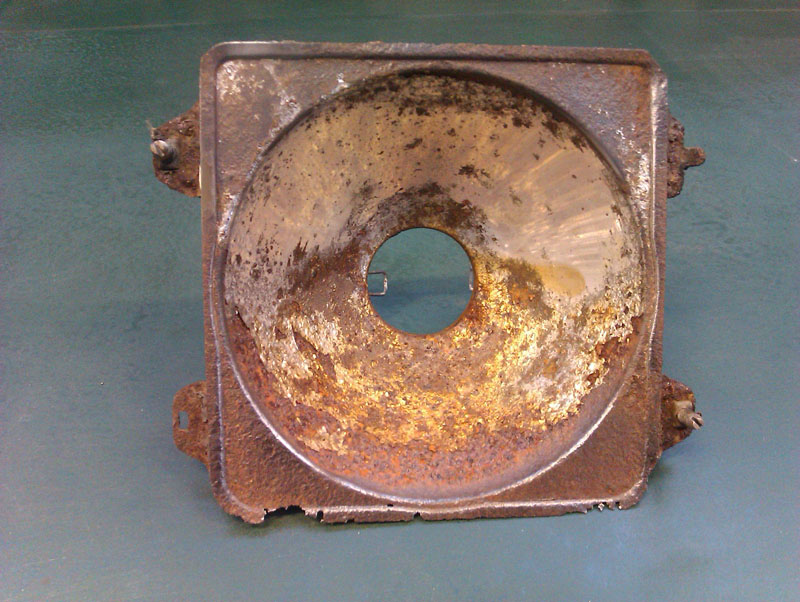
What I did notice is that the brackets that make these lights handed are just spot welded on. With care I can very likely remove them from the above bowl as they're in much better shape than the rest of the unit. I can them convert one of my spare drivers side headlights to a passenger side one. Since the brackets aren't fixed to the actual reflector bowl but the decorative surround I don't need to worry about damaging the silvering either as it shan't matter.
With that out the way I turned my attention to the ball joints. This was to be another horrible job. Started on the driver's side and learned by trial and error how best to remove the two rivets holding the ball joint in place. The third fastener was a captive bolt, the nut for which came undone surprisingly easily. After some effort with spinny tools and hammers, the old ball joint was off.

On fitting the new one, before I'd even finished tightening it, one of the bolts sheared.

Never mind, I found another suitable bolt and nut and had the lower ball joint all buttoned up and ready to go.
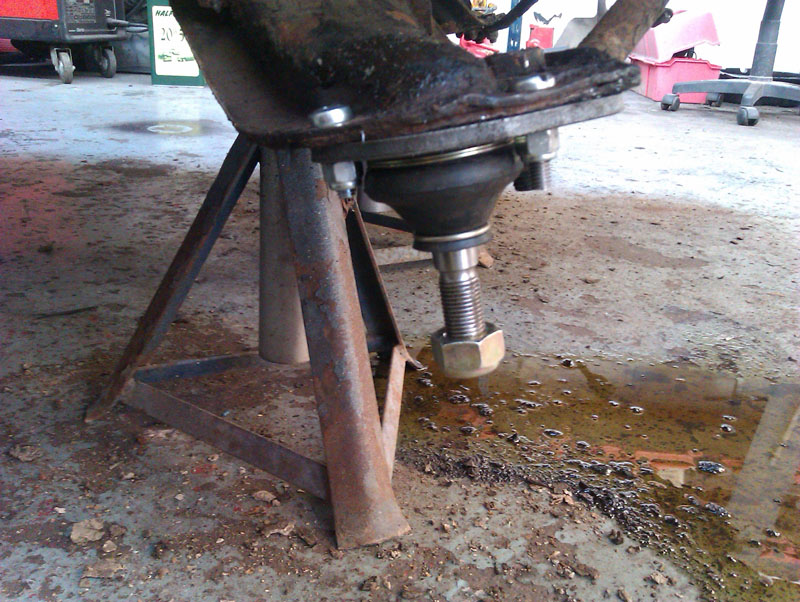
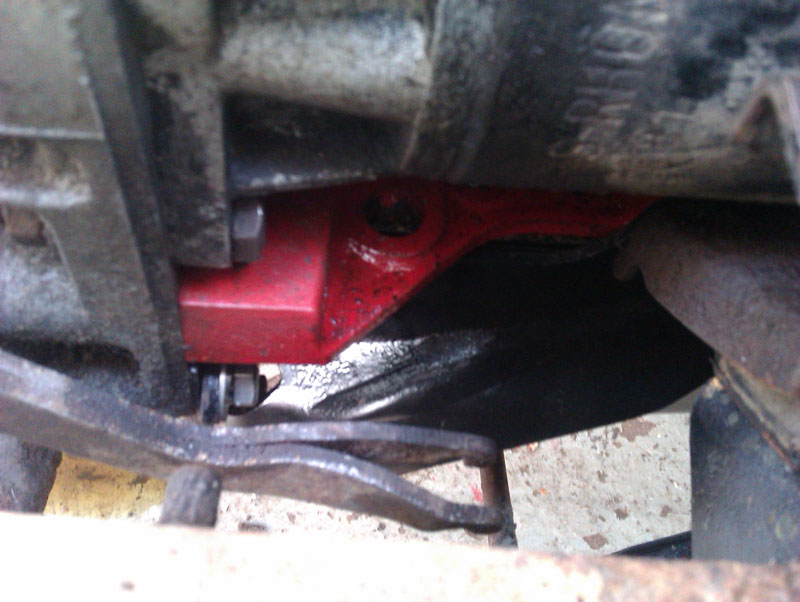
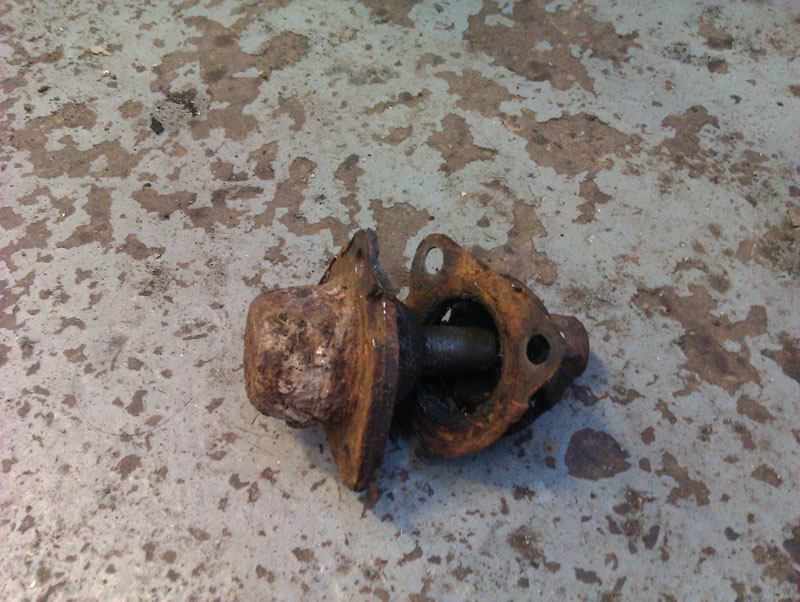
The upper ball joint put up more of a fight, this one has three rivets holding it in. I was thwarted in my attempt to fit the new ball joint because the upper collar I need to remove is also spot welded to the upper arm and to be honest I just hadn't the patience to deal with that. I had been at the unit at this point for six hours, much longer than intended, most of which was faffing about getting the engine in and out again. Here's one dead old upper ball joint.
In other news, I found and reinstated the factory jack. I'd hidden it under the back seat.
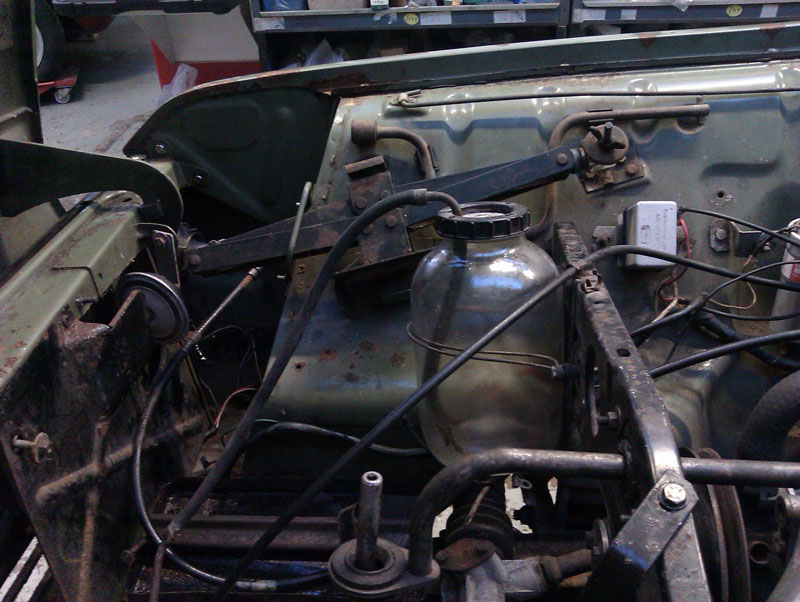
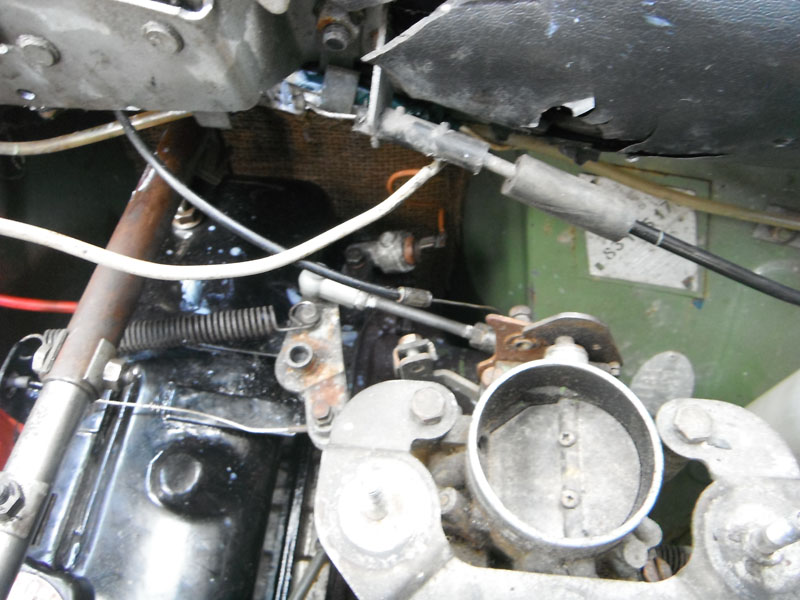
Got the gear linkage properly secured and fitted the throttle return spring. I think the throttle cable needs replacing, it's not only frayed but has a habit of sticking when you've pressed the pedal down because the cable doesn't move smoothly in the sheath. I also fitted the two tiny pieces of new fuel hose needed, I just haven't put clamps on yet as I couldn't find them.
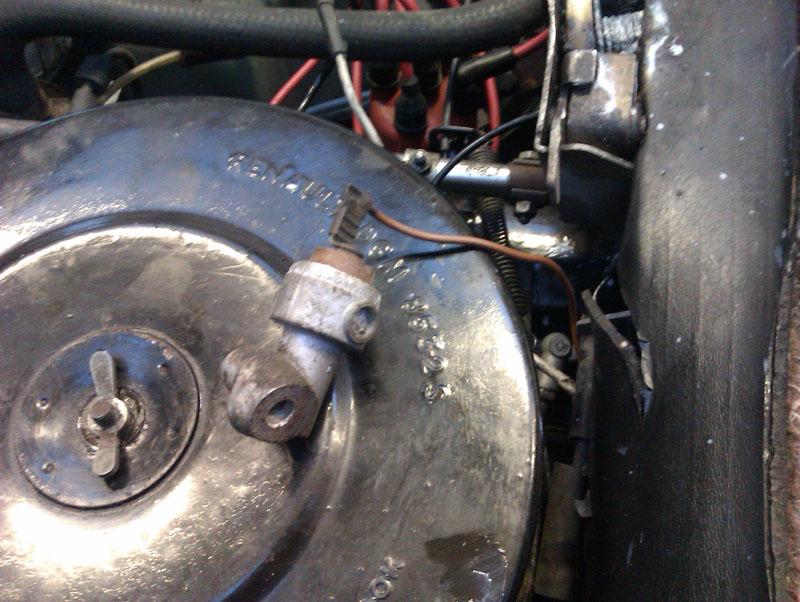
Can anyone tell me what this is and where it goes? With it sat on top of the air filter the wire is pretty much at maximum extension so I assume it must go on or near the carburettor, I just can't find anywhere it looks to fit. Seems to be some sort of sensor.
Tried out the seating position properly today and the gear change. I like the latter but not so much the former, the pedals and steering wheel are very offset which has caused me problems with cars in the past. I might get on with it, I might not, I shan't be driving the car enough for it to cause me the problems the Maestro did.
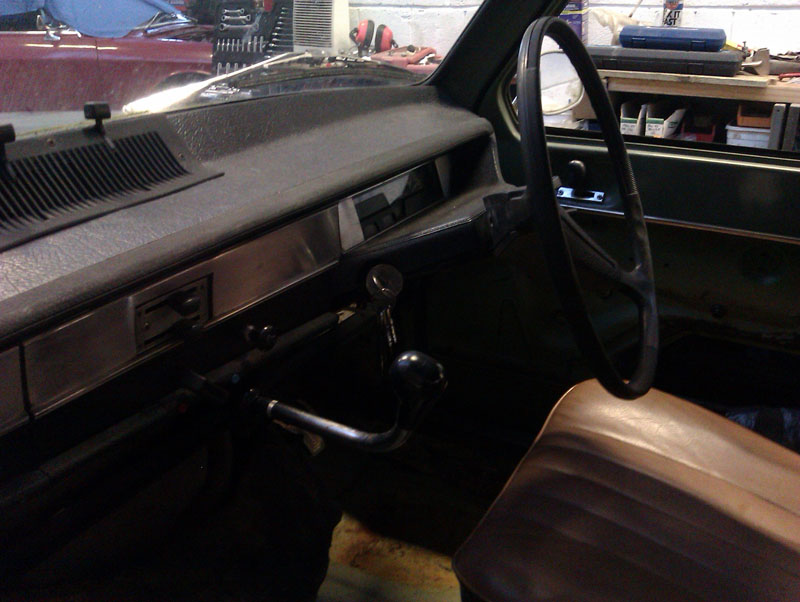
The only thing that's jammed on the dashboard is what I assume is the heater control which is stuck on RED. I haven't attempted to force it for fear of breaking it, it's jammed so firmly it's like it's been bolted down. The choke pull works, it could just do with a little fresh grease to make it smoother to operate.
Mike and I hauled the engine and gearbox out of the engine bay again so we could fit those stiffener brackets that go from the engine mounts to the bellhousing. This was a chore and I wish I'd known what they were before the engine went in the car. What's more, with brackets fitted it's nearly impossible to put the nut on the bottom of the driver's side engine mount because access is something that happens to other cars. Had to remove the bonnet, gear lever brace and steering column to get the engine and gearbox out as well as putting the lifting straps on in such a way that they cleared the locations we needed to fit the stiffener brackets. This was not a particularly fun job.
That done, a bit of info on the headlights. They are handed and have very specific fittings, not at all what I'm used to seeing.
On the outer side at the top there's a spring that the tab that makes the lights handed sits in.
On the inner side at the bottom is a clip of sorts that holds the bracket that doesn't have an adjuster in it.
Frustratingly, the two headlight mounting brackets are mirrored, which is why I can't use the spare headlights I've got in this hole.
So, I decided that I'd take the wire wheel to the passenger side bowl to see if it could be cleaned up to be repaired. Results were less than satisfactory and I stopped almost as soon as I'd started.
What I did notice is that the brackets that make these lights handed are just spot welded on. With care I can very likely remove them from the above bowl as they're in much better shape than the rest of the unit. I can them convert one of my spare drivers side headlights to a passenger side one. Since the brackets aren't fixed to the actual reflector bowl but the decorative surround I don't need to worry about damaging the silvering either as it shan't matter.
With that out the way I turned my attention to the ball joints. This was to be another horrible job. Started on the driver's side and learned by trial and error how best to remove the two rivets holding the ball joint in place. The third fastener was a captive bolt, the nut for which came undone surprisingly easily. After some effort with spinny tools and hammers, the old ball joint was off.
On fitting the new one, before I'd even finished tightening it, one of the bolts sheared.
Never mind, I found another suitable bolt and nut and had the lower ball joint all buttoned up and ready to go.
The upper ball joint put up more of a fight, this one has three rivets holding it in. I was thwarted in my attempt to fit the new ball joint because the upper collar I need to remove is also spot welded to the upper arm and to be honest I just hadn't the patience to deal with that. I had been at the unit at this point for six hours, much longer than intended, most of which was faffing about getting the engine in and out again. Here's one dead old upper ball joint.
In other news, I found and reinstated the factory jack. I'd hidden it under the back seat.
Got the gear linkage properly secured and fitted the throttle return spring. I think the throttle cable needs replacing, it's not only frayed but has a habit of sticking when you've pressed the pedal down because the cable doesn't move smoothly in the sheath. I also fitted the two tiny pieces of new fuel hose needed, I just haven't put clamps on yet as I couldn't find them.
Can anyone tell me what this is and where it goes? With it sat on top of the air filter the wire is pretty much at maximum extension so I assume it must go on or near the carburettor, I just can't find anywhere it looks to fit. Seems to be some sort of sensor.
Tried out the seating position properly today and the gear change. I like the latter but not so much the former, the pedals and steering wheel are very offset which has caused me problems with cars in the past. I might get on with it, I might not, I shan't be driving the car enough for it to cause me the problems the Maestro did.
The only thing that's jammed on the dashboard is what I assume is the heater control which is stuck on RED. I haven't attempted to force it for fear of breaking it, it's jammed so firmly it's like it's been bolted down. The choke pull works, it could just do with a little fresh grease to make it smoother to operate.
-
xantia_v6
- Forum Admin Team
- Posts: 10814
- Joined: 09 Nov 2005, 22:03
- x 1390

Re: 1975 Renault 6TL - 17/04 Update
I think that it is a temperature sensor, for operating an overheat warning light. It probably bolts to the side of the cylinder head somewhere.vulgalour wrote: Can anyone tell me what this is and where it goes? With it sat on top of the air filter the wire is pretty much at maximum extension so I assume it must go on or near the carburettor, I just can't find anywhere it looks to fit. Seems to be some sort of sensor.
-
vulgalour
- Posts: 228
- Joined: 05 Jul 2014, 22:32
- x 36
Re: 1975 Renault 6TL - 19/04 Update
A couple of chaps on other forums have said exactly the same thing. There's a bolt hole in the top of the cylinder head right at the back that this bolts to. Tricky to access (as is everything in this engine bay) but shouldn't need me to take the engine out.
-
xantia_v6
- Forum Admin Team
- Posts: 10814
- Joined: 09 Nov 2005, 22:03
- x 1390
Re: 1975 Renault 6TL - 19/04 Update
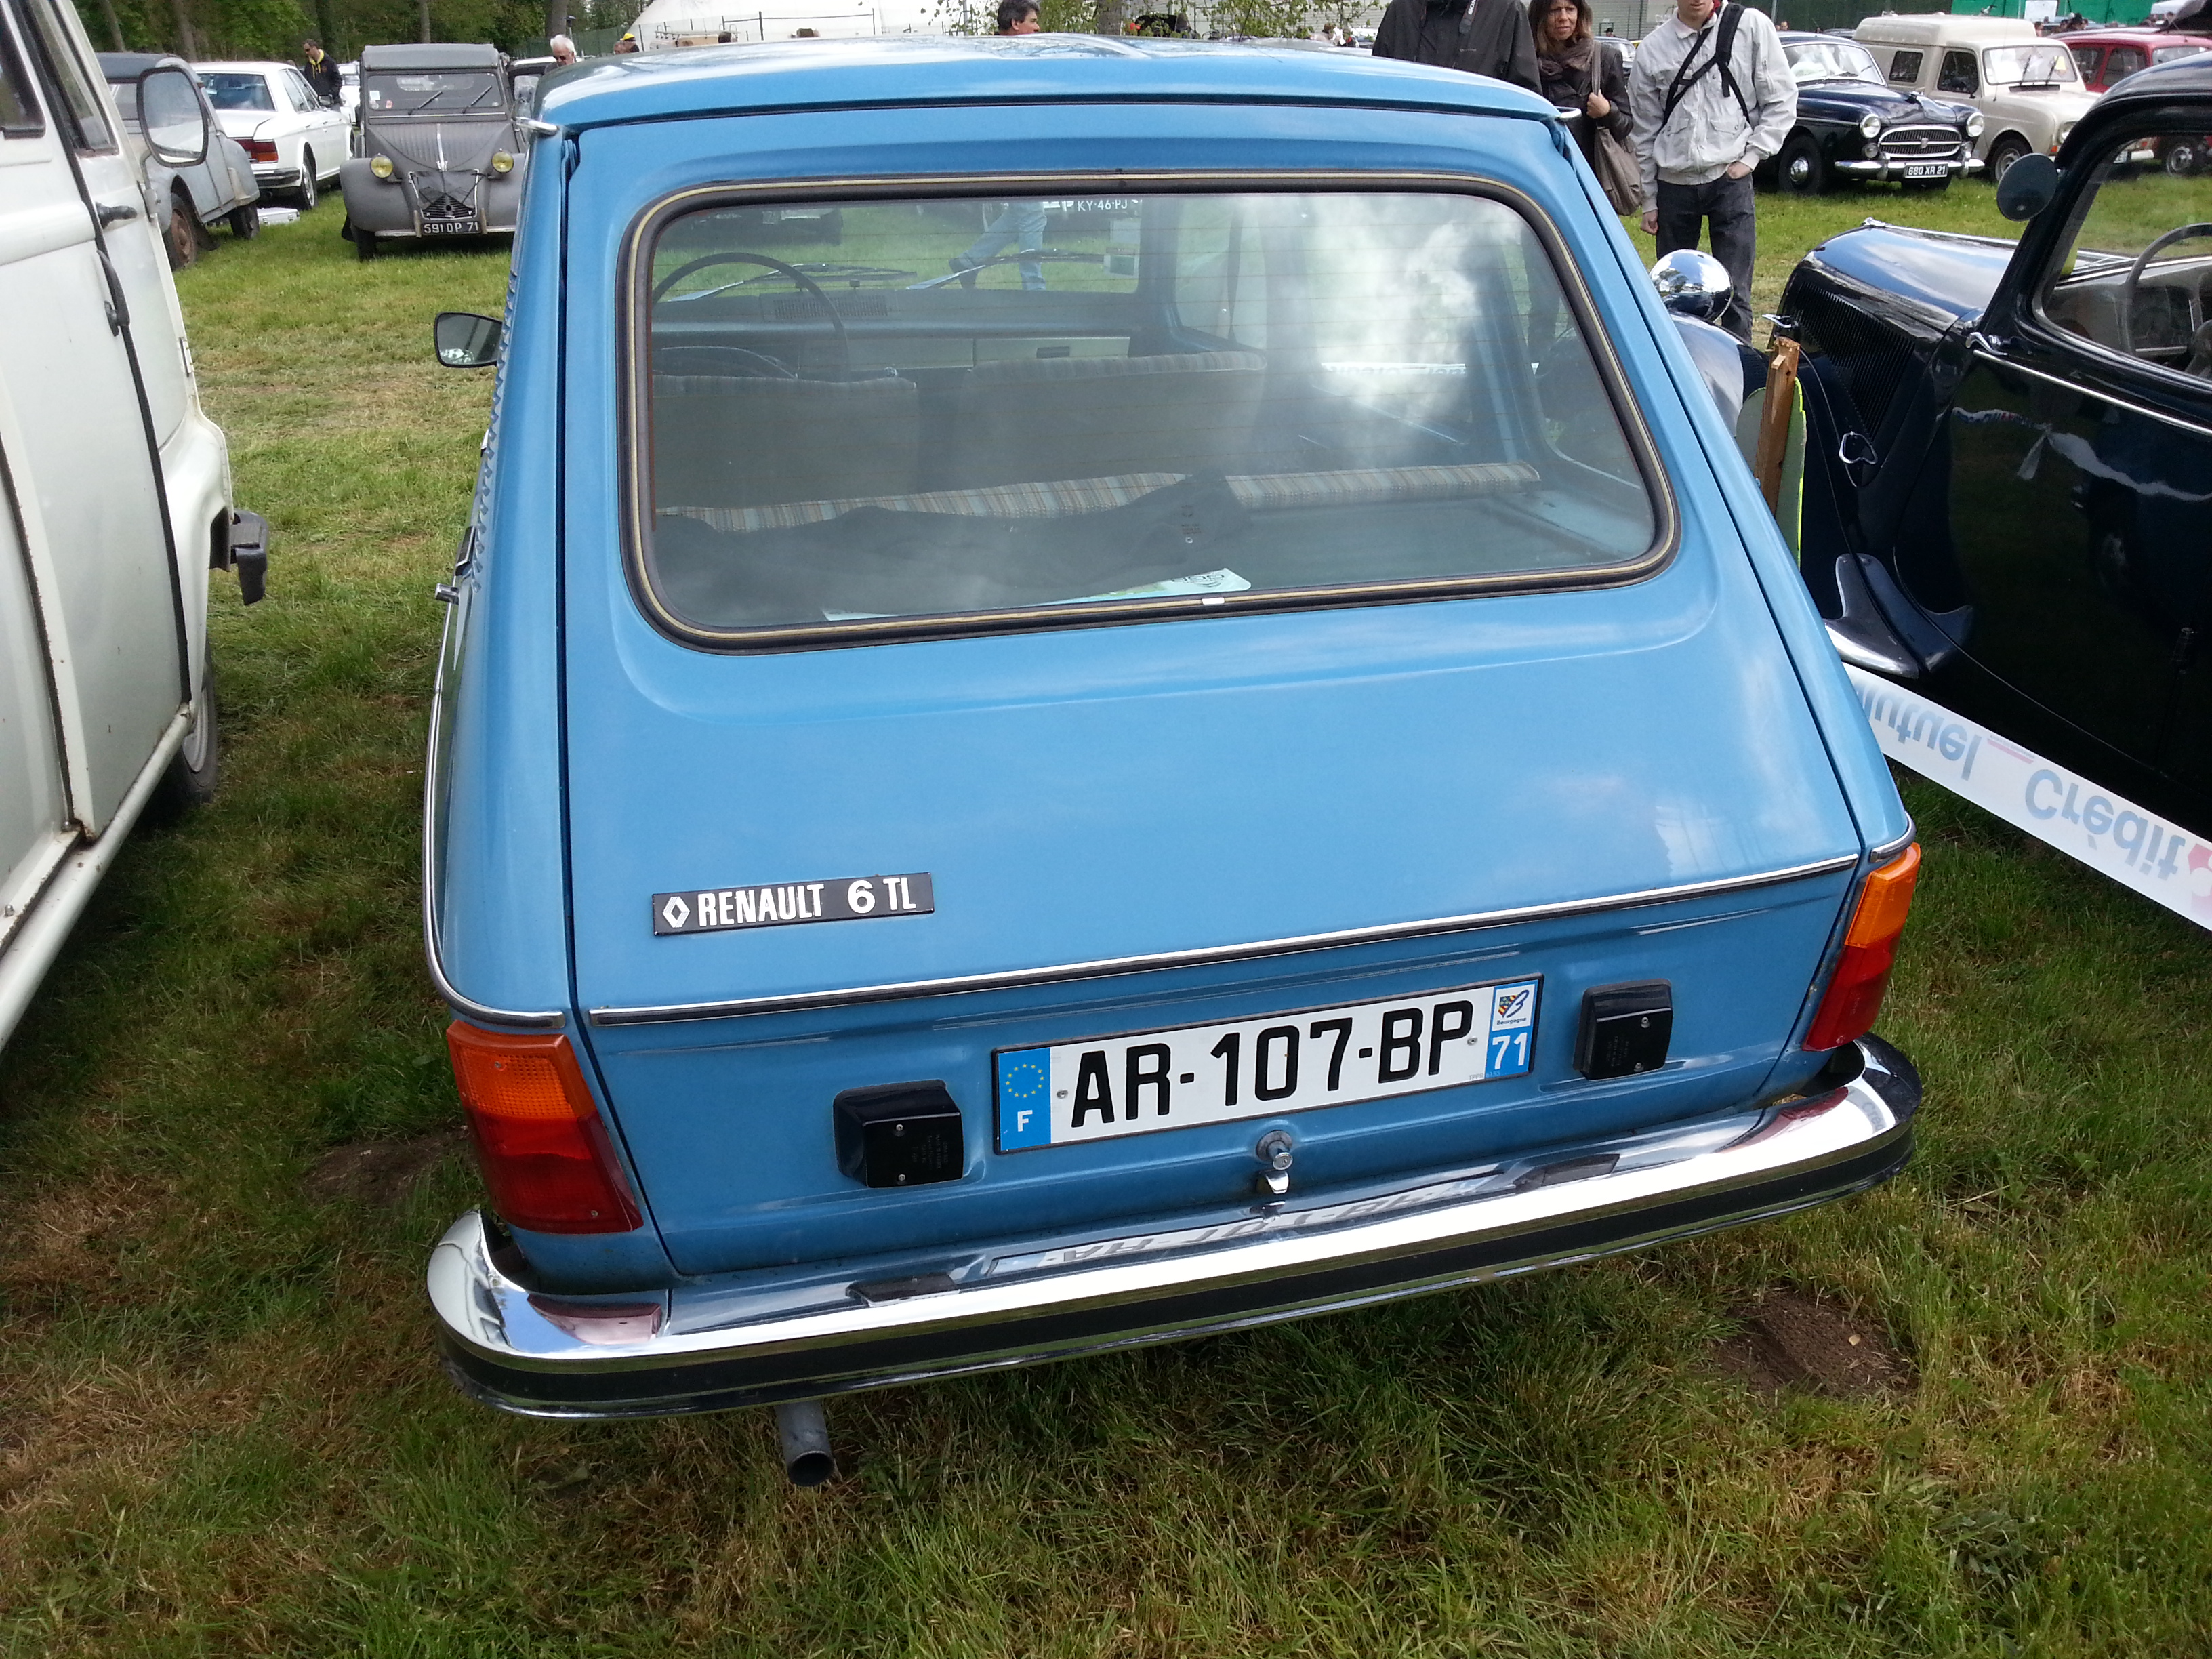
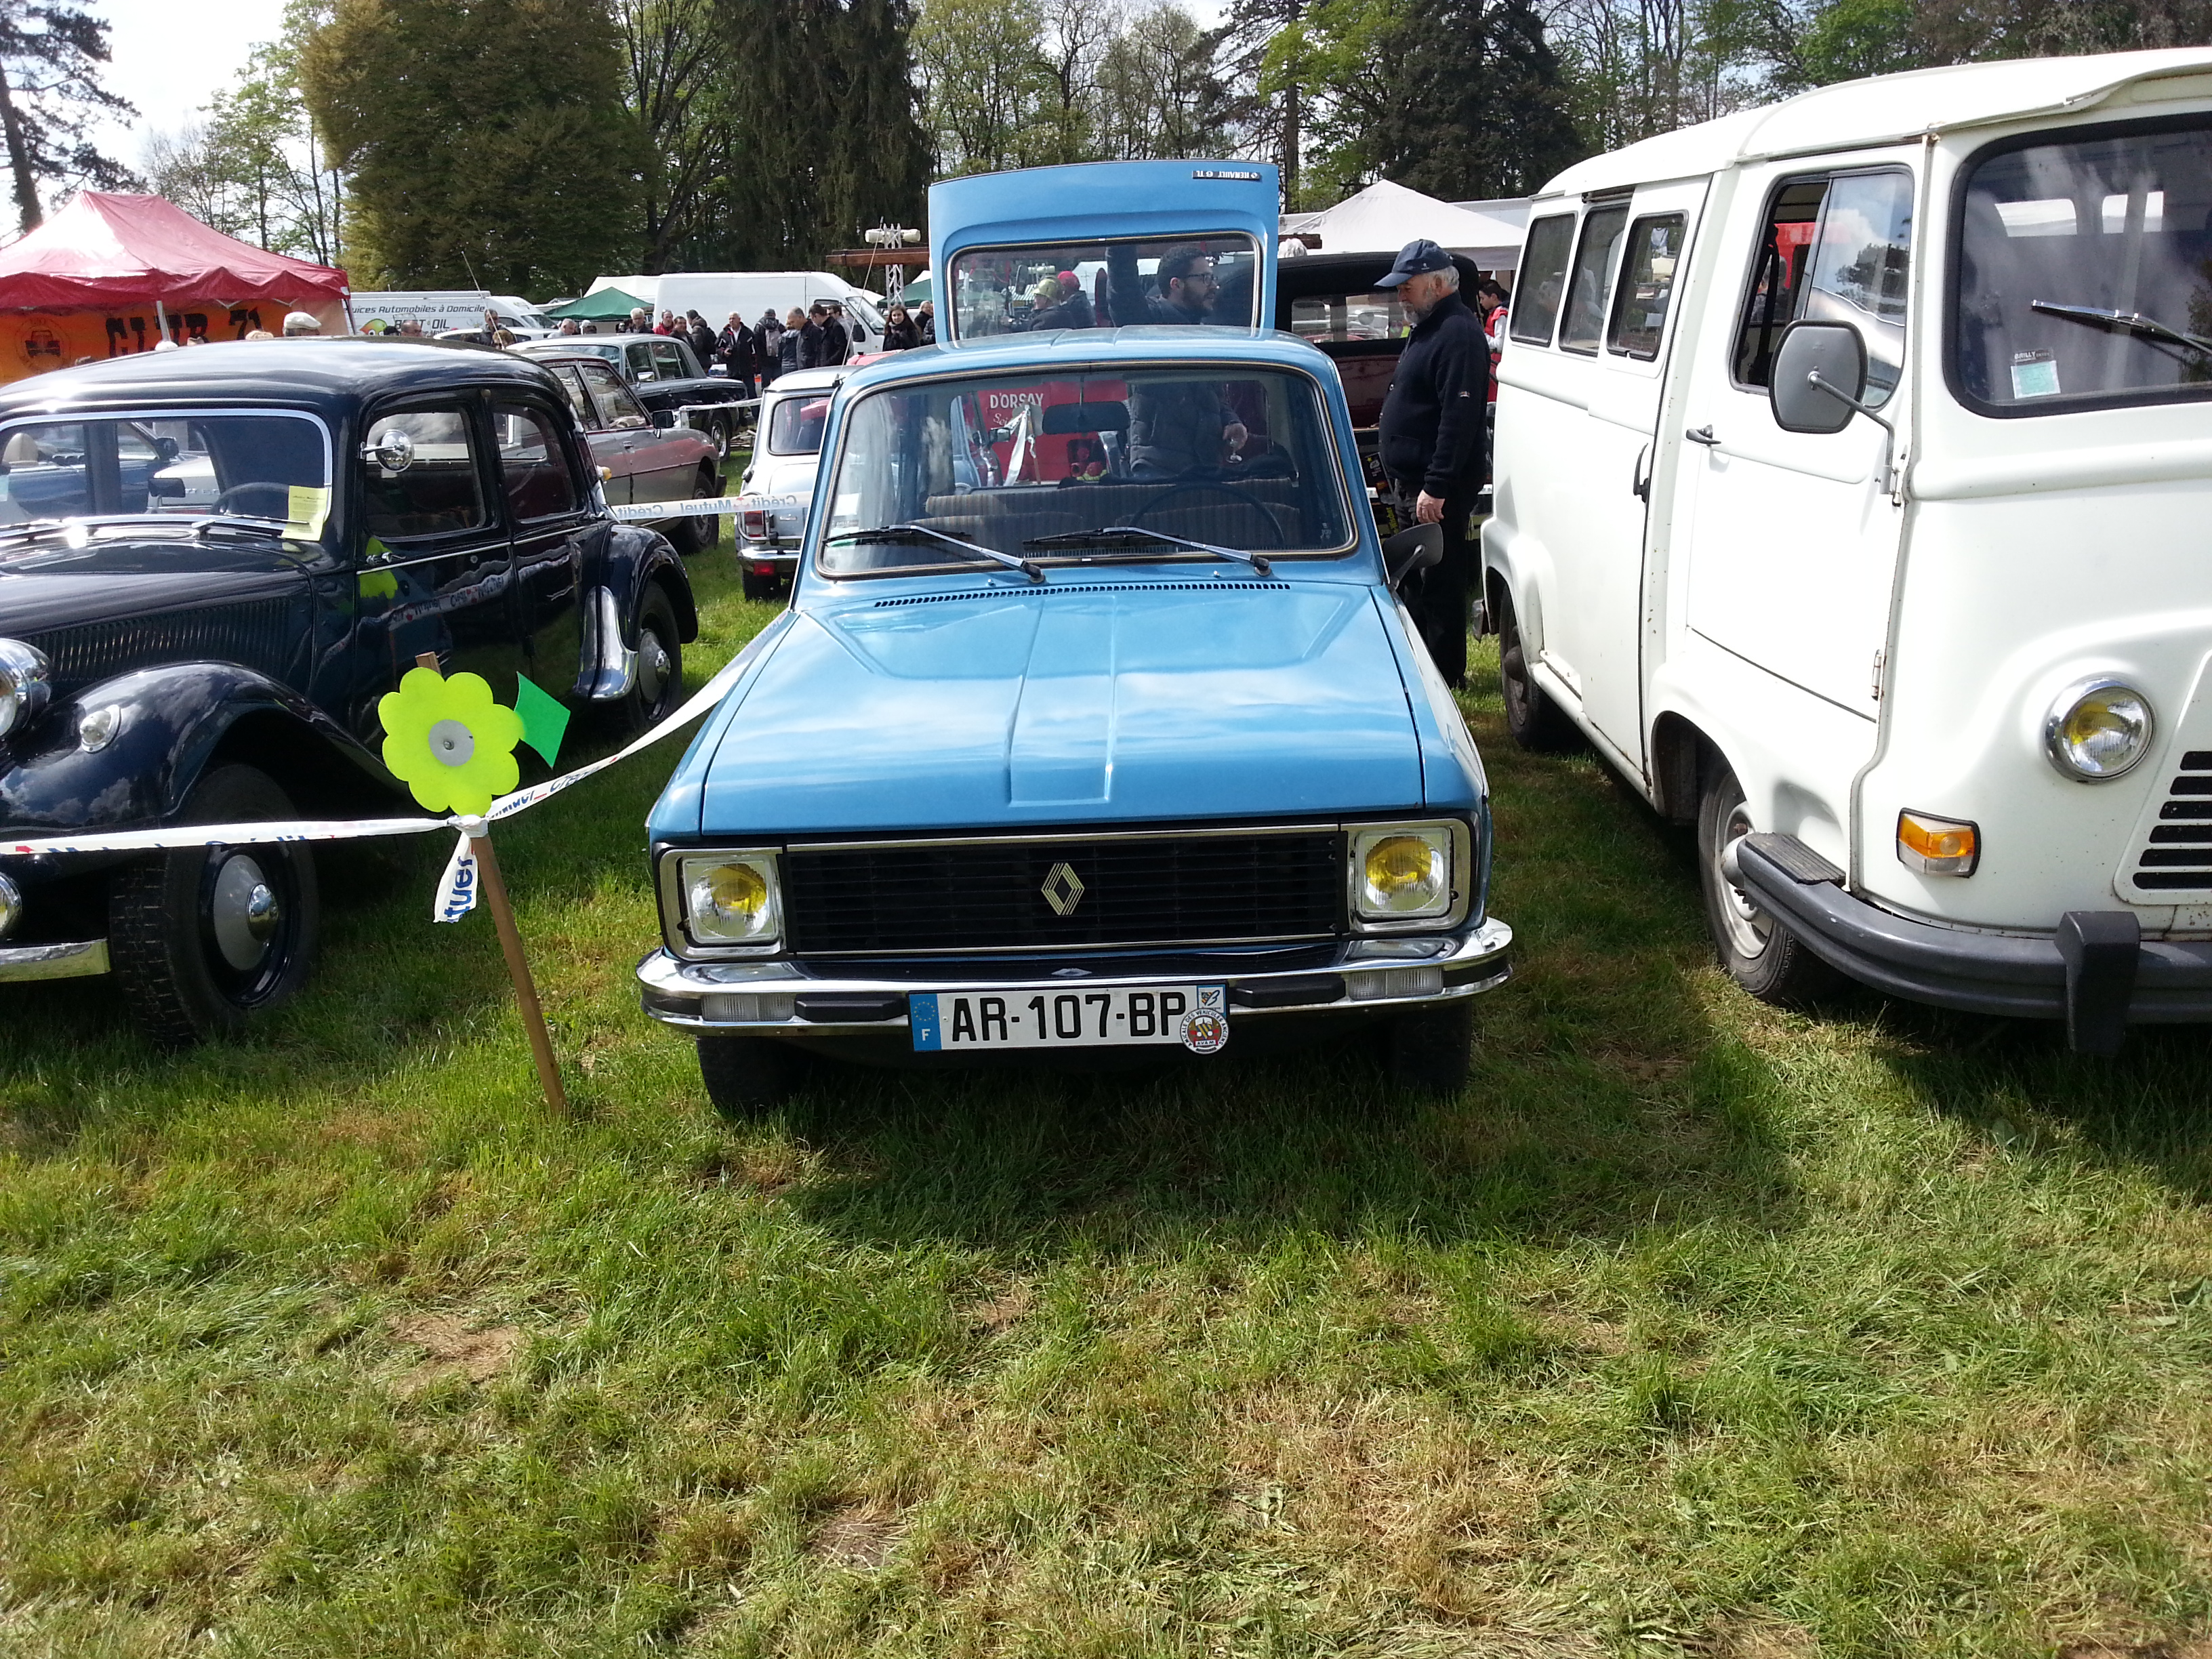
I was at the local classic caar show today, over 1000 old french cars present. There was 1 Renault 6TL, but it has failed to acquire the rat look that yours has:
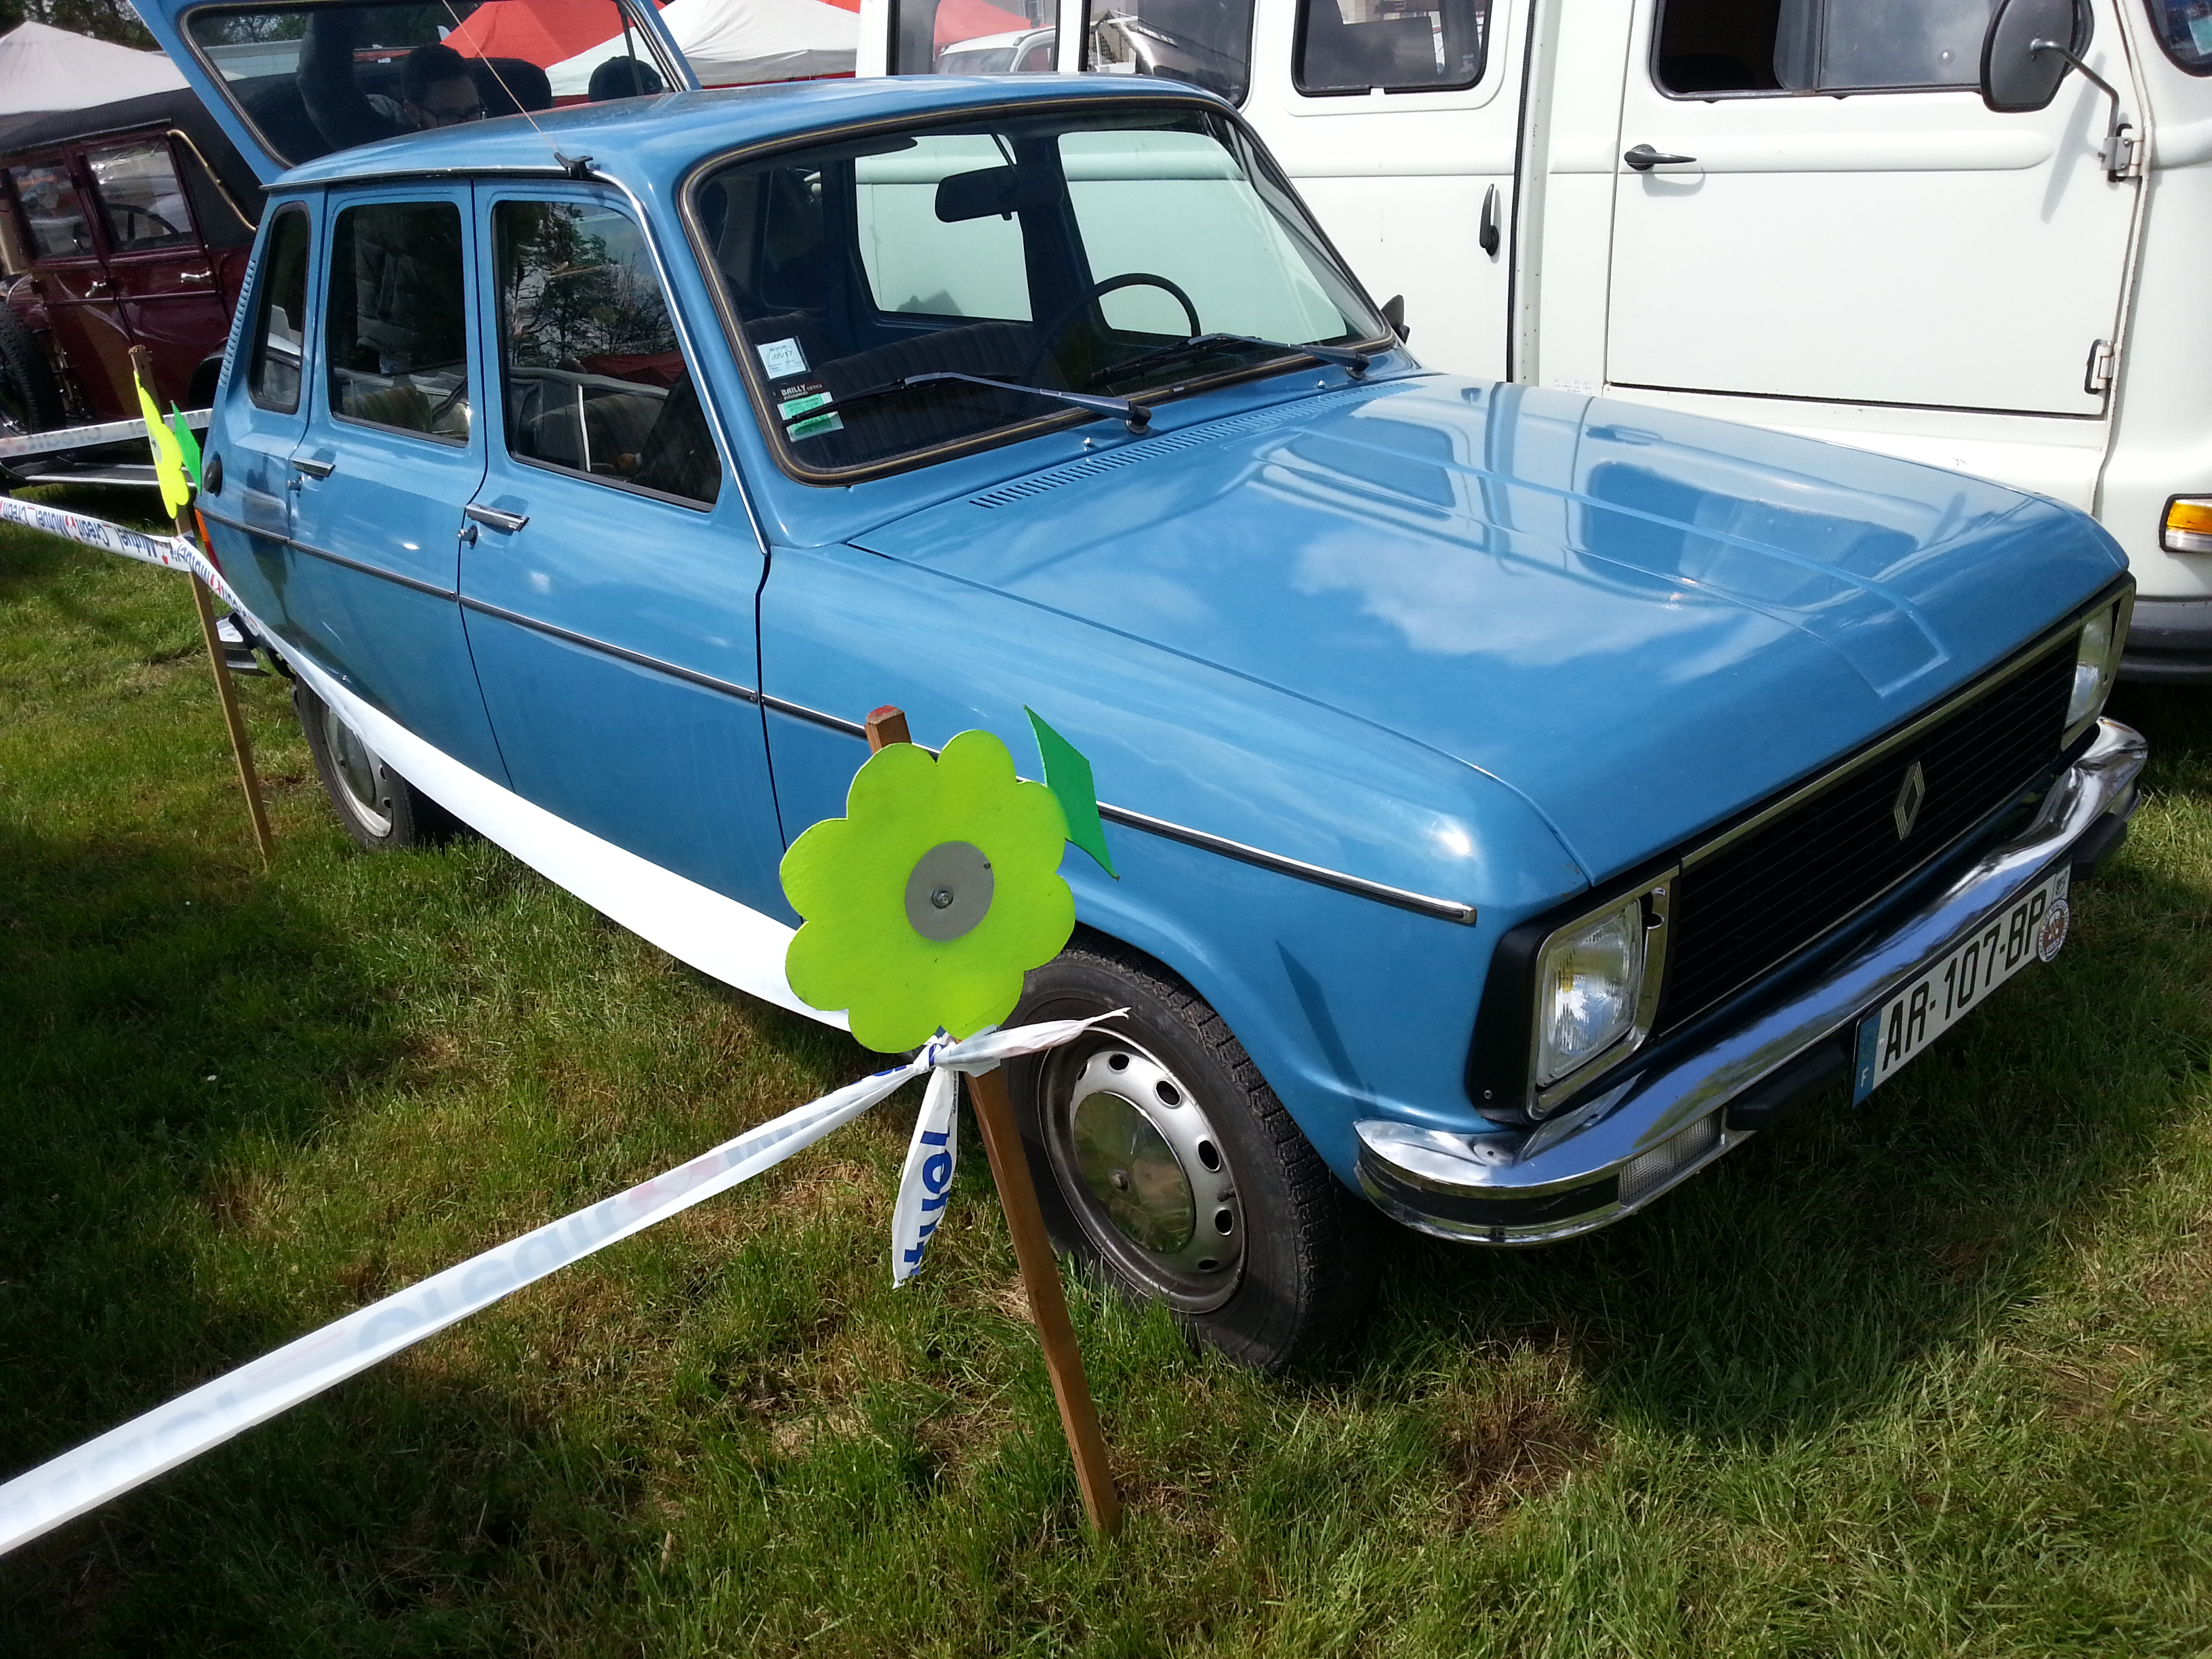
I looked through the spares stands, but the only R6 TL headlight was another right hand one, and not in very good condition.
I looked through the spares stands, but the only R6 TL headlight was another right hand one, and not in very good condition.
-
vulgalour
- Posts: 228
- Joined: 05 Jul 2014, 22:32
- x 36
Re: 1975 Renault 6TL - 19/04 Update
That one you've snapped is even the colour mine used to be. Seems metallic blue with tan interiors are the ones that survive best for some reason. They're a handsome wee thing when in clean condition like that, mine will just have to be happy being Crapaud, warts and all. Thank you for checking the spares stands anyway, getting headlights in France isn't too difficult if you want LHD ones that aren't pristine.
--
Made a bit more progress on the Renault today and intended to have all the front suspension rebuilt, mainly because recently the new shocks arrived.
For two reasons, the upper wishbone was removed from the car. The first was that it should make getting the spot welds drilled out easier, the second that I thought it might make getting the shock out easier too.
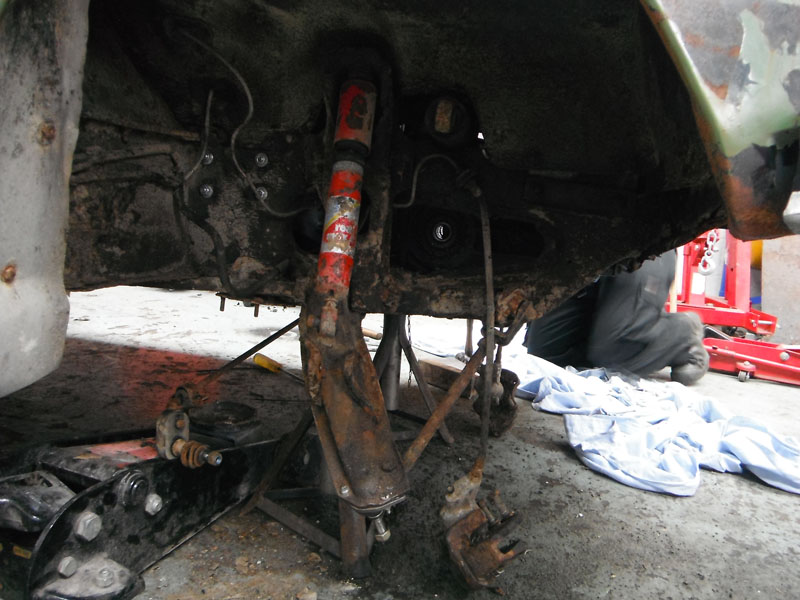
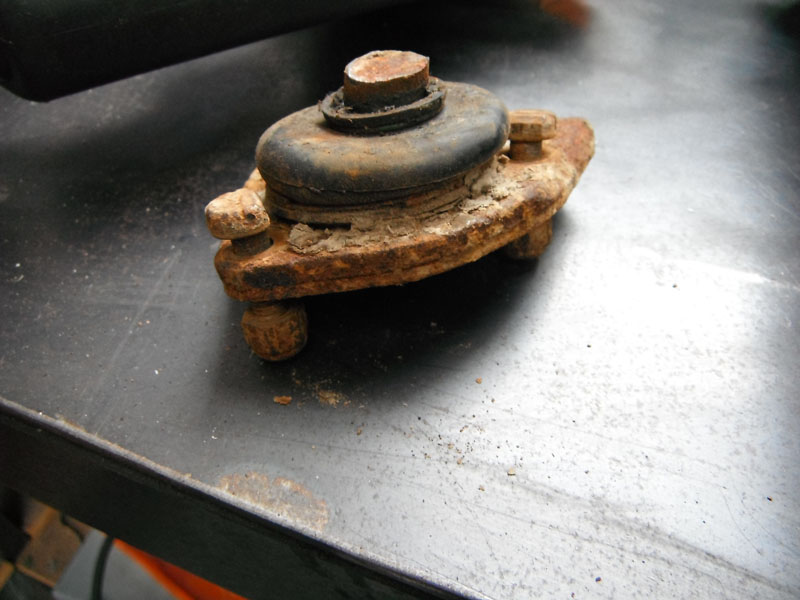
With both upper wishbones on the bench drilling out the spot welds for one side was fairly easy and it was ready for the new ball joint in no time. The other one, however, was the most difficult set of spotwelds and rivets I've ever had to remove. It didn't matter how you went about it, it just didn't want to let go. You can also see the lower passenger ball joint just to the left which was just a case of unbolting it, someone had replaced this many, many years ago and made my life a lot easier.
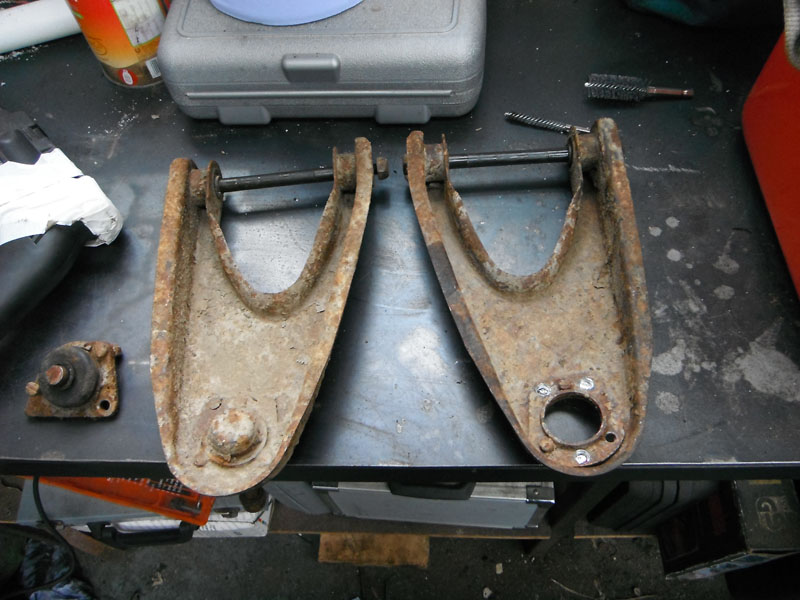
Strange heads though. Rather than a hex bolt or, as in the case of all the new ball joints, screw-headed bolts (both flat and cross type) they were a smooth D shape which meant making use of some mole grips.
I'm going to replace all the 'bolts' that came with the new ball joints, I don't trust that they're up to the job in all honesty. Threads pointing down because that matches what was on the car and seemed to fit better. Upper wishbones refitted for now to make sure I don't lose any fixings, they're very easy to fit and remove really.
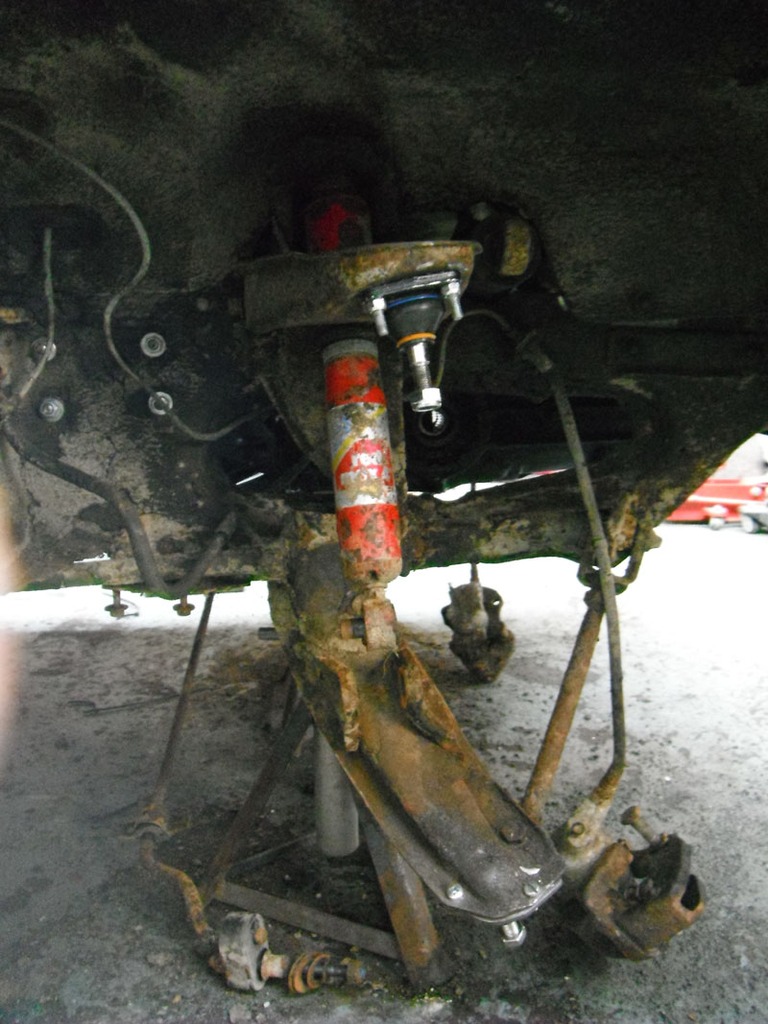
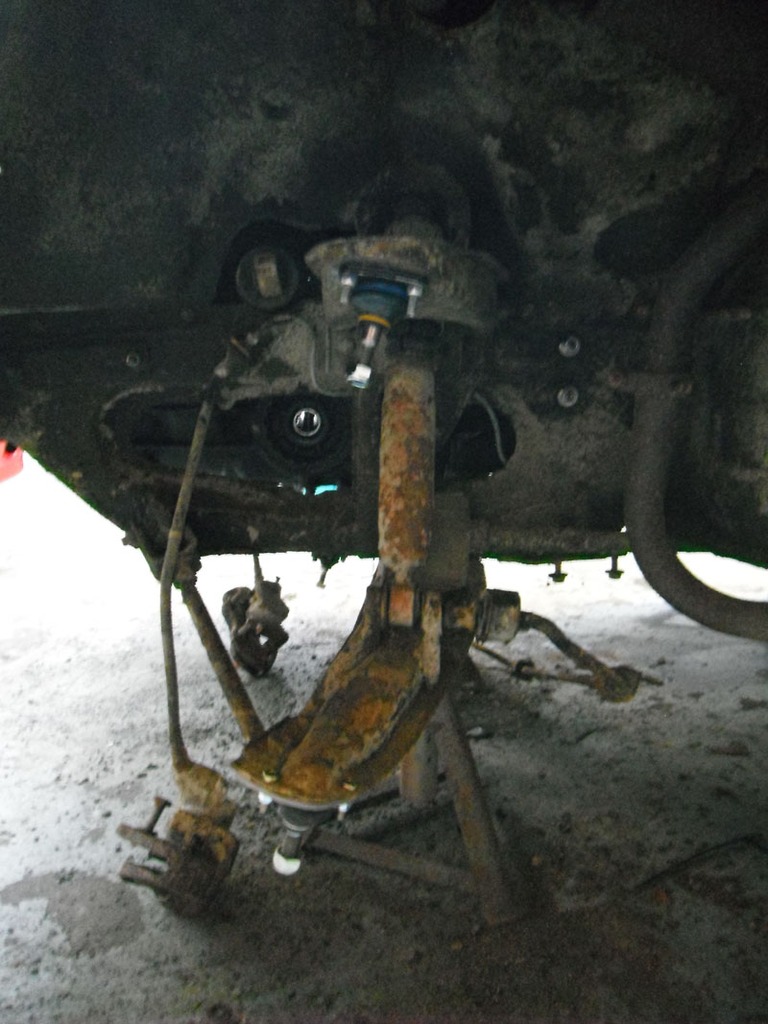
Mike managed to get the top nut off the shock on the passenger side but we couldn't get the bottom bolt out, there just seems to be too much tension on everything. We'll figure it out. On the driver's side I could get a spanner on the top nut of the shock but couldn't figure out how on earth Mike managed to move it on the passenger side, there seems to be just enough space to get the spanner in and nothing else. I do hope I don't have to remove the inner wings to replace them.
Finally, one of the old brake pads was removed and tried against the new ones I'd bought. Previous owner certainly got as much use as he possibly good out of the old pads. As you can see I've managed, yet again, to buy the wrong part even with cross-referencing of brake type, car year and all the rest. Trouble was, there were two brake pads listed wherever I looked for my car and nobody knew exactly which I needed so I took a gamble on the ones that looked right from memory... and got it wrong. No great loss, it was only £8 delivered for a full set of pads and I'm sure I can rehome them along with all the other wrong bits I've bought.

--
Made a bit more progress on the Renault today and intended to have all the front suspension rebuilt, mainly because recently the new shocks arrived.
For two reasons, the upper wishbone was removed from the car. The first was that it should make getting the spot welds drilled out easier, the second that I thought it might make getting the shock out easier too.
With both upper wishbones on the bench drilling out the spot welds for one side was fairly easy and it was ready for the new ball joint in no time. The other one, however, was the most difficult set of spotwelds and rivets I've ever had to remove. It didn't matter how you went about it, it just didn't want to let go. You can also see the lower passenger ball joint just to the left which was just a case of unbolting it, someone had replaced this many, many years ago and made my life a lot easier.
Strange heads though. Rather than a hex bolt or, as in the case of all the new ball joints, screw-headed bolts (both flat and cross type) they were a smooth D shape which meant making use of some mole grips.
I'm going to replace all the 'bolts' that came with the new ball joints, I don't trust that they're up to the job in all honesty. Threads pointing down because that matches what was on the car and seemed to fit better. Upper wishbones refitted for now to make sure I don't lose any fixings, they're very easy to fit and remove really.
Mike managed to get the top nut off the shock on the passenger side but we couldn't get the bottom bolt out, there just seems to be too much tension on everything. We'll figure it out. On the driver's side I could get a spanner on the top nut of the shock but couldn't figure out how on earth Mike managed to move it on the passenger side, there seems to be just enough space to get the spanner in and nothing else. I do hope I don't have to remove the inner wings to replace them.
Finally, one of the old brake pads was removed and tried against the new ones I'd bought. Previous owner certainly got as much use as he possibly good out of the old pads. As you can see I've managed, yet again, to buy the wrong part even with cross-referencing of brake type, car year and all the rest. Trouble was, there were two brake pads listed wherever I looked for my car and nobody knew exactly which I needed so I took a gamble on the ones that looked right from memory... and got it wrong. No great loss, it was only £8 delivered for a full set of pads and I'm sure I can rehome them along with all the other wrong bits I've bought.
-
xantia_v6
- Forum Admin Team
- Posts: 10814
- Joined: 09 Nov 2005, 22:03
- x 1390
Re: 1975 Renault 6TL - 19/04 Update
Now that I know what they look like, I saw another 6TL parked yesterday, a tidy white one, obviously in regular use.vulgalour wrote:That one you've snapped is even the colour mine used to be. Seems metallic blue with tan interiors are the ones that survive best for some reason. They're a handsome wee thing when in clean condition like that, mine will just have to be happy being Crapaud, warts and all. Thank you for checking the spares stands anyway, getting headlights in France isn't too difficult if you want LHD ones that aren't pristine.
Looking at the headlights, the lenses seem symmetrical, which means that a LHD light unit can be converted to RHD by just removing the bulbholder from the reflector and refastening it thisted a few degrees so that the beam dips left instead of right (mayber fitting a RHD bulbholder to a LHD reflector would do it).
-
vulgalour
- Posts: 228
- Joined: 05 Jul 2014, 22:32
- x 36
Re: 1975 Renault 6TL - 01/05 Ball joints
I got lucky, a chap on another french car forum has a pair of RHD headlights in excellent condition so no more worrying about converting lights for me!
You can set the lights to left or right but you lose the kick-up that you need for the MoT, it's like fitting those beam deflector stickers without the faff of beam deflector stickers. Quite why Renault thought people would need that I'm not sure, they're hardly a long distance cruiser. Though having said that, there is some evidence this little Renault did make it from Wales to at least as far as the ferry and may even have been over to the continent so perhaps my assumption people wouldn't want clever headlights is a short sighted one.
You can set the lights to left or right but you lose the kick-up that you need for the MoT, it's like fitting those beam deflector stickers without the faff of beam deflector stickers. Quite why Renault thought people would need that I'm not sure, they're hardly a long distance cruiser. Though having said that, there is some evidence this little Renault did make it from Wales to at least as far as the ferry and may even have been over to the continent so perhaps my assumption people wouldn't want clever headlights is a short sighted one.
-
vulgalour
- Posts: 228
- Joined: 05 Jul 2014, 22:32
- x 36
Re: 1975 Renault 6TL - 01/05 Ball joints
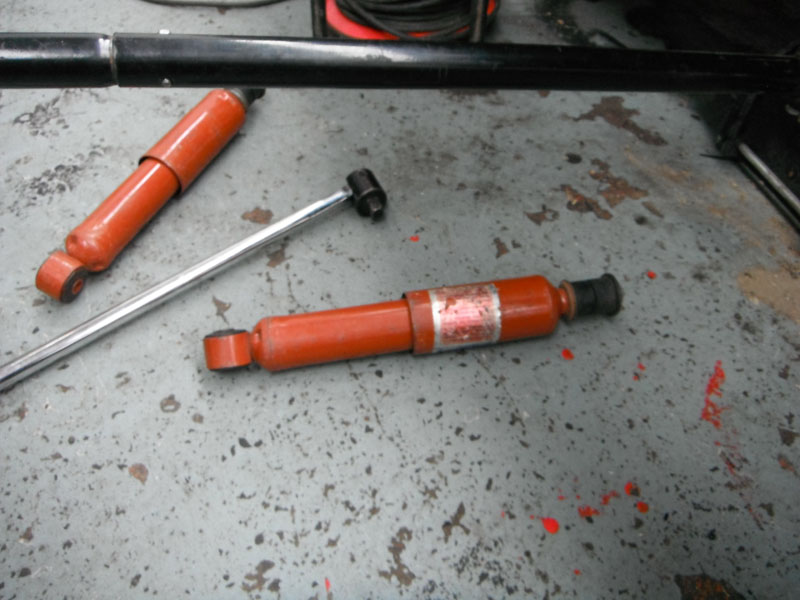
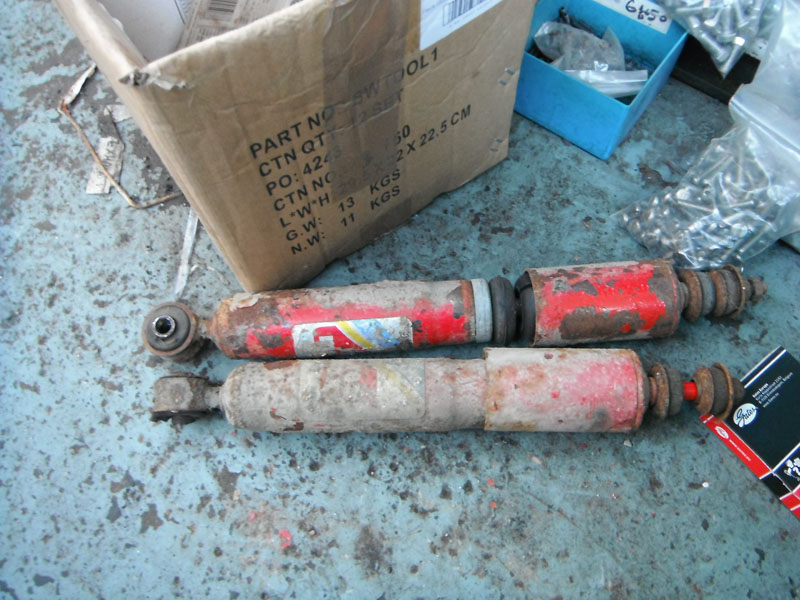
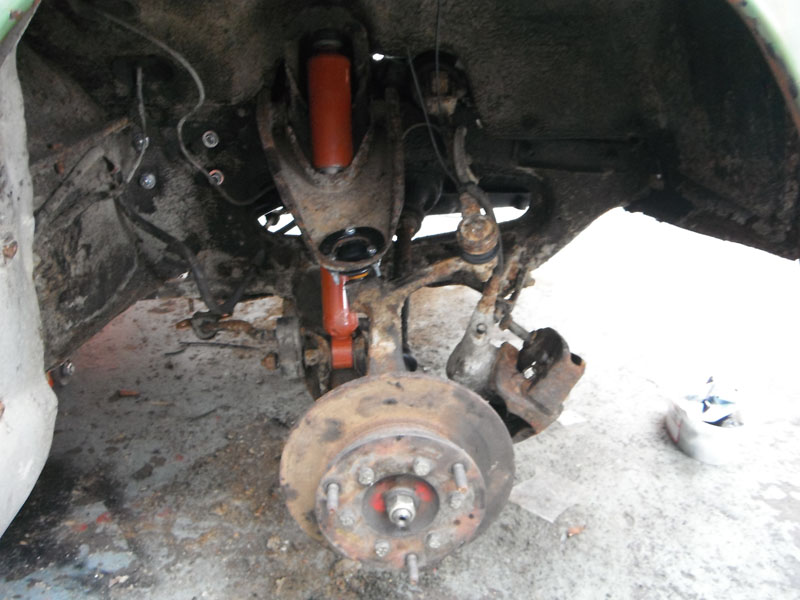
Sort of a big update today because things are going quite well. Over the hump of everything being in bits it's now the more pleasant task of putting the car back together again. First job was to get the shocks swapped over, I was struggling to get tools and hands into the gap so Mike kindly got the old ones off and the new ones on. The old ones were deader than a dead thing, all the rubber parts were just flat and deformed.
New ones fitted and everything went together fairly easily. I couldn't get the bolts I wanted for the ball joints today because it's bank holiday Monday, but when I do get chance to get them I'll go round the car and replace the ten that I need to so that the ball joints are held in with proper bolts and not the rubbish that was supplied.
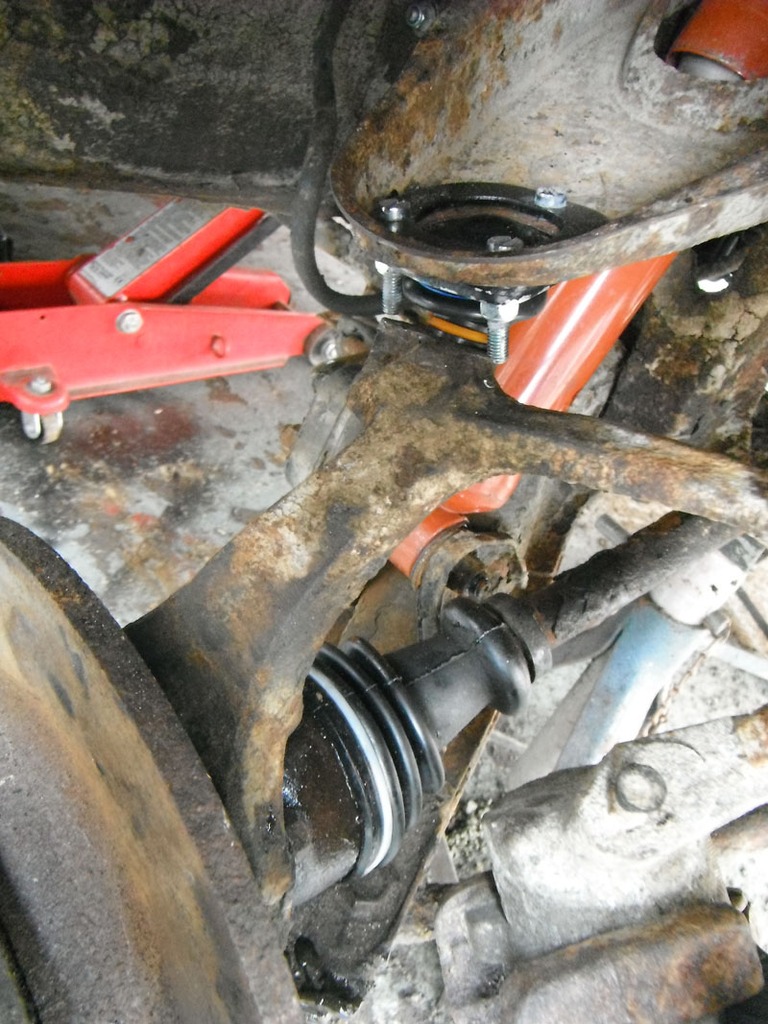
Of note is the outer driveshaft boot on this side. The old spring wire clip thing had lost its spring and we didn't have a suitable clip in to replace it so I used a tie wrap instead. As far as I know this is perfectly fine as a solution, it holds the boot in place and keeps dirt and oil on the correct sides of the rubber. I'm going to order some new CV/driveshaft boot clips anyway but again, Bank Holiday Monday put paid to getting any today.
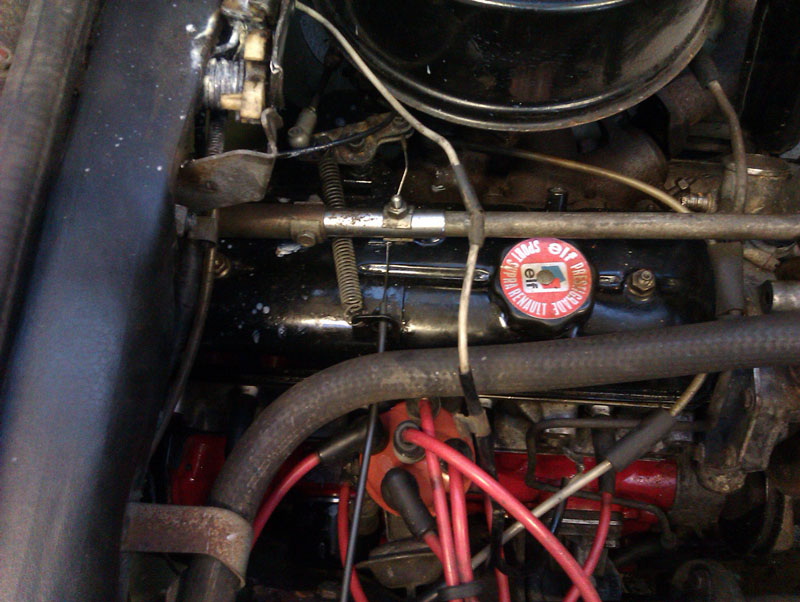
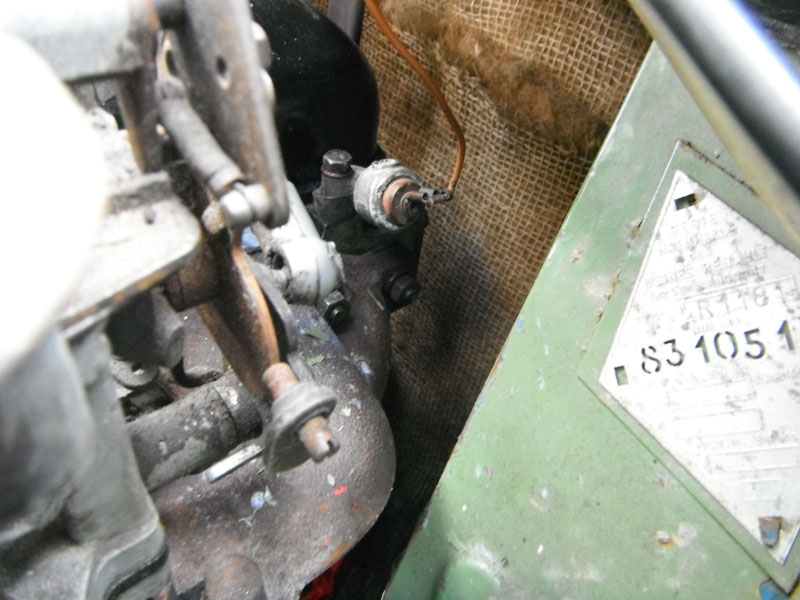
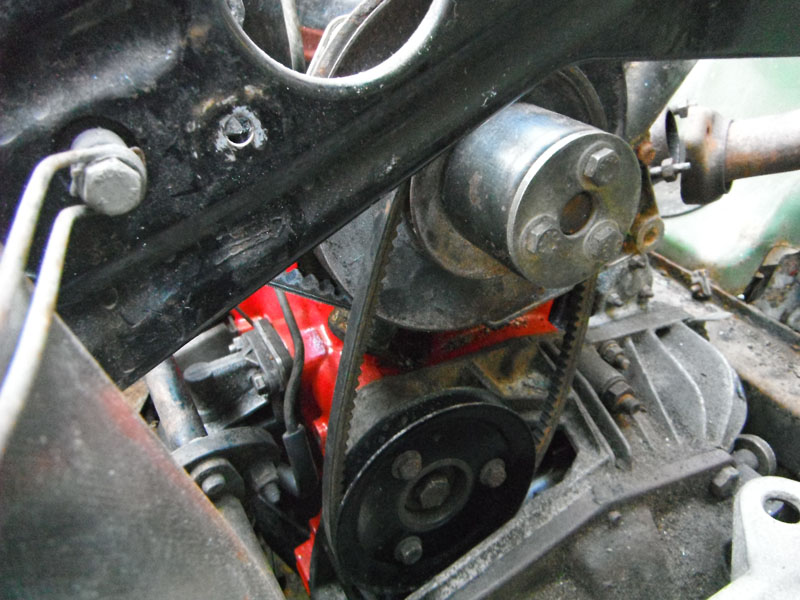
The temperature sender was reconnected, the bolt for it was even still in the head. Bit of a bugger to do as access isn't great, but it's done.
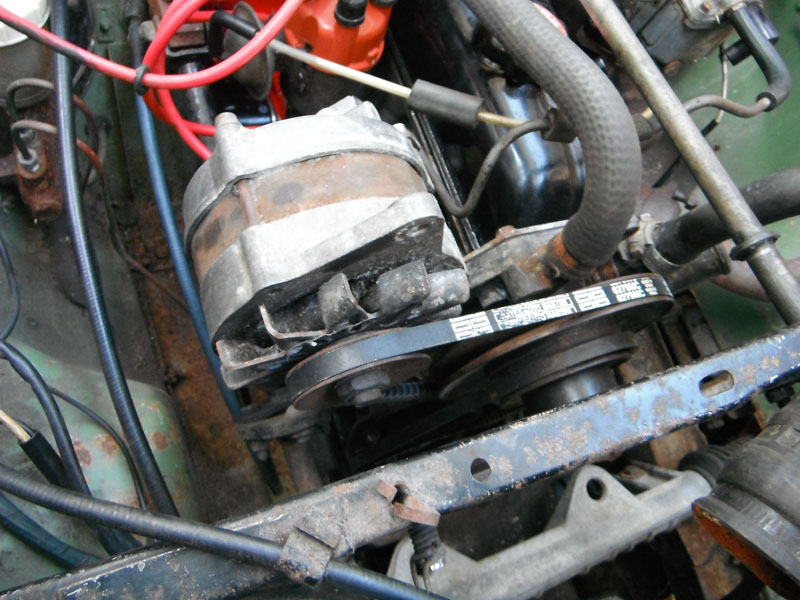
Alternator fitted and new drive belts on too. Couldn't fit the tensioner because I dropped the nut and it vanished, you wouldn't think it could, but it did. I'll get a new nut, I didn't have any in stock.
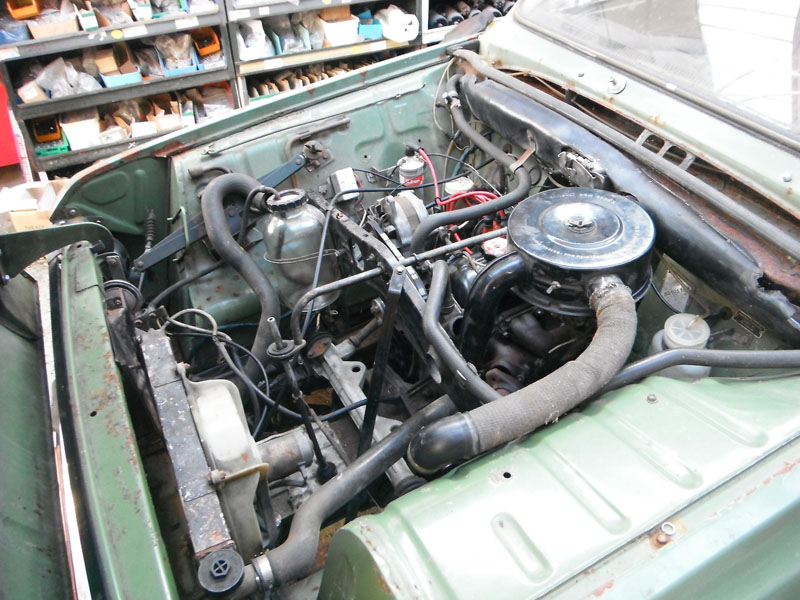
Just plonked the radiator in the hole to keep it out of the way for now. I've got some wires to connect, the radiator to flush and connect, and a new clutch cable to fit under the bonnet. Once that's done I can actually test fire the engine, which I still haven't done. I want everything to be right first and with the engine having lots of lovely oil in it I'm not worrying about it seizing or anything in the meantime.
Took the spotlights I was given apart to check them out. They're past the first flush of youth but serviceable. Used the Rover to provide power and they work perfectly fine, don't even need bulbs.
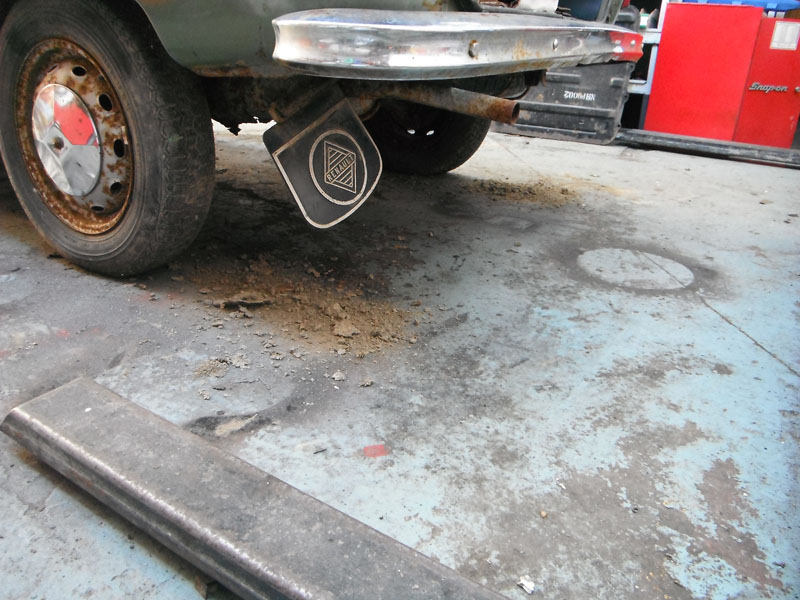
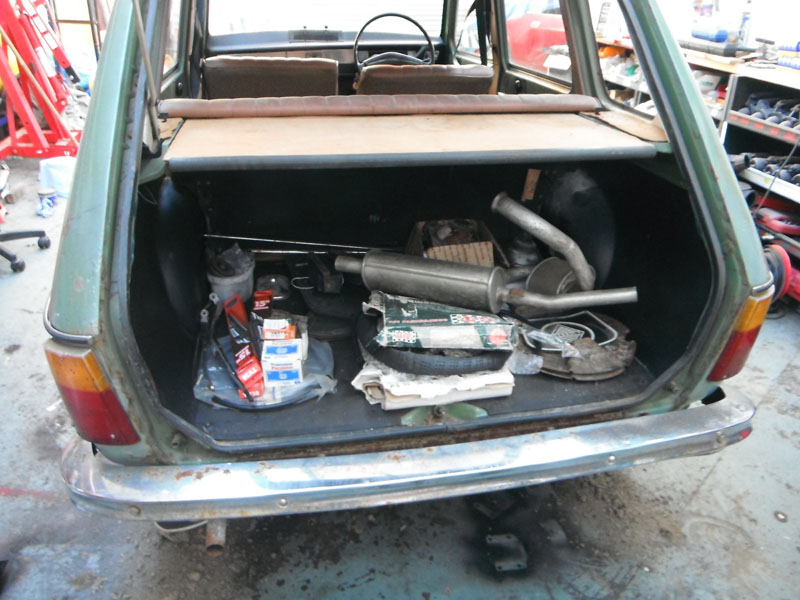
While the Renault has been in the unit drying out and being bashed about there's a lot of dirt appearing on the floor. Quite a lot of it is in the rear of the bodywork so all of this will need a really good clean out. I need to clean up and refit the mud flaps too, they're both fine it's just that one fell off and one has nearly fallen off.
Since I'm down to much smaller jobs now I started checking various little things. I noticed the rear lights didn't look quite right, look at where the screw holes are in the passenger side lens.
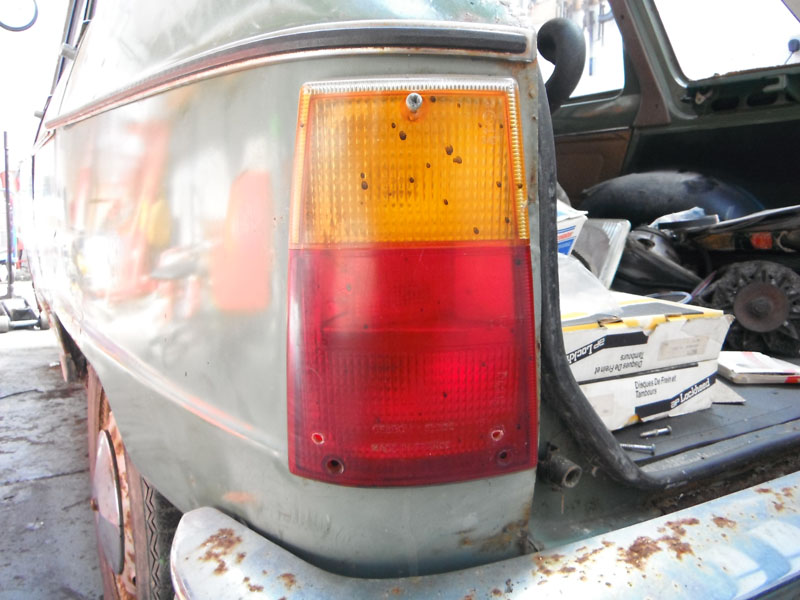
That would be because it's a small back and the lens doesn't fit it. I reckon this is an earlier style light cluster with a later lens bodged on top. I'm seriously tempted to fit an early light lens this side just because.
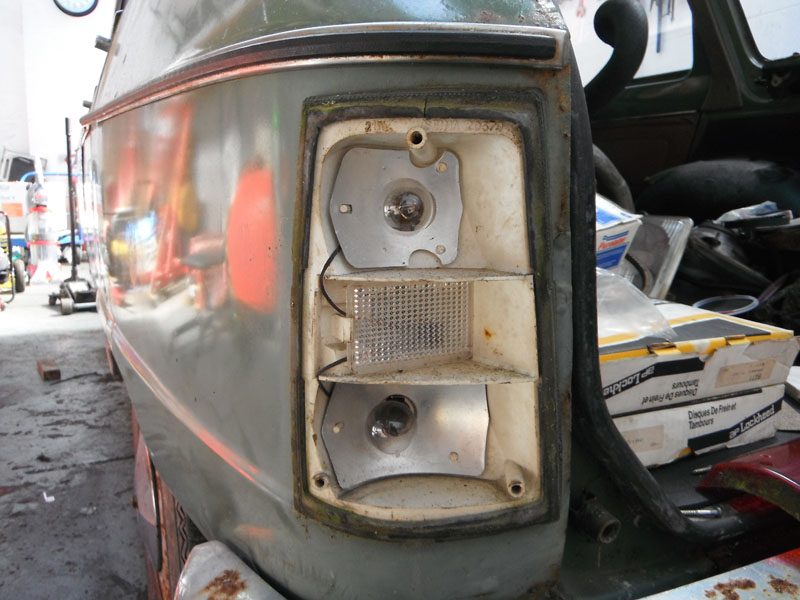
The other side hasn't got extra holes, but it looked like there might not be reflector fitted.
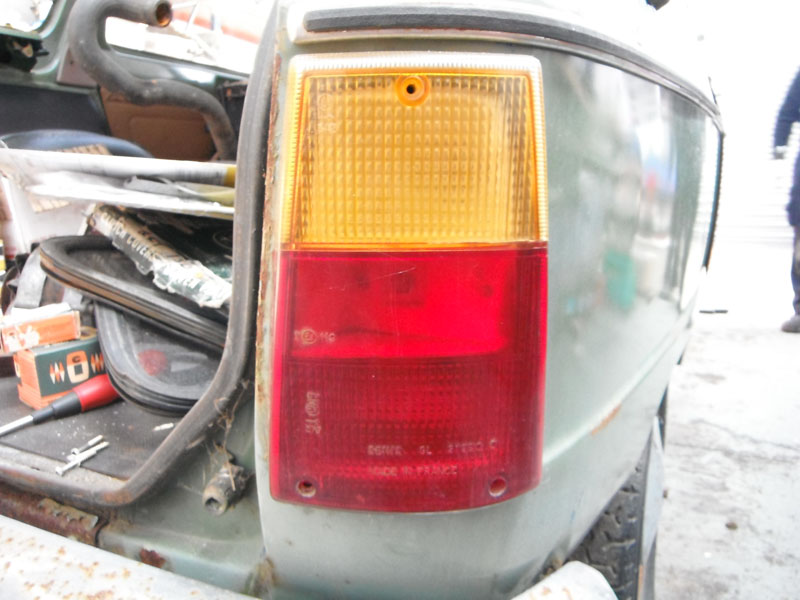
Nope, no reflector! I can cut a new one from a spare Princess lens I've got, seems like a sensible solution to that problem. I don't know where the old reflector has gone and this is the first time I've had the rear lights apart so I suspect it's not had one on this side for quite some time.

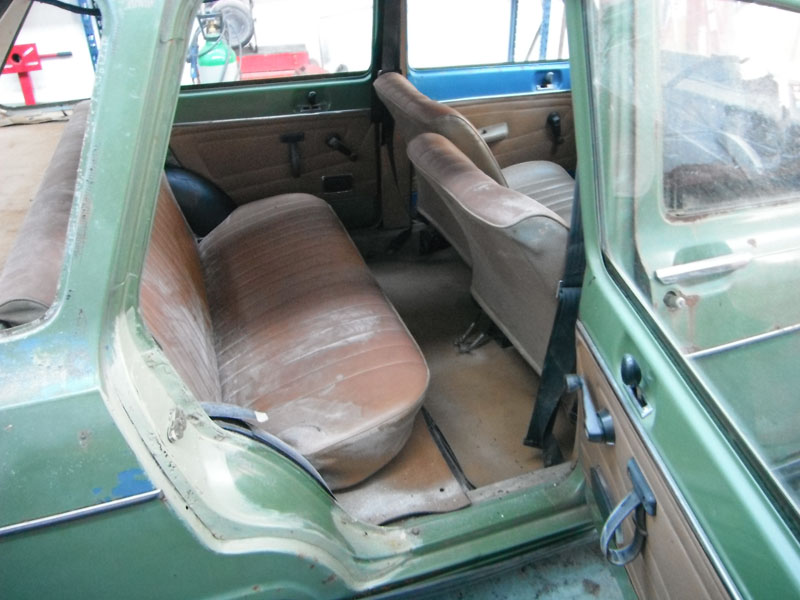
Because I had so few things left to put on the car now I cleared it out, put the rear seat back where it should be and put the mat back down.
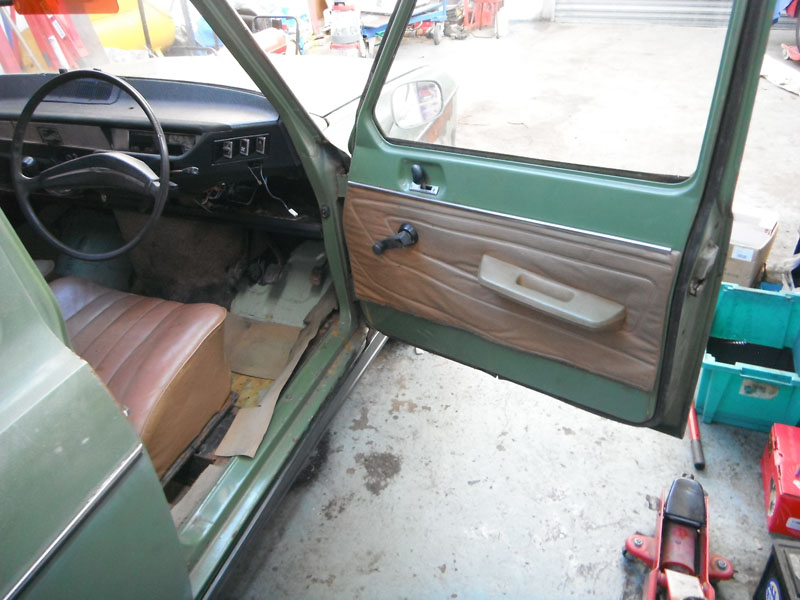
Persuaded the driver's door card to sort of go back on. I've got a better card on my spare door that I'll fit because it's the same colour and nicely aged.
What's left of the front mats were plonked in too. I need to buy a scrap of carpet to redo the carpet bits, that shan't cost me much.

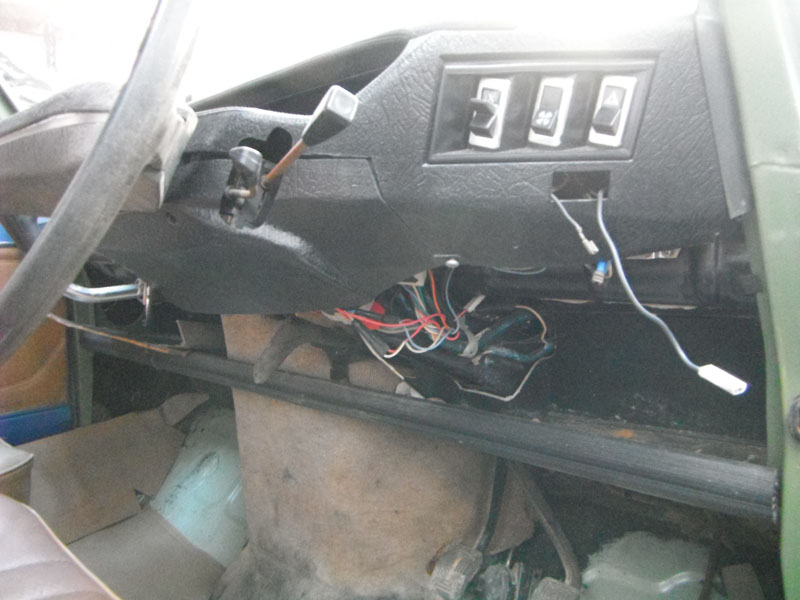
Loosely put the lower cowling back under the steering column, all the screws for it have gone missing. I'm still trying to figure out what the neat rectangular hole in the side of the dashboard is for where those wires are coming out. I haven't found any likely spare parts or switches for it, my suspicion is that someone had a fan over ride switch installed and have since removed it.
This is all that's left to go on the car now.
Loosely put the sill trims back on. They really need a clean and some of the wire clips replacing. I've got all the end caps too, they're in the boot.
The front end sits higher than it did, I'm sure of it, and is much firmer than it was since fitting the new suspension parts. I didn't disturb the torsion bars so I hope it's just that it now sits at the normal height rather than it's sitting too high.
The wiper arms were removed - the easiest I've ever removed on any car - for when I test the electrics. I don't want the wiper arms accidentally mangling things or themselves if there's anything wrong with the wiper motor.
Next big mechanical job is the exhaust and front brakes. I have no idea if the master cylinder is any good and won't find out until the new brake pads arrive. The discs I bought do appear to be the correct ones, we compared old and new before refitting the driveshafts. I've brought the old headlining back to see if I've got enough fabric in stock to redo it and, since I want to take the windscreen out to cure the leak it strikes me as sensible to do the headlining at the same time if I can.
To my knowledge, for the MoT I only need the following, providing everything else I've fixed is good:
Headlight (sourced)
Throttle cable
Battery
Brake fluid (in stock)
Gearbox oil
Tyres
New ones fitted and everything went together fairly easily. I couldn't get the bolts I wanted for the ball joints today because it's bank holiday Monday, but when I do get chance to get them I'll go round the car and replace the ten that I need to so that the ball joints are held in with proper bolts and not the rubbish that was supplied.
Of note is the outer driveshaft boot on this side. The old spring wire clip thing had lost its spring and we didn't have a suitable clip in to replace it so I used a tie wrap instead. As far as I know this is perfectly fine as a solution, it holds the boot in place and keeps dirt and oil on the correct sides of the rubber. I'm going to order some new CV/driveshaft boot clips anyway but again, Bank Holiday Monday put paid to getting any today.
The temperature sender was reconnected, the bolt for it was even still in the head. Bit of a bugger to do as access isn't great, but it's done.
Alternator fitted and new drive belts on too. Couldn't fit the tensioner because I dropped the nut and it vanished, you wouldn't think it could, but it did. I'll get a new nut, I didn't have any in stock.
Just plonked the radiator in the hole to keep it out of the way for now. I've got some wires to connect, the radiator to flush and connect, and a new clutch cable to fit under the bonnet. Once that's done I can actually test fire the engine, which I still haven't done. I want everything to be right first and with the engine having lots of lovely oil in it I'm not worrying about it seizing or anything in the meantime.
Took the spotlights I was given apart to check them out. They're past the first flush of youth but serviceable. Used the Rover to provide power and they work perfectly fine, don't even need bulbs.
While the Renault has been in the unit drying out and being bashed about there's a lot of dirt appearing on the floor. Quite a lot of it is in the rear of the bodywork so all of this will need a really good clean out. I need to clean up and refit the mud flaps too, they're both fine it's just that one fell off and one has nearly fallen off.
Since I'm down to much smaller jobs now I started checking various little things. I noticed the rear lights didn't look quite right, look at where the screw holes are in the passenger side lens.
That would be because it's a small back and the lens doesn't fit it. I reckon this is an earlier style light cluster with a later lens bodged on top. I'm seriously tempted to fit an early light lens this side just because.
The other side hasn't got extra holes, but it looked like there might not be reflector fitted.
Nope, no reflector! I can cut a new one from a spare Princess lens I've got, seems like a sensible solution to that problem. I don't know where the old reflector has gone and this is the first time I've had the rear lights apart so I suspect it's not had one on this side for quite some time.
Because I had so few things left to put on the car now I cleared it out, put the rear seat back where it should be and put the mat back down.
Persuaded the driver's door card to sort of go back on. I've got a better card on my spare door that I'll fit because it's the same colour and nicely aged.
What's left of the front mats were plonked in too. I need to buy a scrap of carpet to redo the carpet bits, that shan't cost me much.
Loosely put the lower cowling back under the steering column, all the screws for it have gone missing. I'm still trying to figure out what the neat rectangular hole in the side of the dashboard is for where those wires are coming out. I haven't found any likely spare parts or switches for it, my suspicion is that someone had a fan over ride switch installed and have since removed it.
This is all that's left to go on the car now.
Loosely put the sill trims back on. They really need a clean and some of the wire clips replacing. I've got all the end caps too, they're in the boot.
The front end sits higher than it did, I'm sure of it, and is much firmer than it was since fitting the new suspension parts. I didn't disturb the torsion bars so I hope it's just that it now sits at the normal height rather than it's sitting too high.
The wiper arms were removed - the easiest I've ever removed on any car - for when I test the electrics. I don't want the wiper arms accidentally mangling things or themselves if there's anything wrong with the wiper motor.
Next big mechanical job is the exhaust and front brakes. I have no idea if the master cylinder is any good and won't find out until the new brake pads arrive. The discs I bought do appear to be the correct ones, we compared old and new before refitting the driveshafts. I've brought the old headlining back to see if I've got enough fabric in stock to redo it and, since I want to take the windscreen out to cure the leak it strikes me as sensible to do the headlining at the same time if I can.
To my knowledge, for the MoT I only need the following, providing everything else I've fixed is good:
Headlight (sourced)
Throttle cable
Battery
Brake fluid (in stock)
Gearbox oil
Tyres
-
CitroJim
- A very naughty boy
- Posts: 54745
- Joined: 30 Apr 2005, 23:33
- x 8172
Re: 1975 Renault 6TL - 02/05 Update
Excellent That's coming along a perfect treat! Well done!
Jim
A bit of a Citroen AX fan...
A bit of a Citroen AX fan...