

The system consists of dashboard switch to turn it on/off, a relay operated by the switch, an ECU, a stalk to engage and control speed and resume, a vacuum pump and a vacuum bellows attached by a rod to the throttle butterfly quadrant. A switch on the brake pedal, in the same housing as the brakelight switch, disengages cruise as soon as the pedal is touched.
The ECU senses speed from the gearbox speed sensor, the same one that drives the speedo.
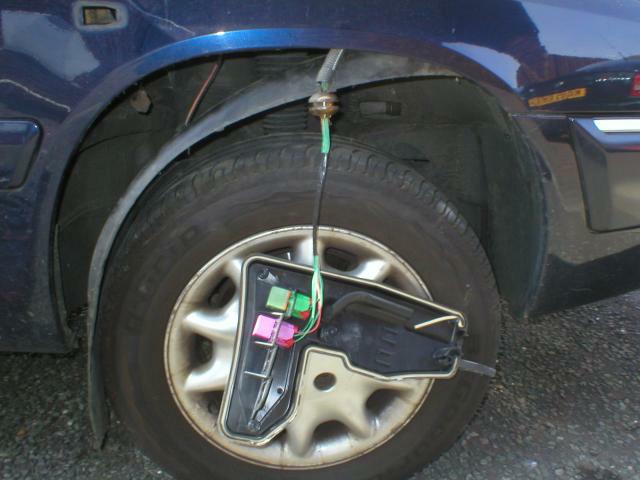
The vacuum pump lives under the nearside front wing at the front, almost under the bumper but actually suspended from the top of the inner wing under the battery tray. There's no need to remove the front bumper to get to it, sufficient access can be got by removal of the wheelarch liner. Access is not good but sufficient.
The main things that stop the system working are, in order of popularity, a split in the vacuum pipe 'twixt pump and bellows, a faulty brake switch and dirty electrical connections on the vacuum pump.
The vacuum pipe attaches to a spigot on the end of the vacuum pump and this spigot is really a little too large for the pipe and hence it splits and falls off. Looking at the pump, a number of spigots will be seen and it can be hard to know which is which. The correct spigot is identified by the red arrow below that shows the vacuum pump and bellows with the rest of the car removed for clarity:
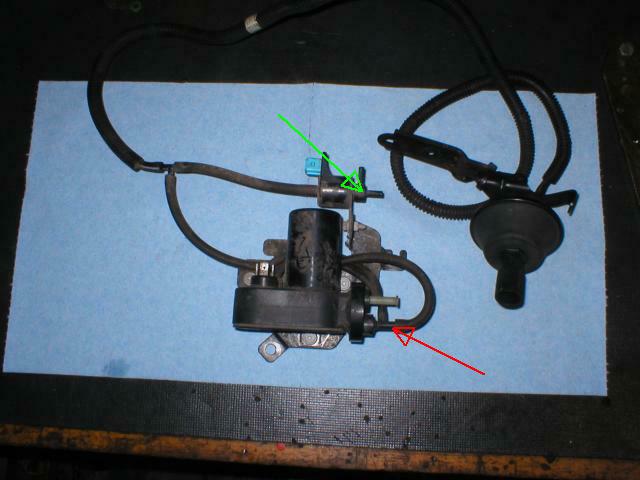
Do not connect to the vacuum dump valve spigots (green arrow). The picture shows all the pipes on the pump. Note that the feed to the bellows is via a "T" piece.
Often, reconnecting the pipe is enough to restore operation. Note that if the pipe has been off for a time, the end of the pipe might be blocked with mud. Check this as a plug of mud will stop cruise working.
The next test is to check the brake switch. Follow the cable up from the brake pedal and it will terminate in a brown three pin plug just under the dash. Disconnect it and look for continuity between Pins 1 and 3 with the pedal released. Pressing the pedal will break the continuity. If there is no continuity, the switch is likely to have dirty contacts. These can be carefully cleaned but forst the switch needs to be removed. It is secured by one 10mm nut behind the pedal pad.
The switch can be carefully dismantled by pressing in the clip lugs and pulling it apart. It is difficult and takes a bit of patience. Mind the two springs as it comes apart.
Inside it looks like this:
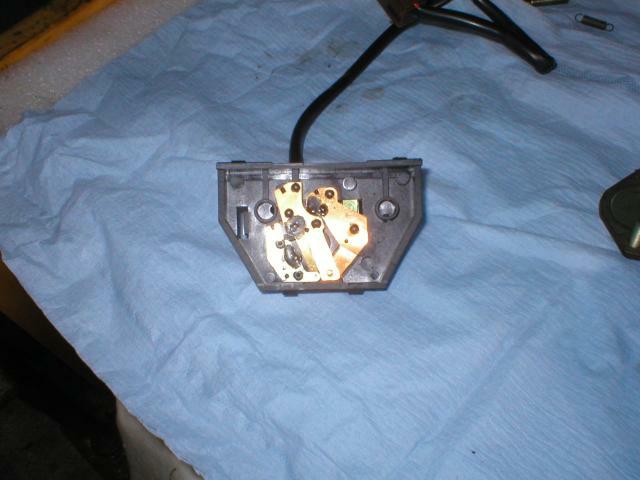
The small contact set is the cruise switch. Clean the contacts with very fine emery paper and test it before reassembly. A small bend in the contact spring may be needed to ensure reliable operation. Test again after reassembly.
When engaging cruise (by pulling the stalk forward) there should be a brief delay and the throttle pedal will then lighten underfoot as the bellows takes over. There may be a small surge of acceleration. Touching the brake should instantly disengage cruise.
The vacuum pump has two electrical connectors, one a triangular three pin and a blue two pin next to the dump valve. The purpose of the dump valve is to immediately kill the vacuum on cruise disengagement. The two pin connector rarely suffers but the three pin does suffer in the exposed position it is in. Disconnect it and spray liberally with switch cleaner. If the contacts are very green, it may need to be replaced.
If the above does not restore normal operation, more tests are required at the ECU connector. The ECU lives on the B pillar under the drivers seat and under the carpet (on the Xantia at least). By motoring the seat right forward and lifting the carpet, the ECU can just be seen and it's connector released. Pull out the red tag on the side of the connector and it'll pop off.
Using a meter, check that with the cruise switch on and ignition on, 12V can be seen between pins 8 and 9. If so, the cruise relay is OK and the ECU is being supplied. If not check the cruise relay. On the MK1 Xantia it hides under the drivers side wing in a big box. It's the pink one...
On the MK2 it hides in the main relay cluster in the drivers footwell.
The operation of the vacuum pump can be checked by firstly disconnecting the vacuum pipe at the bellows and then carefully feeding 12V to it via the ECU connector from a battery. I use a small motorcycle type battery.
Apply the positive of the battery to pin 1. Earth the negative side of the battery and also earth pins 6 and 7. It is critical that the pins are very carefully identified and no errors are made here. Connecting thus should make the pump run and the dump valve close. The pump should be heard running. Now place your fingertip near the end of the pipe feeding the bellows and a strong vacuum should be felt.
The dump valve may be tested by unearthing the battery but leaving the positive connected to pin 1 and the negative to pins 6 and 7. The pump should still be running but there should be zero vacuum at the pipe.
The valve can be further tested by applying a battery between pin 1 and earth. The valve should click when the connection is made.
There is another electrovalve in the pump itself. Test this by earthing the applying a battery between in 1 (positive) and pin 6 (MK1) or pin 7 (MK2).
A click should be heard from the pump on application of the battery. Running the pump with the dump valve operated but with the internal pump electrovalve disconnected should result in a partial vacuum being felt at the pipe.
Finally, if all that works, test the bellows. With the pipe disconnected, manually squeeze the bellows down and hold your finger over the bellows vacuum spigot. Release the squeeze and the bellows should stay compressed. If the bellows rapidly regains its relaxed state, there is a leak. If so, check that they bellows has not been rubbing against the engine wiring harness and rubbed a hole as a result as shown in this picture:
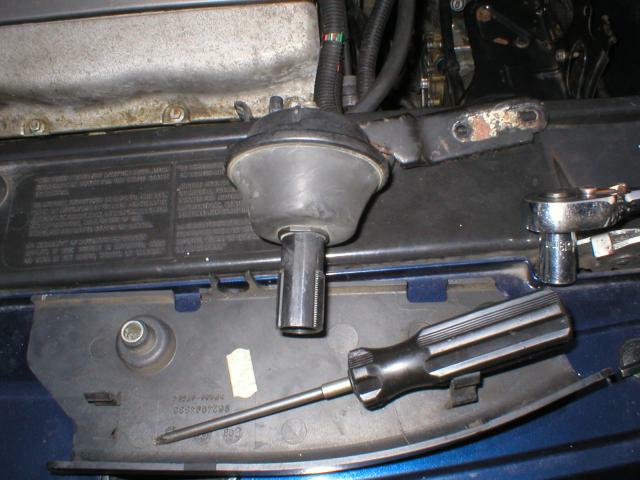
Any holes can be repaired successfully with a simple bicycle puncture repair patch.
That should help restore a working cruise. If it still fails, the stalk contacts may be dirty, the speed sensor may be faulty or the cruise ECU itself may be faulty although this is rare.
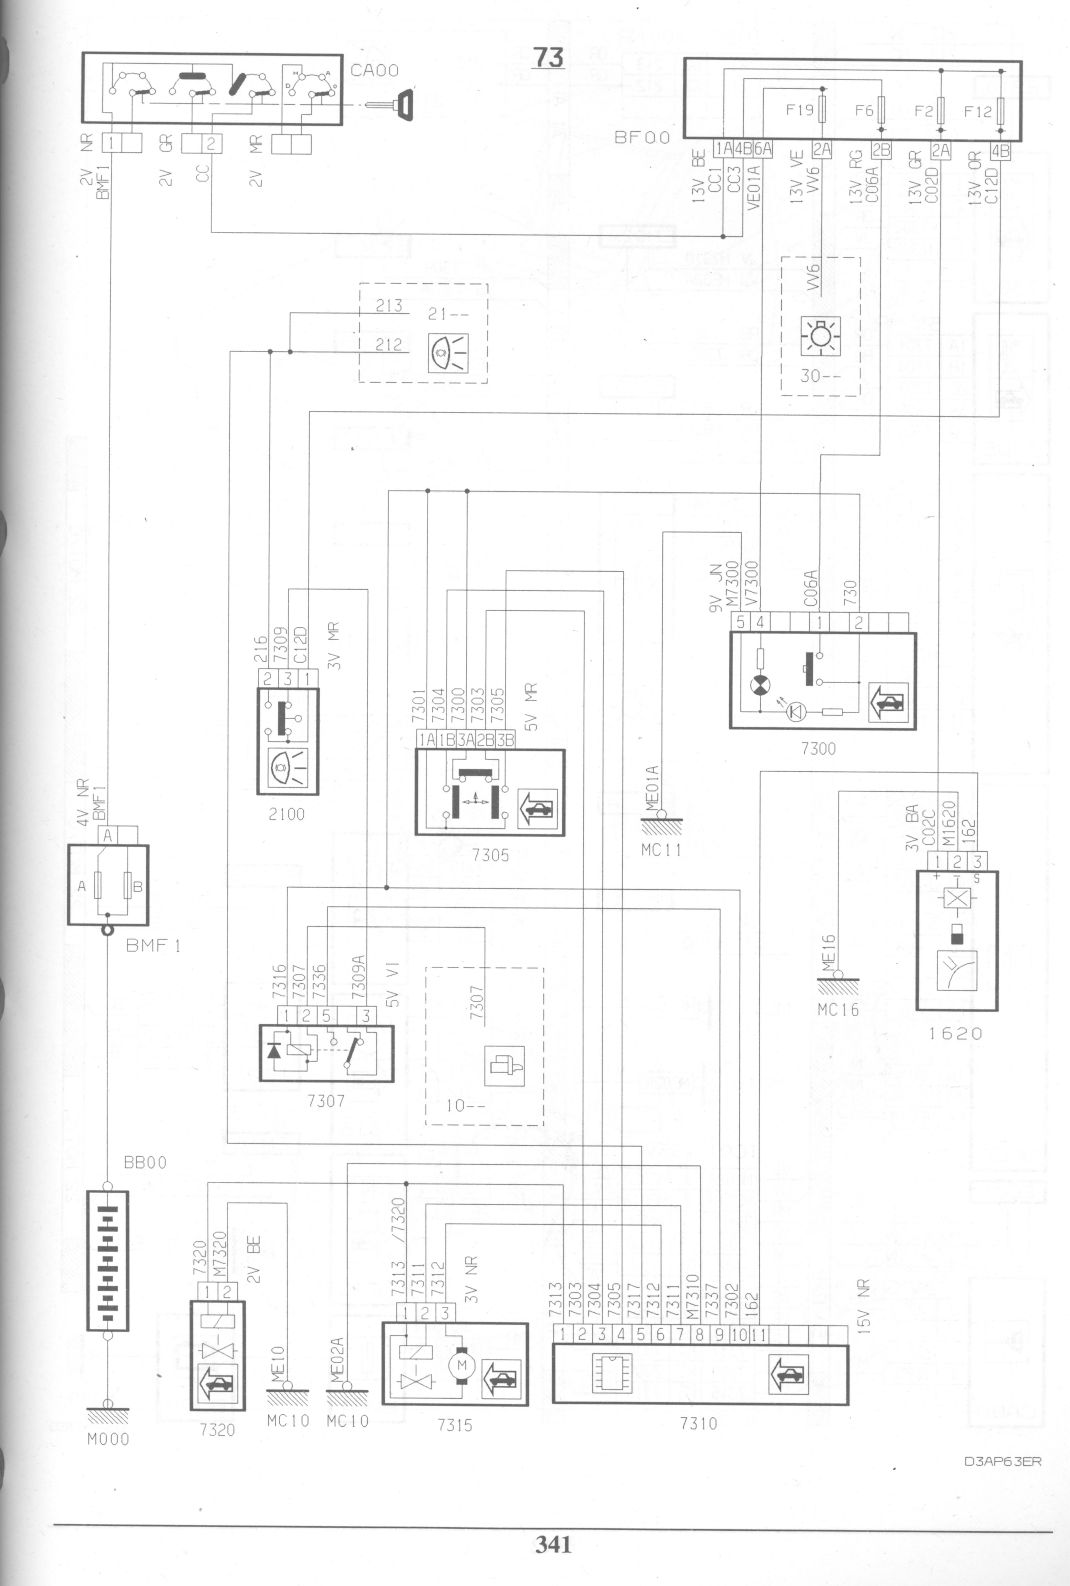
Finally, to assist faultfinding, here is a circuit diagram. It is for the MK2 Xantia but the MK1 is almost identical. The major difference is that pins 6 and 7 are transposed on the MK1.
After a time, this thread can be moved to the normal place for such threads following any corrections and additional information that might help fix a dead cruise.