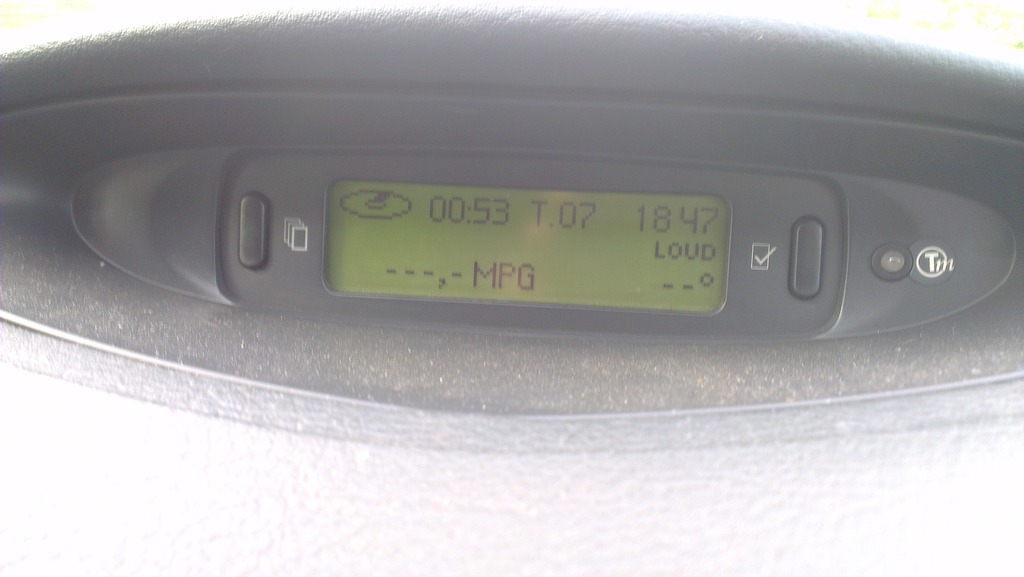
C5 2.0HDi (110bhp) LX Est - Trailer Electrics Let Down!
-
- Posts: 1368
- Joined: 30 Oct 2012, 23:37
- x 68
C5 2.0HDi (110bhp) LX Est - Trailer Electrics Let Down!
A few pics of what I've just bought for £650, MOT'd till Sept.
The mark 1 C5 is not a looker from the front IMO...
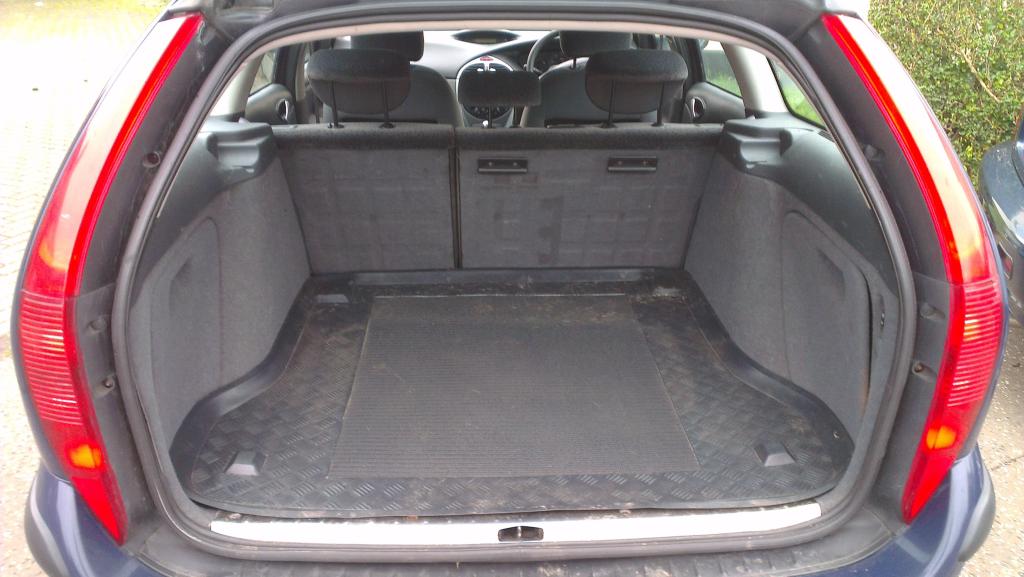
But is smart from the back
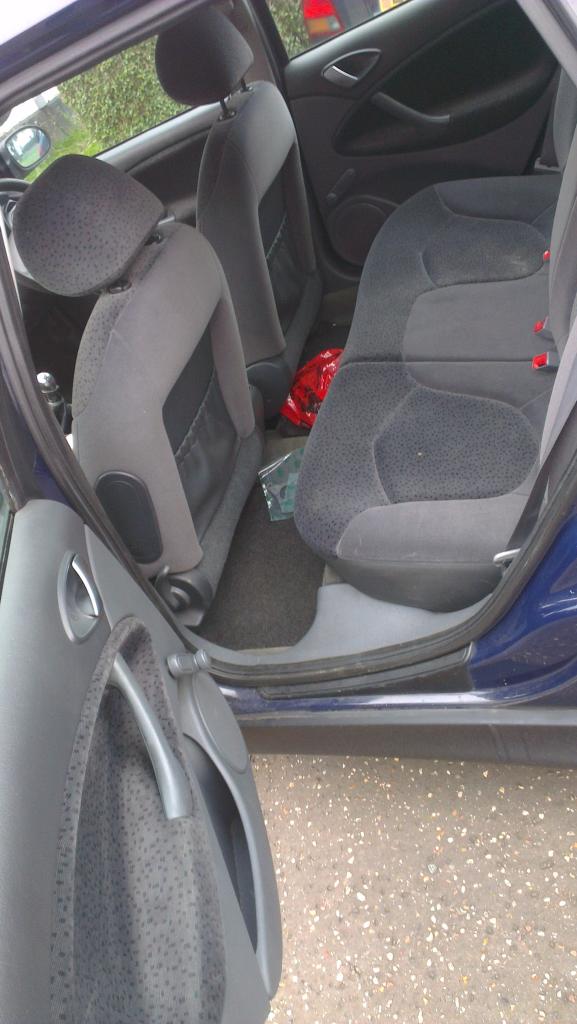
It needs a clean but the interior is in great nick really;
Typical modern engine bay, covered with plastic crap everywhere, but in good nick and I know when the cambelt was last done;
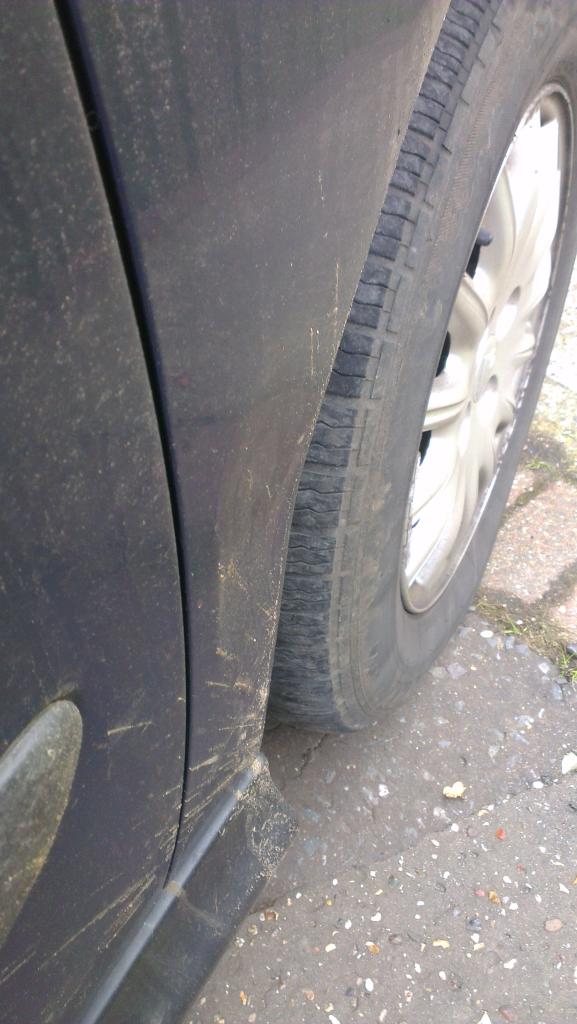
Tiny dent in the offside wing (not damaged the paint, so should just pop out )
Also this one in the pass rear door (also not damaged the paint)
Drivers side door seal slightly split
Bit of wear on the pass side door card
Which is weird 'cause there's none on the drivers!
It will need new front tyres in the not too distant
Last service was at Wolsely House, when it had all new front pads and discs.
It has also had a new exhaust since then.
Not bad for a car that's done 150k and only cost £650 A lot of car for not much money and it will do the job it was bought to do, admirably (tow my trailer to move cars and stuff about )
Faults to fix;
- Speedo and Tacho under reading
- Front suspension height too high
- Judder from front drive-train under hard acceleration or at high speed (hopefully just as a result of the suspension height, but I suspect also an engine mount)
- Centre digital display lights u/s
- Right hand side bulb on heater controls u/s
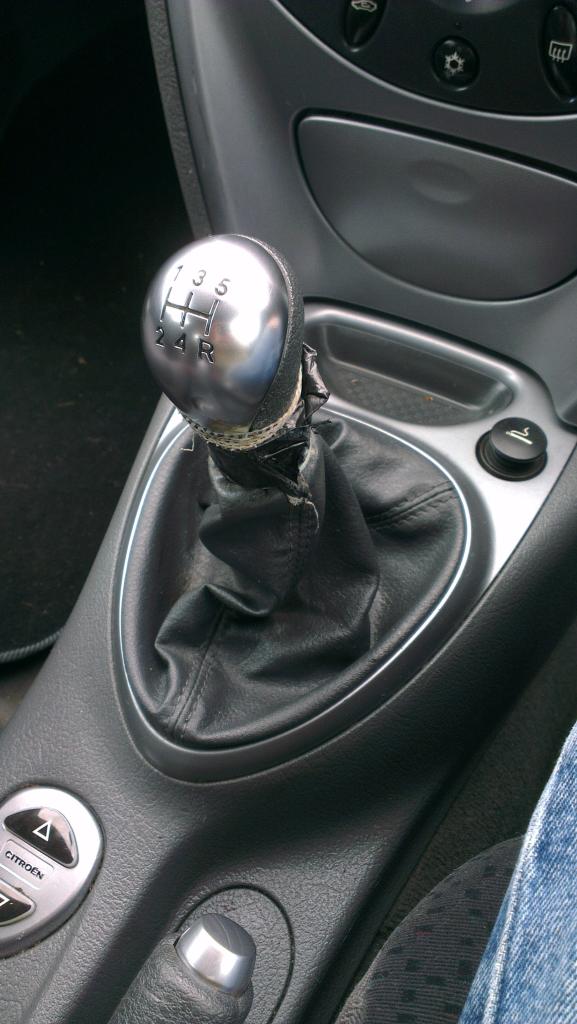
- New gear gaitor required
- Tailgate doesn't stay open
- Blocked washer jets and missing washer bottle cap
- Floor mats required
- Rear load bay pull out cover required
- Clean it!
Probable upgrade;
- Fit cruise
- Fit leather
- Fit electric rear windows
Last edited by wurlycorner on 27 Feb 2018, 18:56, edited 15 times in total.
--
Iain
1x '85 CX GTi Turbo s1 (metallic blue)
2x '85 CX GTi Turbo s2 t1 (metallic silver & grey)
'88 CX GTi Turbo s2 T2 (metallic light blue)
CX DTR T2 Safari (silver)
2x '96 Xantia Activa (Black & metallic green)
'01 C5 2.0 HDi LX Estate (Blue)
Iain
1x '85 CX GTi Turbo s1 (metallic blue)
2x '85 CX GTi Turbo s2 t1 (metallic silver & grey)
'88 CX GTi Turbo s2 T2 (metallic light blue)
CX DTR T2 Safari (silver)
2x '96 Xantia Activa (Black & metallic green)
'01 C5 2.0 HDi LX Estate (Blue)
-
- Posts: 1368
- Joined: 30 Oct 2012, 23:37
- x 68
Re: C5 2.0HDi (110bhp) LX Est - at least I have a Cit on the
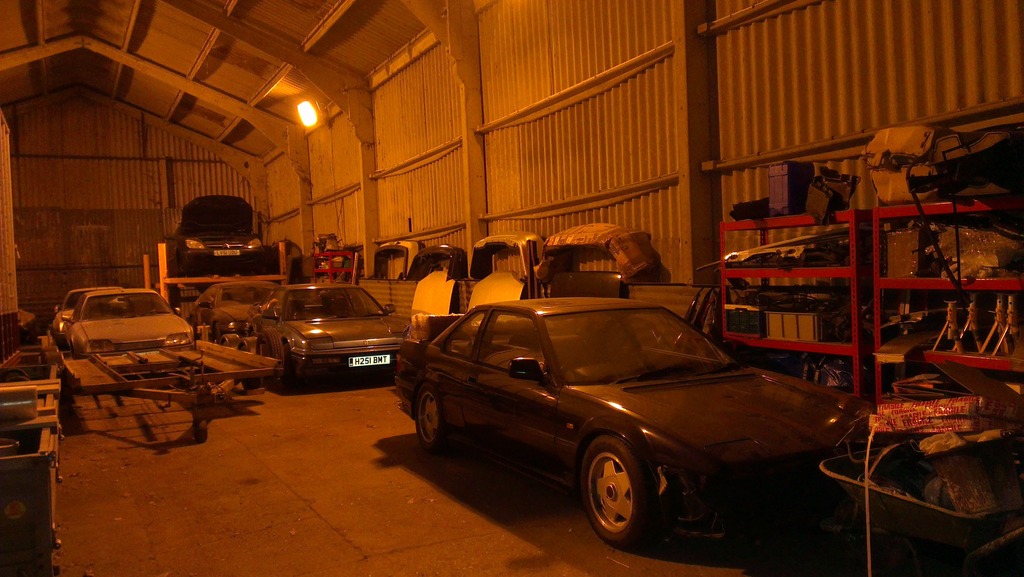
ps yes - that's my Activa lurking in the background... The C5 will be helping to get that back on the road
--
Iain
1x '85 CX GTi Turbo s1 (metallic blue)
2x '85 CX GTi Turbo s2 t1 (metallic silver & grey)
'88 CX GTi Turbo s2 T2 (metallic light blue)
CX DTR T2 Safari (silver)
2x '96 Xantia Activa (Black & metallic green)
'01 C5 2.0 HDi LX Estate (Blue)
Iain
1x '85 CX GTi Turbo s1 (metallic blue)
2x '85 CX GTi Turbo s2 t1 (metallic silver & grey)
'88 CX GTi Turbo s2 T2 (metallic light blue)
CX DTR T2 Safari (silver)
2x '96 Xantia Activa (Black & metallic green)
'01 C5 2.0 HDi LX Estate (Blue)
-
- A very naughty boy
- Posts: 50871
- Joined: 30 Apr 2005, 23:33
- x 6618
Re: C5 2.0HDi (110bhp) LX Est - at least I have a Cit on the
Excellent Iain and a great Activa support vehicle They all need one
Jim
Runner, cyclist, duathlete, Citroen AX fan and the CCC Citroenian 'From A to Z' Columnist...
-
- (Donor 2020)
- Posts: 2803
- Joined: 17 Apr 2008, 17:51
- x 138
Re: C5 2.0HDi (110bhp) LX Est - at least I have a Cit on the
There seems to be some mistake here. That looks like my fishing wagon you have there!
Good luck with the workhorse.
Citroen C5 1.6 HDI 110bhp Estate 06 plate
French Mistresses gone.
Citroen C5 HDI Mk 1 hatchback
Vel Satis 3.5 v6
ZX 1.9D Est.
ZX 1.9DHatch
Xantia 1.9td est.
Xantia 2.0 hdi Est.
Xantia V6 MK1
Xantia V6 MK 2
French Mistresses gone.
Citroen C5 HDI Mk 1 hatchback
Vel Satis 3.5 v6
ZX 1.9D Est.
ZX 1.9DHatch
Xantia 1.9td est.
Xantia 2.0 hdi Est.
Xantia V6 MK1
Xantia V6 MK 2
-
- Posts: 1368
- Joined: 30 Oct 2012, 23:37
- x 68
Re: C5 2.0HDi (110bhp) LX Est - at least I have a Cit on the
Trip to the local scrapyard last weekend yielded a choice of 5 breakers to pick bits from, to sort out a few of the niggles with it.
Washer bottle cap replaced;
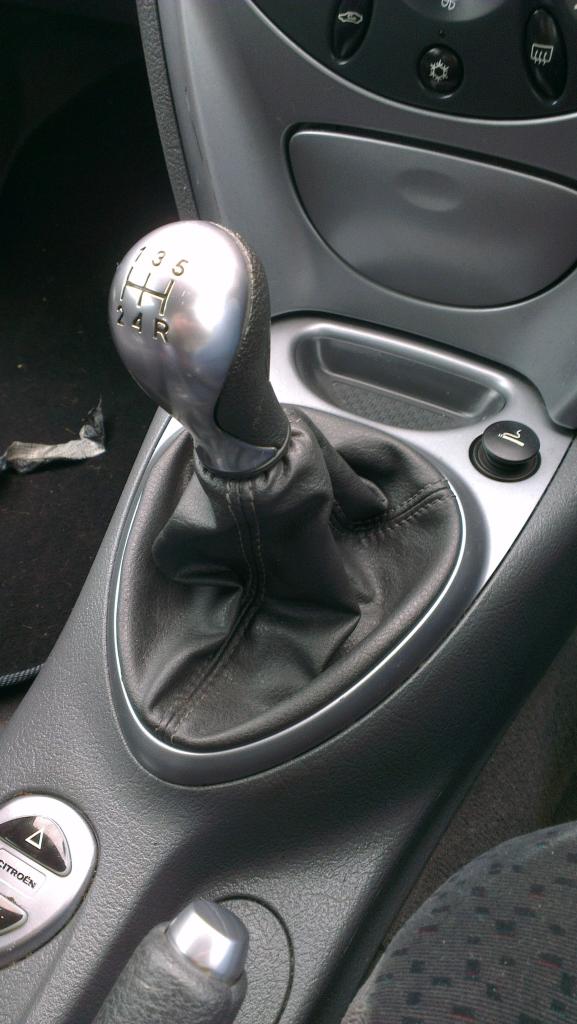
Manked up gear gaitor and damaged gear knob;
Replaced
Missing parcel shelf/load bay cover replaced;
Full set of original dealer mats (they're a bit meh and I want to find some genuine citroen ones, but at least I'm no longer trashing the carpet)
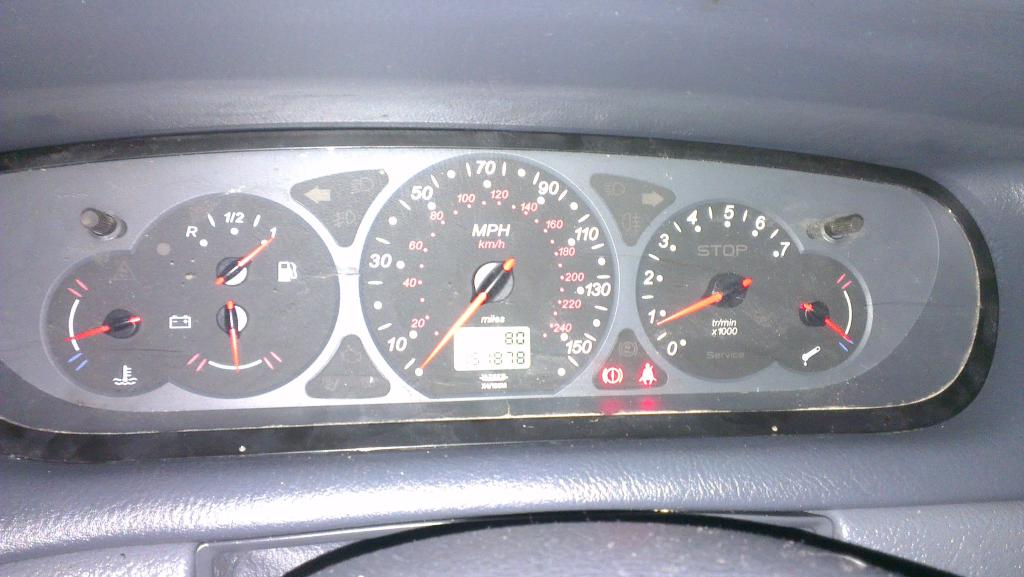
Also picked up a set of clocks so I can fix the speedo/tacho and the bits I need in order to fit cruise control.
All for £40. Bargain!
Ramp still not sorted, so not been able to sort the front ride height yet Really need to do that, pretty sure a driveshaft is on its way out now
--
Iain
1x '85 CX GTi Turbo s1 (metallic blue)
2x '85 CX GTi Turbo s2 t1 (metallic silver & grey)
'88 CX GTi Turbo s2 T2 (metallic light blue)
CX DTR T2 Safari (silver)
2x '96 Xantia Activa (Black & metallic green)
'01 C5 2.0 HDi LX Estate (Blue)
Iain
1x '85 CX GTi Turbo s1 (metallic blue)
2x '85 CX GTi Turbo s2 t1 (metallic silver & grey)
'88 CX GTi Turbo s2 T2 (metallic light blue)
CX DTR T2 Safari (silver)
2x '96 Xantia Activa (Black & metallic green)
'01 C5 2.0 HDi LX Estate (Blue)
-
- Posts: 1696
- Joined: 29 May 2011, 22:11
- x 35
Re: C5 2.0HDi (110bhp) LX Est - at least I have a Cit on the
A nice haul from the breakers, it's the little bits which make you happier with the car.
Mark
Mark
2009 Landrover Freelander 2 TD4se (killed an Audi) , sadly now gone .
2012 Landrover Freelander 2 SD4 AUTO Love it . Now gone .
2014 Ford Bmax 1.0 Ecoboost Zetec . Fantastic little machine .Gone now.
2014 Ford Focus 2.0 Tdci Zetec S with the French heart.
2012 Landrover Freelander 2 SD4 AUTO Love it . Now gone .
2014 Ford Bmax 1.0 Ecoboost Zetec . Fantastic little machine .Gone now.
2014 Ford Focus 2.0 Tdci Zetec S with the French heart.
-
- Posts: 1368
- Joined: 30 Oct 2012, 23:37
- x 68
Re: C5 2.0HDi (110bhp) LX Est - at least I have a Cit on the
Sorted a few more of the little niggles today (laziness as to why I didn't the other day really, 'cause it took all of ten mins )
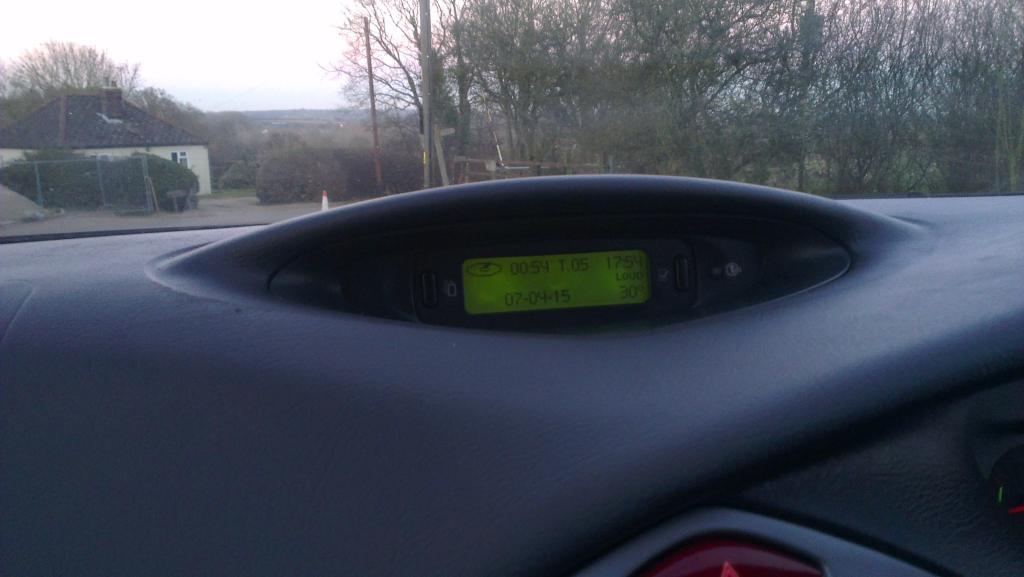
Bulbs replaced in the central display, so it's now readable in the dark
Clocks swapped, so I now have a working speedo and tacho;
But more importantly, I also now have a battery volts meter and oil temp
No loss of mileage, so presumably the main odo is stored on the ECU rather than the clocks.
The trip odo was wrong though, but no big deal (it was only on 0.2 anyway )
In the process I have lost the indicator lights that tell you what suspension height the car is on (these new clocks either came out of a non-hydraulic C5 or higher spec one that has the suspension height on the central display instead of lights in the dash - I forget which it was now...).
So next weekend, I plan on heading back to the scrappies to see if swapping in the high spec digital display works... If not, it would mean either living without (mr MOT man might not like that?) or cannibalising the clocks between each other.
I WANT my battery volts meter and oil temp
--
Iain
1x '85 CX GTi Turbo s1 (metallic blue)
2x '85 CX GTi Turbo s2 t1 (metallic silver & grey)
'88 CX GTi Turbo s2 T2 (metallic light blue)
CX DTR T2 Safari (silver)
2x '96 Xantia Activa (Black & metallic green)
'01 C5 2.0 HDi LX Estate (Blue)
Iain
1x '85 CX GTi Turbo s1 (metallic blue)
2x '85 CX GTi Turbo s2 t1 (metallic silver & grey)
'88 CX GTi Turbo s2 T2 (metallic light blue)
CX DTR T2 Safari (silver)
2x '96 Xantia Activa (Black & metallic green)
'01 C5 2.0 HDi LX Estate (Blue)
-
- Posts: 1368
- Joined: 30 Oct 2012, 23:37
- x 68
Re: C5 2.0HDi (110bhp) LX Est - Spec upgrades continue...
Higher spec central display fitted. From this;
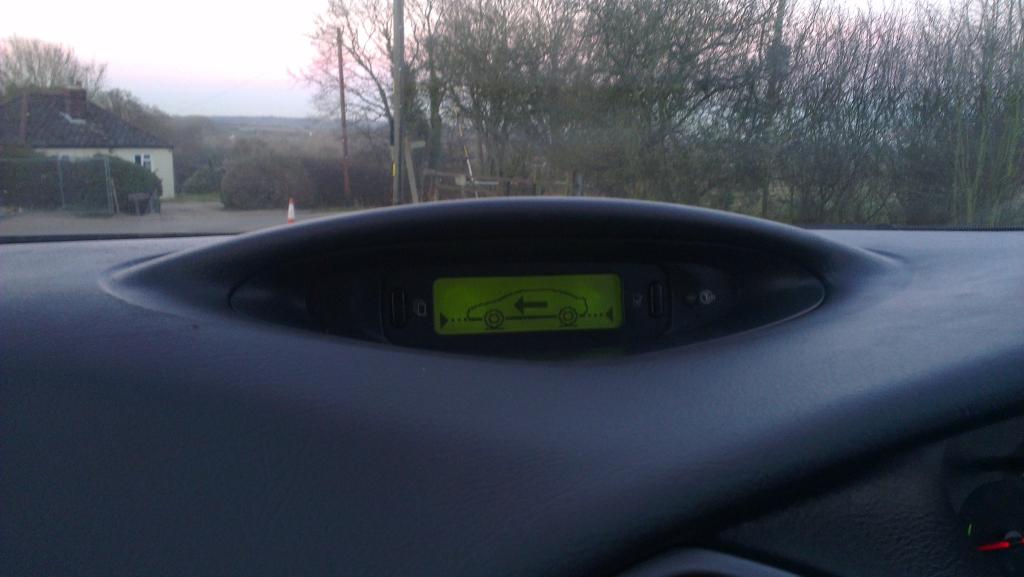
To this;
Shows more info generally but the main thing is that it means the suspension height is now shown on this display instead of the lights on the clocks (which means I can keep my battery volts and oil temp gauges )
I do love how easy it is to upgrade the spec on this car - all the wiring and functionality is there, just need to swap in the upgraded switch/display/gauge
And it only cost a fiver
--
Iain
1x '85 CX GTi Turbo s1 (metallic blue)
2x '85 CX GTi Turbo s2 t1 (metallic silver & grey)
'88 CX GTi Turbo s2 T2 (metallic light blue)
CX DTR T2 Safari (silver)
2x '96 Xantia Activa (Black & metallic green)
'01 C5 2.0 HDi LX Estate (Blue)
Iain
1x '85 CX GTi Turbo s1 (metallic blue)
2x '85 CX GTi Turbo s2 t1 (metallic silver & grey)
'88 CX GTi Turbo s2 T2 (metallic light blue)
CX DTR T2 Safari (silver)
2x '96 Xantia Activa (Black & metallic green)
'01 C5 2.0 HDi LX Estate (Blue)
-
- A very naughty boy
- Posts: 50871
- Joined: 30 Apr 2005, 23:33
- x 6618
Re: C5 2.0HDi (110bhp) LX Est - Spec upgrades continue...
Now that is a nice result Iain
Jim
Runner, cyclist, duathlete, Citroen AX fan and the CCC Citroenian 'From A to Z' Columnist...
-
- Posts: 1368
- Joined: 30 Oct 2012, 23:37
- x 68
Re: C5 2.0HDi (110bhp) LX Est - Ride height sorted
Finally got my ramp sorted this weekend, which meant I could sort out the ride height on the C5.
I'm sure you all know what this looks like and how you do it, but anyway...
Pleased to see it's all the same principle as with CXs and Xantia - engine running, system pressurised, loosen the bolt on the ARB clamp and tap it round to alter the ride height. Now all sorted and much the better for it Gave the front and rear sensors/mechanisms a good squirting over with silicone spray lube before putting it back on the deck again.
As suspected though, having run for so long (before I got it) with the front ride height too high, it's damaged the passenger driveshaft. Can't really notice it when driving now the height is back to where it should be, but it was really bad under load and I could feel the play in it when I tested it by hand, so it'll have to be done
Also found and sorted a niggle with the exhaust - the centre and rear sections are new (but installed with typical sloppy alignment )
Will have to try and adjust that, before it wrecks the front mounts.
But anyway, found a small hole in the top of the front pipe, just before the first chamber (explains the turbo whistle I've been enjoying over the last week ) soon sorted with some exhaust putty.
So, drive shaft next weekend then, I guess
--
Iain
1x '85 CX GTi Turbo s1 (metallic blue)
2x '85 CX GTi Turbo s2 t1 (metallic silver & grey)
'88 CX GTi Turbo s2 T2 (metallic light blue)
CX DTR T2 Safari (silver)
2x '96 Xantia Activa (Black & metallic green)
'01 C5 2.0 HDi LX Estate (Blue)
Iain
1x '85 CX GTi Turbo s1 (metallic blue)
2x '85 CX GTi Turbo s2 t1 (metallic silver & grey)
'88 CX GTi Turbo s2 T2 (metallic light blue)
CX DTR T2 Safari (silver)
2x '96 Xantia Activa (Black & metallic green)
'01 C5 2.0 HDi LX Estate (Blue)
-
- Posts: 1368
- Joined: 30 Oct 2012, 23:37
- x 68
Re: C5 2.0HDi (110bhp) LX Est - Ride height sorted
Right, catching up with this one...
Nearside driveshaft was on its way out (vibrating badly under load and when I checked it, had nice loads of play both ends ). Found out they're stupidly cheap (one side is £35 and the other £40), so decided if I was stripping it all to do one side, I might as well do both sides.
When they turned up, they were actually brand new ones not reconditioned!
So, up on the ramp
Most of it stripped down pretty easily. Thankfully no silly buggers with the driveshaft nuts (windy gun helped )
The gearbox drain plug was a PITA...
No hex outer and the centre square drive turned out to be between the 2 standard smaller square drive socket set sizes (3/8 and 1/4 ) so you need a proper drain plug kit, which I didn't have. So the oil came out the old fashioned messy way
Haynes didn't help, being full of lies as usual. It said the usual 'prise out the old driveshaft oil seals with a screwdriver and tap new ones in'... Complete horseshit for this box - one side seal sits behind a drive plate that you have to unbolt, for a start! That was just a minor inconvenience though, compared to the rest of the oil seal saga
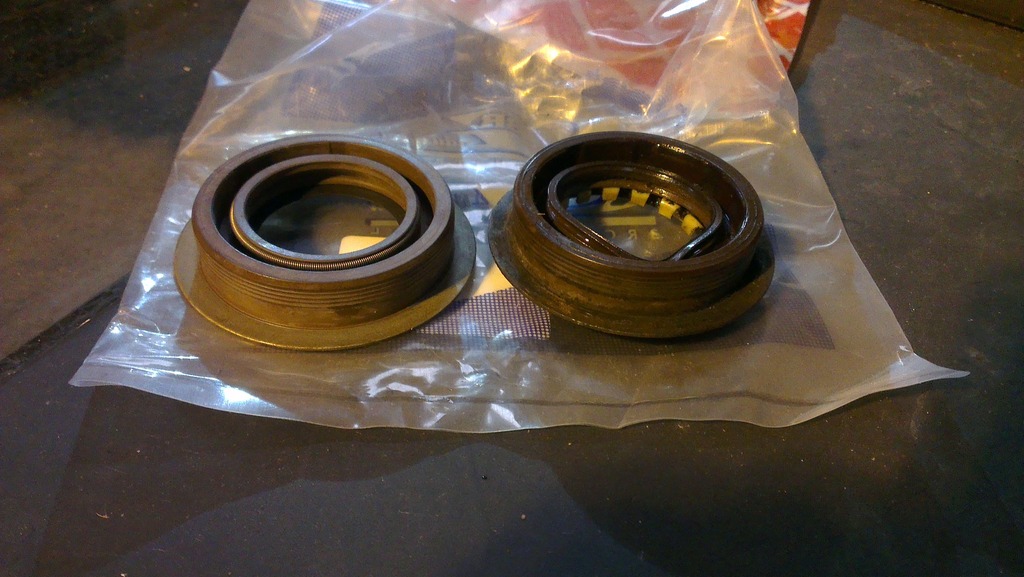
I'd ordered new driveshaft oil seals of course. The nearside one (that sits behind the plate) was fine. The off side one though, was not...
When I took the old one out, I noticed it had some kind of plastic insert that sat inside the main seal, fitted around the driveshaft and rotated within the seal. I pulled this out and then set to work popping the rest of the seal out. What happened was a 'sleeve' popped out the end of the box, with what looked like a normal oil seal inside it.
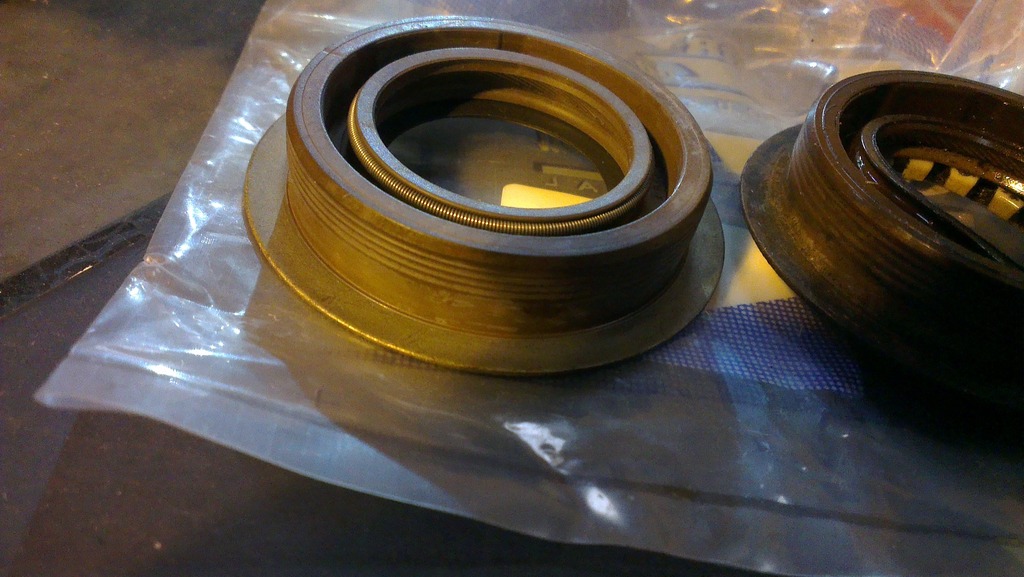
The replacement just looked like an ordinary oil seal. Pics;
(The white nylon bit is the 'insert' I mentioned earlier).
The new seal was too small to locate properly in the box;
I assumed that the old seal consisted of a standard oil seal within the outer sleeve, so set to work trying to tap it out of the sleeve. Found that the combination of an old exhaust pipe and a socket made the perfect combination of sizes to support the outer sleeve and whack the inside of the oil seal
But...
Whacked the s**t out of it and couldn't get the old seal to budge. All that happened was that the metal former inside the old seal deformed and yet another inner sleeve seperated;
This was Sunday, so that left me with no options for parts till the next week.
End of the day, had to leave it buried away at the back, in bits
Consulting on here turned up someone that knew there were 2 types of oil seal at this end on some boxes (not clear on the Citroen parts diagrams) and an aftermarket supplier. So, duly ordered and delivered. Many thanks for the help there
Ah... That explains why I couldn't knock the inner seal out of the sleeve - it isn't an inner seal at all, it's all one piece!
Easy to understand when you see the new one, not easy when you look at the old one, covered/stained in dirt and oil.
God knows why it's like that, but whatever... Who cares now!
Had also got a drain plug key set by now, so the next weekend back at the car, drain plug out to get the rest of the oil out and check for bits. The oil was a disgusting grey... Definitely been in there for the full 150k!!!
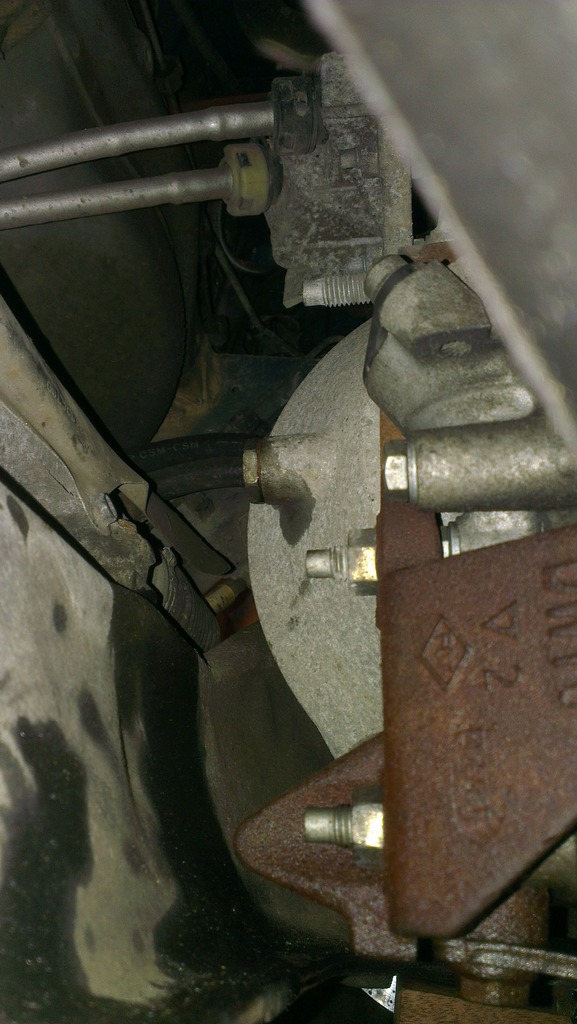
Build up on the drain plug not too bad though, considering that amount of mileage;
Fill plug was nicely located
I had horrible visions of this being square drive only (there was no room to get a tool in between the sub frame and the plug) but fortunately it was hex outer drive, so a spanner did just nicely
Driveshafts in, seals in, oil in... Home straight then?
Bottom ball joints were a total s**t to refit and do up Could not stop them spinning so I could do up the new nuts I'd bought.
I resorted to putting the whole weight of the front of the car through them by putting the wheels free block under the front suspension arms (don't try this at home kids);
That worked for the nearside but not on the drivers side - it was still spinning.
The nearside was an after market ball joint so had no hex drive in the bottom of the pin, but fortunately the off side was the original one, so with the combination of all the weight of the car on the cone and with a massive extension on the allen key and all my weight on the end of it,
I was just able to get the nut done up (it was f'ing tight on that thread for some reason, hence the need for so much leverage).
So then, job done.
Sweet
At this point I started to clear up, poured the oil from the drain pan into my waste oil bottle and... Found a plug washer at the bottom of it WTF?
*checks fill plug*
Nope, sealing washer on there.
*checks drain plug*
Not leaking, but no sealing washer on there.
I only had about 300ml of box fluid left, so doing a full drain and refill was not an option...
Only one thing for it then...
Yep, underneath the car, open the drain plug with the box full and quickly refit the washer while oil pisses out all over your arm and stick the plug back in asap
Nearside driveshaft was on its way out (vibrating badly under load and when I checked it, had nice loads of play both ends ). Found out they're stupidly cheap (one side is £35 and the other £40), so decided if I was stripping it all to do one side, I might as well do both sides.
When they turned up, they were actually brand new ones not reconditioned!
So, up on the ramp
Most of it stripped down pretty easily. Thankfully no silly buggers with the driveshaft nuts (windy gun helped )
The gearbox drain plug was a PITA...
No hex outer and the centre square drive turned out to be between the 2 standard smaller square drive socket set sizes (3/8 and 1/4 ) so you need a proper drain plug kit, which I didn't have. So the oil came out the old fashioned messy way
Haynes didn't help, being full of lies as usual. It said the usual 'prise out the old driveshaft oil seals with a screwdriver and tap new ones in'... Complete horseshit for this box - one side seal sits behind a drive plate that you have to unbolt, for a start! That was just a minor inconvenience though, compared to the rest of the oil seal saga
I'd ordered new driveshaft oil seals of course. The nearside one (that sits behind the plate) was fine. The off side one though, was not...
When I took the old one out, I noticed it had some kind of plastic insert that sat inside the main seal, fitted around the driveshaft and rotated within the seal. I pulled this out and then set to work popping the rest of the seal out. What happened was a 'sleeve' popped out the end of the box, with what looked like a normal oil seal inside it.
The replacement just looked like an ordinary oil seal. Pics;
(The white nylon bit is the 'insert' I mentioned earlier).
The new seal was too small to locate properly in the box;
I assumed that the old seal consisted of a standard oil seal within the outer sleeve, so set to work trying to tap it out of the sleeve. Found that the combination of an old exhaust pipe and a socket made the perfect combination of sizes to support the outer sleeve and whack the inside of the oil seal
But...
Whacked the s**t out of it and couldn't get the old seal to budge. All that happened was that the metal former inside the old seal deformed and yet another inner sleeve seperated;
This was Sunday, so that left me with no options for parts till the next week.
End of the day, had to leave it buried away at the back, in bits
Consulting on here turned up someone that knew there were 2 types of oil seal at this end on some boxes (not clear on the Citroen parts diagrams) and an aftermarket supplier. So, duly ordered and delivered. Many thanks for the help there
Ah... That explains why I couldn't knock the inner seal out of the sleeve - it isn't an inner seal at all, it's all one piece!
Easy to understand when you see the new one, not easy when you look at the old one, covered/stained in dirt and oil.
God knows why it's like that, but whatever... Who cares now!
Had also got a drain plug key set by now, so the next weekend back at the car, drain plug out to get the rest of the oil out and check for bits. The oil was a disgusting grey... Definitely been in there for the full 150k!!!
Build up on the drain plug not too bad though, considering that amount of mileage;
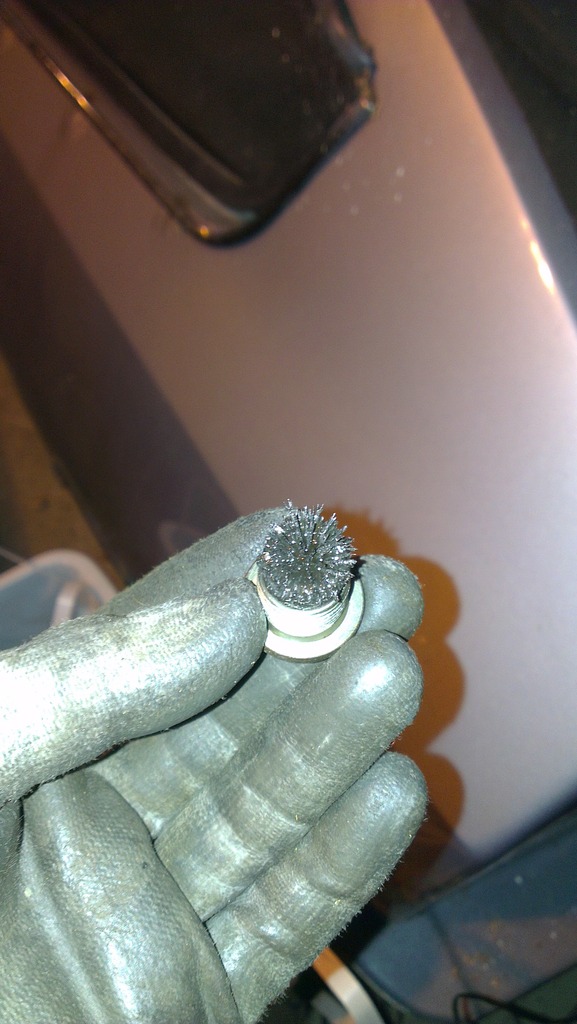
Fill plug was nicely located
I had horrible visions of this being square drive only (there was no room to get a tool in between the sub frame and the plug) but fortunately it was hex outer drive, so a spanner did just nicely
Driveshafts in, seals in, oil in... Home straight then?
Bottom ball joints were a total s**t to refit and do up Could not stop them spinning so I could do up the new nuts I'd bought.
I resorted to putting the whole weight of the front of the car through them by putting the wheels free block under the front suspension arms (don't try this at home kids);
That worked for the nearside but not on the drivers side - it was still spinning.
The nearside was an after market ball joint so had no hex drive in the bottom of the pin, but fortunately the off side was the original one, so with the combination of all the weight of the car on the cone and with a massive extension on the allen key and all my weight on the end of it,
I was just able to get the nut done up (it was f'ing tight on that thread for some reason, hence the need for so much leverage).
So then, job done.
Sweet
At this point I started to clear up, poured the oil from the drain pan into my waste oil bottle and... Found a plug washer at the bottom of it WTF?
*checks fill plug*
Nope, sealing washer on there.
*checks drain plug*
Not leaking, but no sealing washer on there.
I only had about 300ml of box fluid left, so doing a full drain and refill was not an option...
Only one thing for it then...
Yep, underneath the car, open the drain plug with the box full and quickly refit the washer while oil pisses out all over your arm and stick the plug back in asap
Last edited by wurlycorner on 07 Oct 2015, 20:26, edited 1 time in total.
--
Iain
1x '85 CX GTi Turbo s1 (metallic blue)
2x '85 CX GTi Turbo s2 t1 (metallic silver & grey)
'88 CX GTi Turbo s2 T2 (metallic light blue)
CX DTR T2 Safari (silver)
2x '96 Xantia Activa (Black & metallic green)
'01 C5 2.0 HDi LX Estate (Blue)
Iain
1x '85 CX GTi Turbo s1 (metallic blue)
2x '85 CX GTi Turbo s2 t1 (metallic silver & grey)
'88 CX GTi Turbo s2 T2 (metallic light blue)
CX DTR T2 Safari (silver)
2x '96 Xantia Activa (Black & metallic green)
'01 C5 2.0 HDi LX Estate (Blue)
-
- Posts: 1368
- Joined: 30 Oct 2012, 23:37
- x 68
Re: C5 2.0HDi (110bhp) LX Est - Ride height sorted
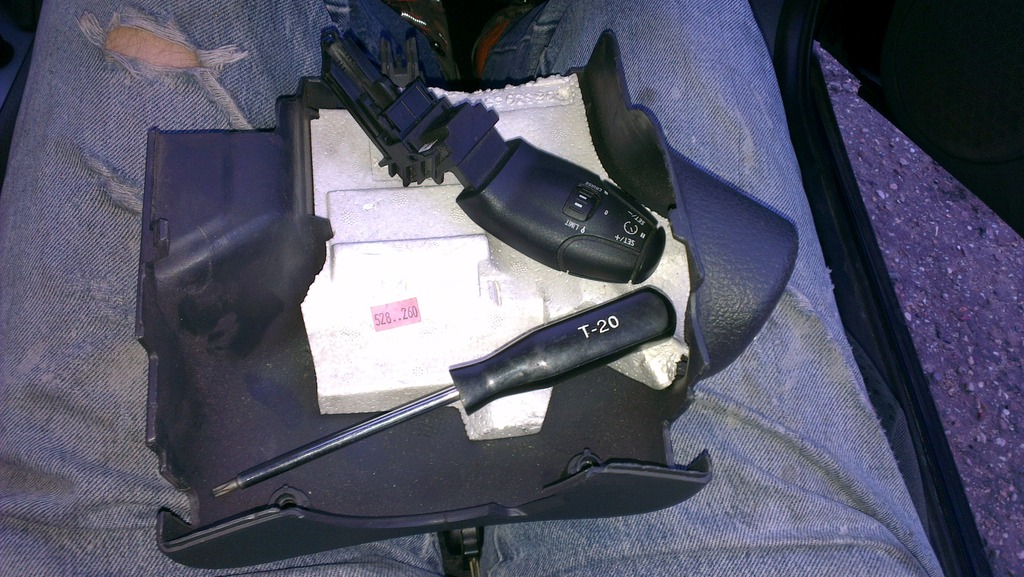
Next up was cruise control fitting.
Bits needed;
Take off the old steering column under-cowl
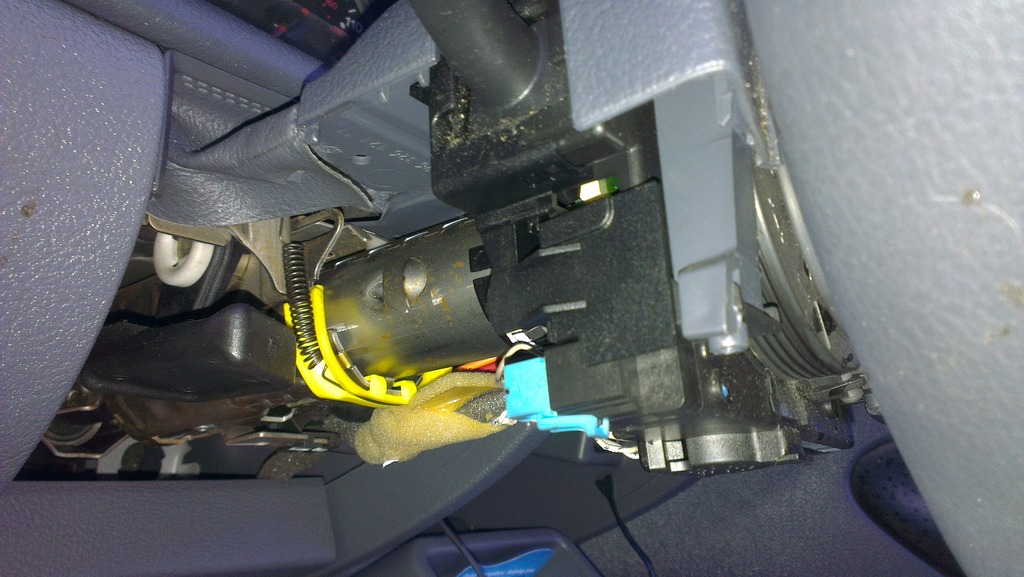
Reveals the side of the column;
Remove the plastic cover to reveal the end of the PCB;
Slide the cruise control stalk in and refit the new lower cover (which has a slot for the extra stalk - you could just cut a slot in the old cover of course)
Total time?
5 mins
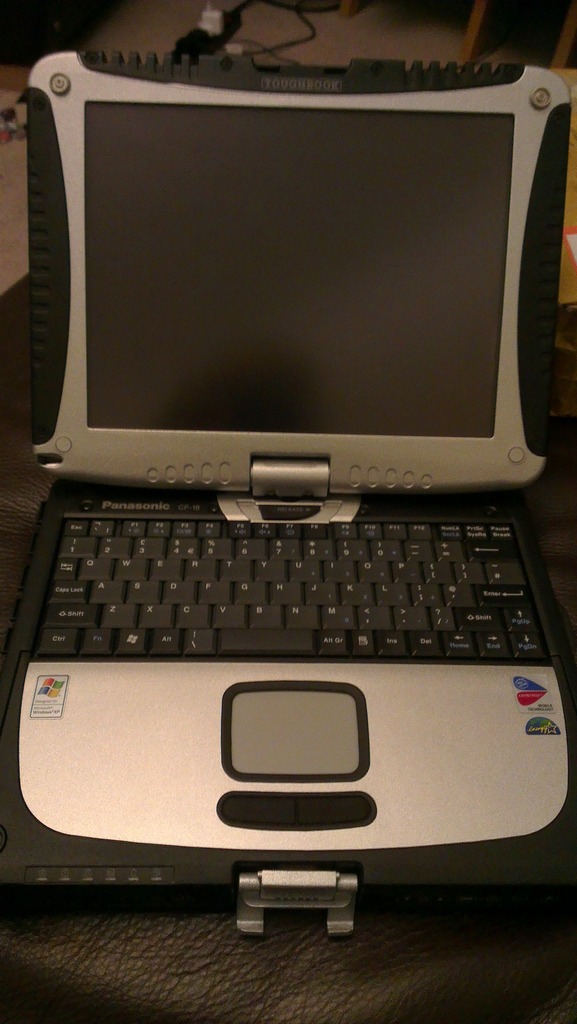
Unfortunately then comes the more complex bit in order to 'enable' it of course so this lot purchased;
The toughbook was an absolute bargain at £80 supposedly 'refurb' (it's actually brand new as far as I can tell and with upgraded memory and HDD )
--
Iain
1x '85 CX GTi Turbo s1 (metallic blue)
2x '85 CX GTi Turbo s2 t1 (metallic silver & grey)
'88 CX GTi Turbo s2 T2 (metallic light blue)
CX DTR T2 Safari (silver)
2x '96 Xantia Activa (Black & metallic green)
'01 C5 2.0 HDi LX Estate (Blue)
Iain
1x '85 CX GTi Turbo s1 (metallic blue)
2x '85 CX GTi Turbo s2 t1 (metallic silver & grey)
'88 CX GTi Turbo s2 T2 (metallic light blue)
CX DTR T2 Safari (silver)
2x '96 Xantia Activa (Black & metallic green)
'01 C5 2.0 HDi LX Estate (Blue)
-
- Posts: 851
- Joined: 07 Aug 2012, 19:50
- x 111
Re: C5 2.0HDi (110bhp) LX Est - Driveshafts done, Cruise hal
Cor!
Result!,,,
Result!,,,
C5 HDi 110 SX (Fifi 7 or Otterchops)
RIP
Citroen Xantia 1.8i LX (Fifi 6)
BX16TRS (x2) (Fifi 4 and 5)
BX19DTR (Fifi 2)
BX14E (x2) (Fifi 1 and 3)
RIP
Citroen Xantia 1.8i LX (Fifi 6)
BX16TRS (x2) (Fifi 4 and 5)
BX19DTR (Fifi 2)
BX14E (x2) (Fifi 1 and 3)
-
- Posts: 1368
- Joined: 30 Oct 2012, 23:37
- x 68
Re: C5 2.0HDi (110bhp) LX Est - Driveshafts done, Cruise hal
Ok,
So after fitting all that hardware for my cruise control, I couldn't get it to work.
Thread started here to work out why and advice duly received
So after that lot of the hardware, you need to enable the cruise control in the engine ECU;
Then don't forget to 'write' the new settings to the ECU (otherwise it won't remember them!!!)
My car being an early C5, also needed the additional brake switch fitting;
Behind the glovebox on the passenger side is where the brake switches reside (yes, I know that sounds odd when the pedals are on the opposite side, but it's true...).
The white one on the left is the normal brake switch. The red one on the right is the 'redundant brake' switch which runs the cruise control.
(Pics were taken from the breaker that picked the switch up from)
On later models, it's a single switch with 4 contacts, rather than 2 separate switches.
All fitted (5 minute job) and cruise then all working
It's all described in wheeler's guide which can be downloaded on the forum (pdf). The only difference is that the guide states you need the cruise control stalk WITHOUT the limit function, however I fitted a stalk WITH the limit function and the cruise control works fine. (Haven't tested the limit stuff, so no idea if that also works or not).
--
Iain
1x '85 CX GTi Turbo s1 (metallic blue)
2x '85 CX GTi Turbo s2 t1 (metallic silver & grey)
'88 CX GTi Turbo s2 T2 (metallic light blue)
CX DTR T2 Safari (silver)
2x '96 Xantia Activa (Black & metallic green)
'01 C5 2.0 HDi LX Estate (Blue)
Iain
1x '85 CX GTi Turbo s1 (metallic blue)
2x '85 CX GTi Turbo s2 t1 (metallic silver & grey)
'88 CX GTi Turbo s2 T2 (metallic light blue)
CX DTR T2 Safari (silver)
2x '96 Xantia Activa (Black & metallic green)
'01 C5 2.0 HDi LX Estate (Blue)
-
- Posts: 1368
- Joined: 30 Oct 2012, 23:37
- x 68
Re: C5 2.0HDi (110bhp) LX Est - Cruise sorted
Next job was the external temp sensor;
(Take at least 20^C off that number to get the correct value! )
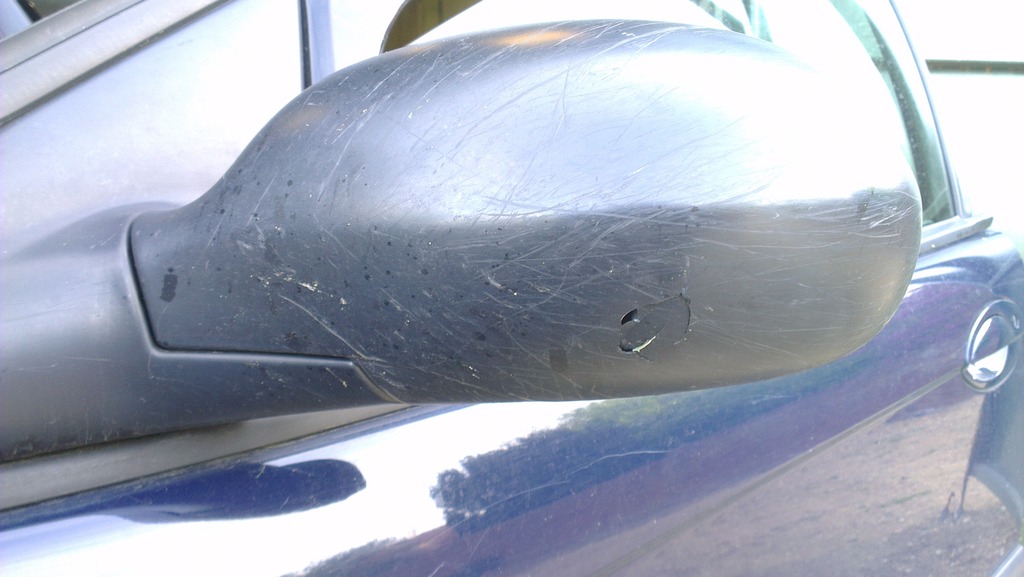
It lives in the bottom of the nearside wing mirror. I assumed it was guff because of this;
(water getting in)
So the breaker that gave me the brake switch for cruise, also yielded a replacement mirror.
Door card needs to come off in order to do it, so all in about 20 mins.
From that, to this;
Oh...
One step forward, one step back, then
I sodded about for a bit checking it was nothing obvious. You can swap the connector around. I found if it was flipped 180^C, I got a reading from the new sensor (albeit one that was hopelessly wrong )
Plugging the old one back in as a comparison showed that when the plug was put in upside down, it doubled the temperature reading, which was interesting/surprising.
I'll get round to looking at this again some day, when I swap the interior probably...
On which - yep, full grey leather interior (seats and door cards) secured for £130 Just need to suss out how to get them down from my mates garage in Mansfield, so I can fit them
--
Iain
1x '85 CX GTi Turbo s1 (metallic blue)
2x '85 CX GTi Turbo s2 t1 (metallic silver & grey)
'88 CX GTi Turbo s2 T2 (metallic light blue)
CX DTR T2 Safari (silver)
2x '96 Xantia Activa (Black & metallic green)
'01 C5 2.0 HDi LX Estate (Blue)
Iain
1x '85 CX GTi Turbo s1 (metallic blue)
2x '85 CX GTi Turbo s2 t1 (metallic silver & grey)
'88 CX GTi Turbo s2 T2 (metallic light blue)
CX DTR T2 Safari (silver)
2x '96 Xantia Activa (Black & metallic green)
'01 C5 2.0 HDi LX Estate (Blue)